Magnetic Kids Chore Chart

I have looked and looked for the perfect chore chart. We tried the dry erase ones….but they always seemed to get erased and the girls got frustrated. Then Mommy got frustrated! So they went in the trash. Tried just printing them out. That wasn’t really working for us. So I decided I wanted something where we could change out chores as often as I wanted and would be easy. And cute of course! Here’s what I came up with.
Supplies needed:
Board ( I found this zebra board in the serving supplies at Hobby Lobby.
It has a cork backing and measures 15 1/2 by 12.)
Small piece of metal (I got a large piece and cut it to 9 x 12)
Vinyl
Contact Paper
E6000 Glue
Small Wood Circles
Paint
Magnets
3M Hangers
Glue Gun & Glue Sticks
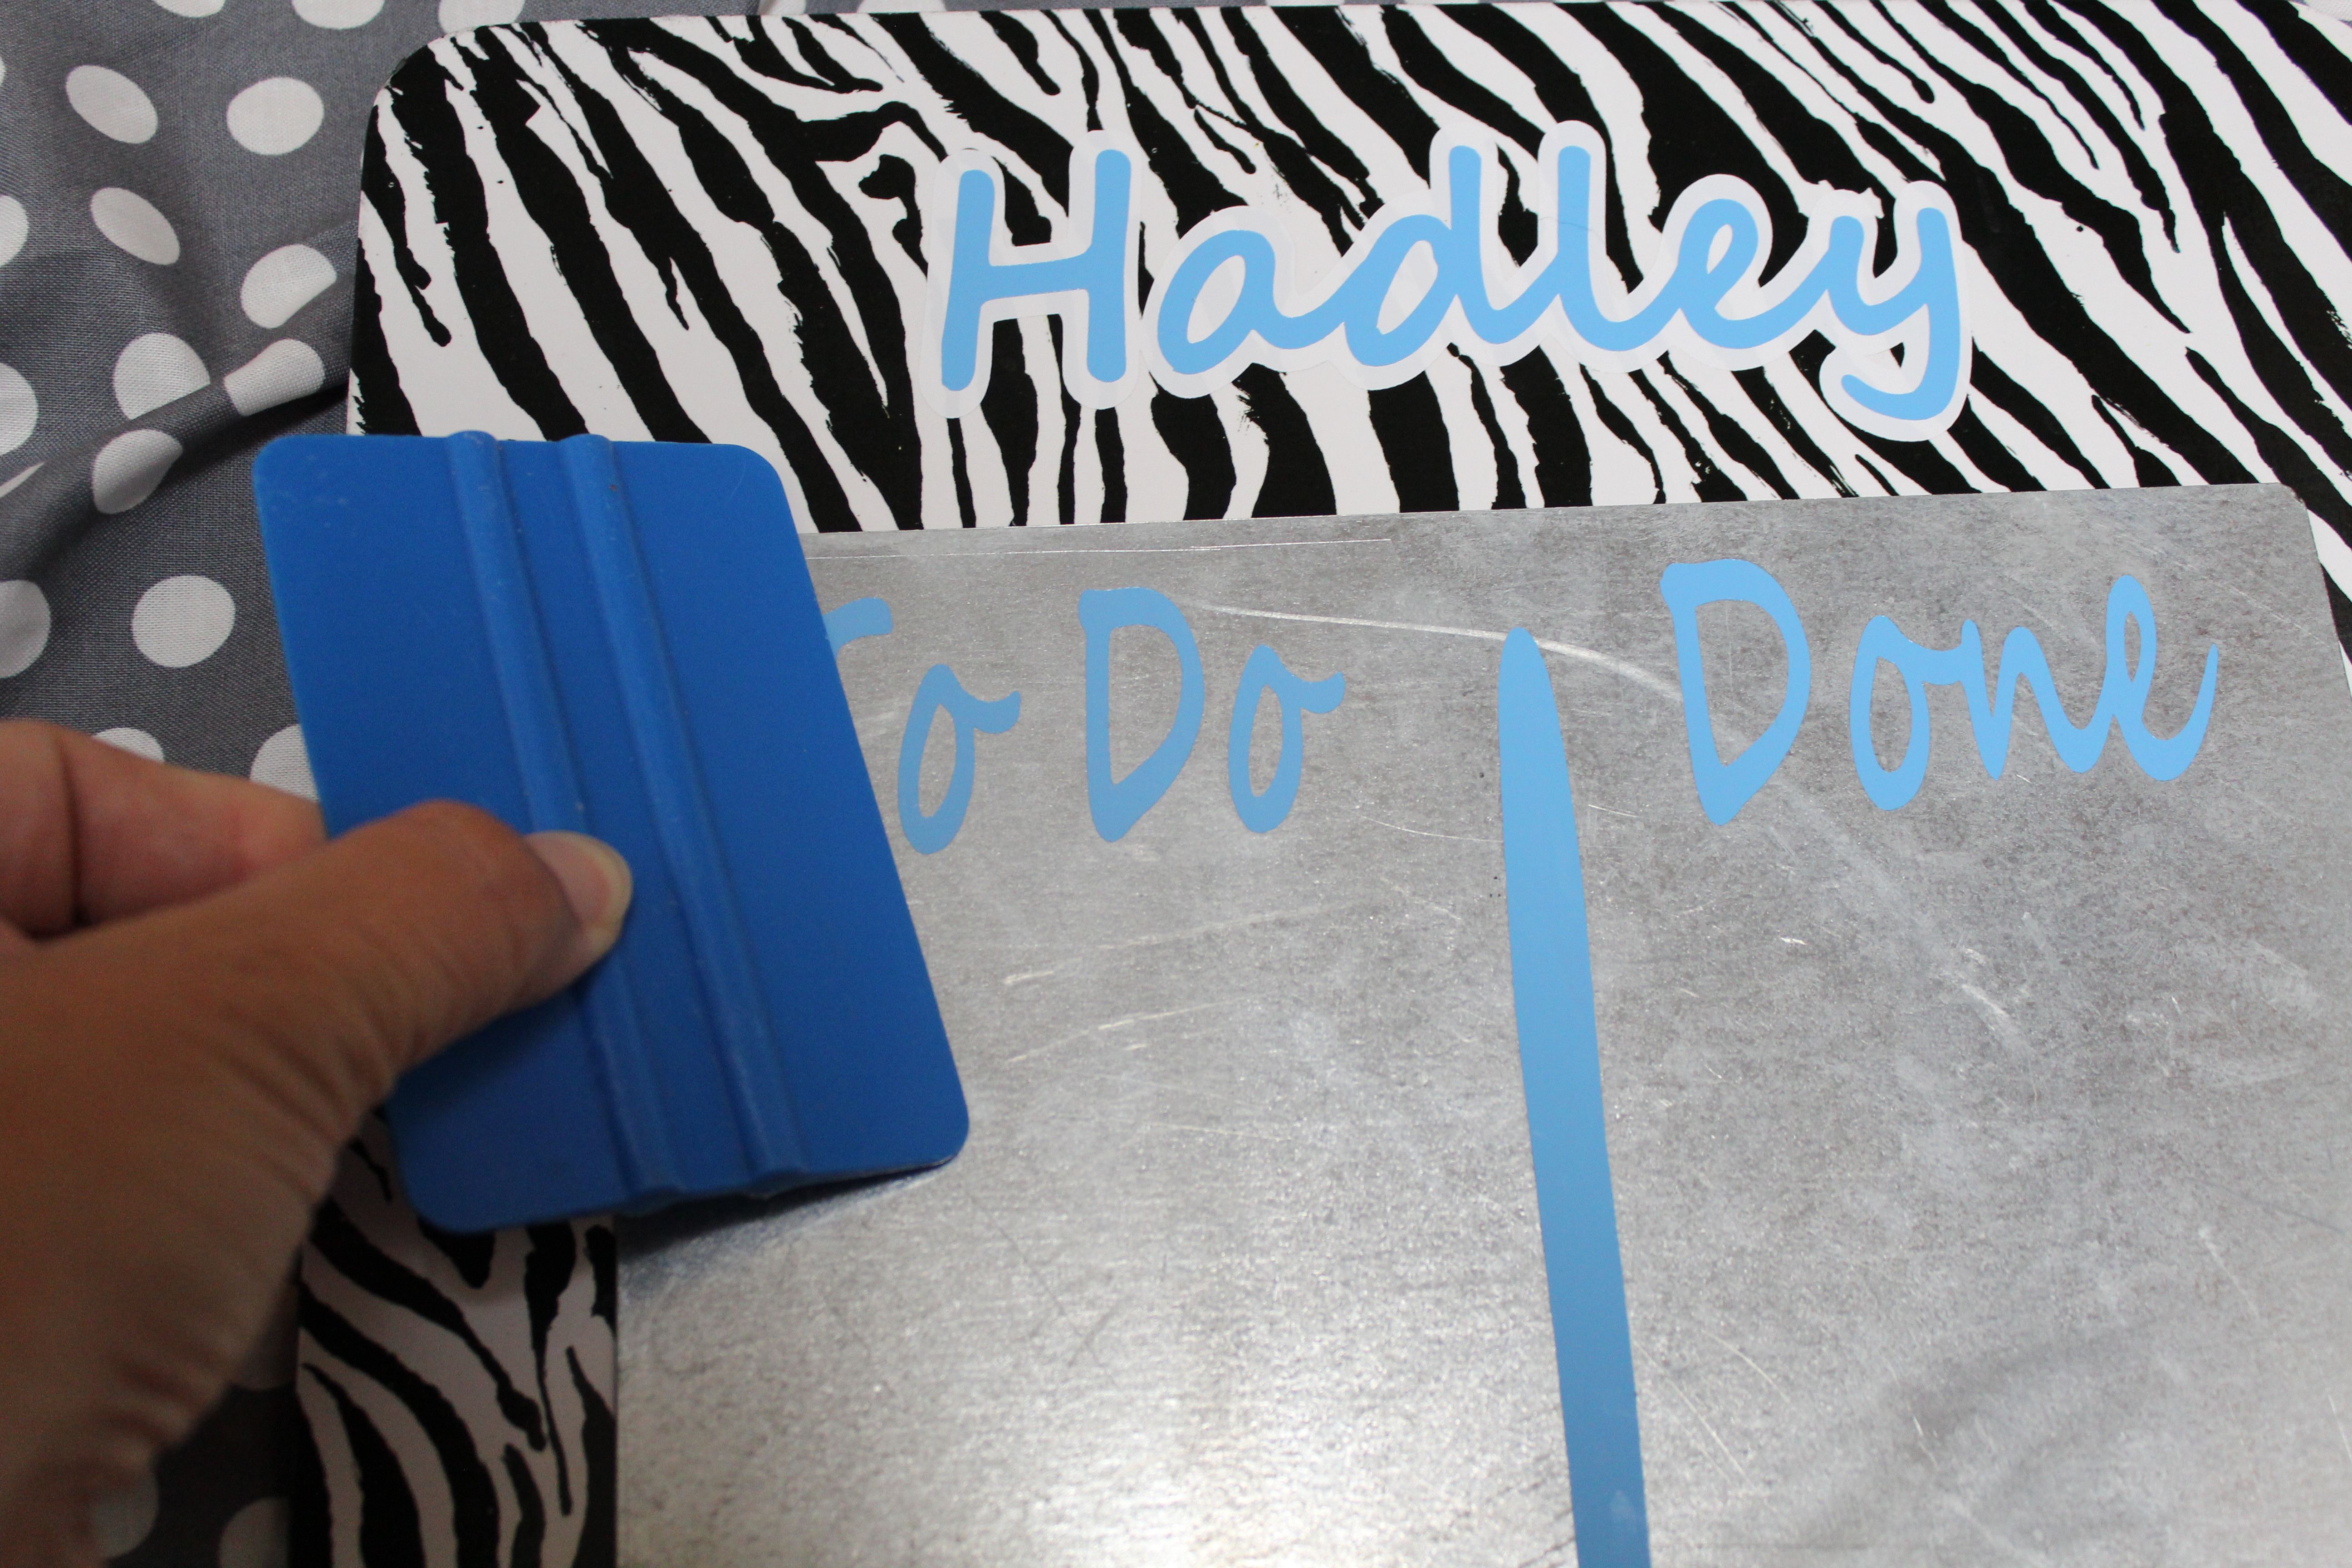
The first thing you need to do is glue your metal to your board using E6000. Leave extra room at the top so you can put a name on the top. I left 3.25″. Then just center the board from side to side.
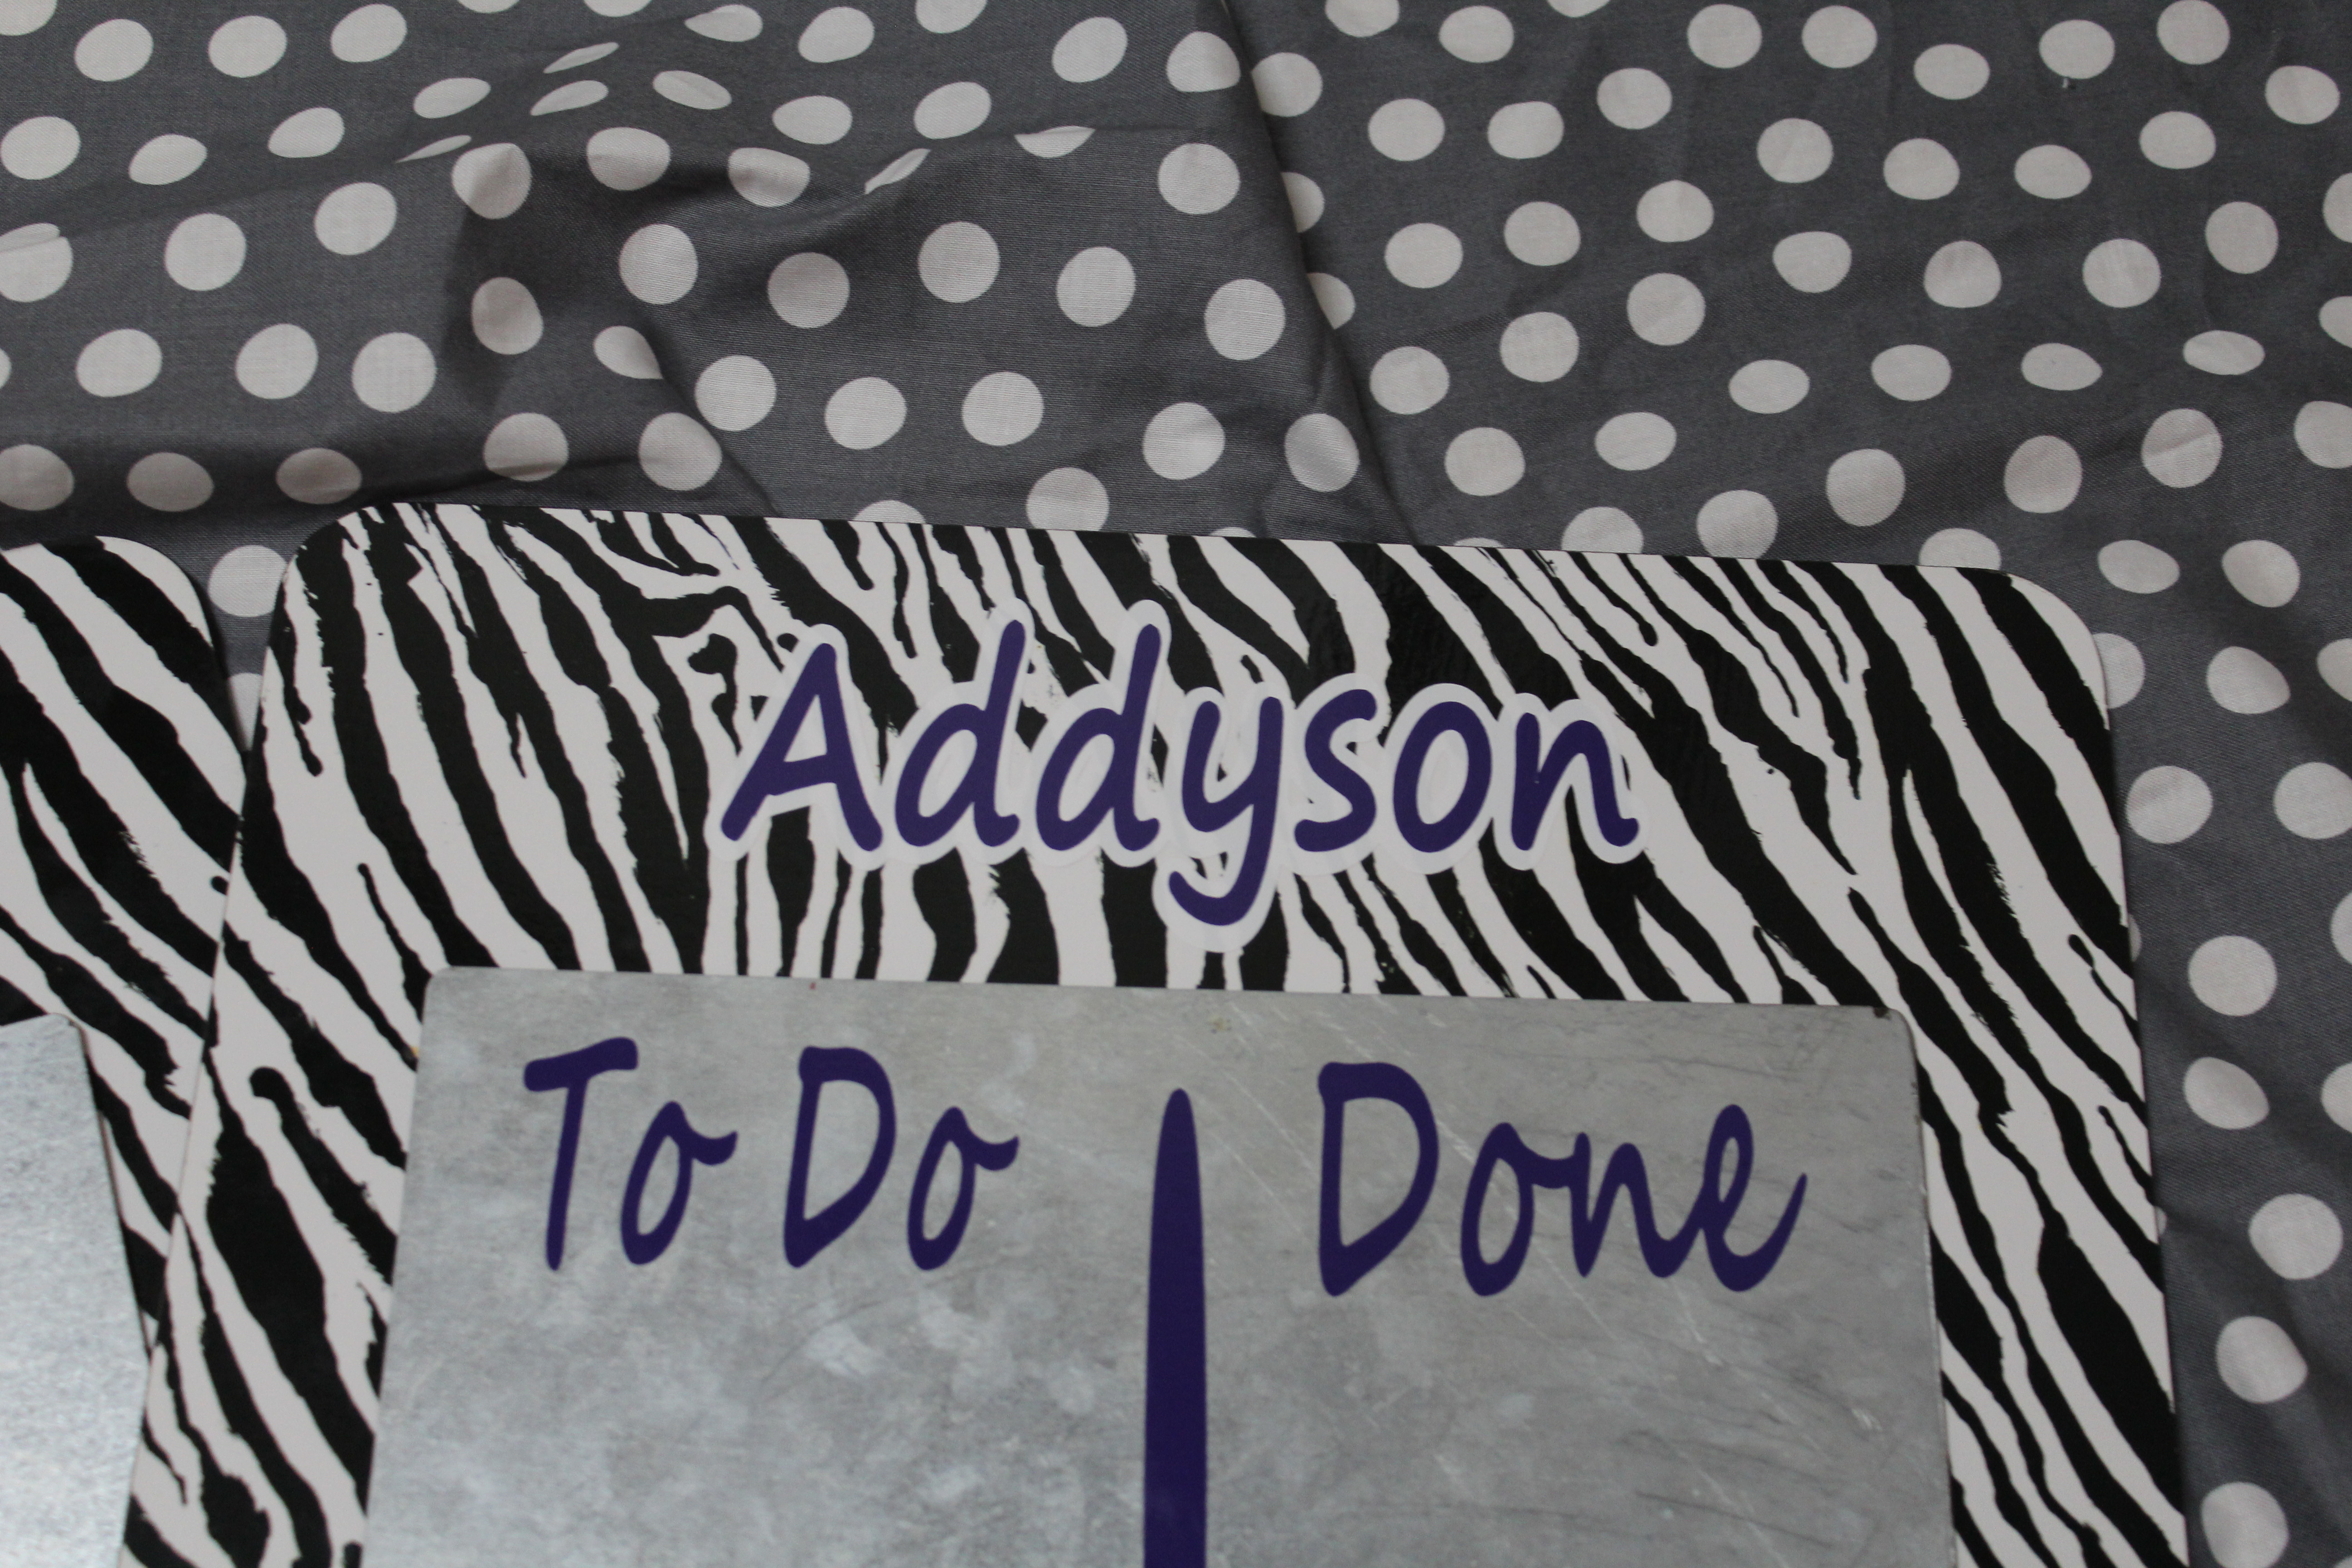
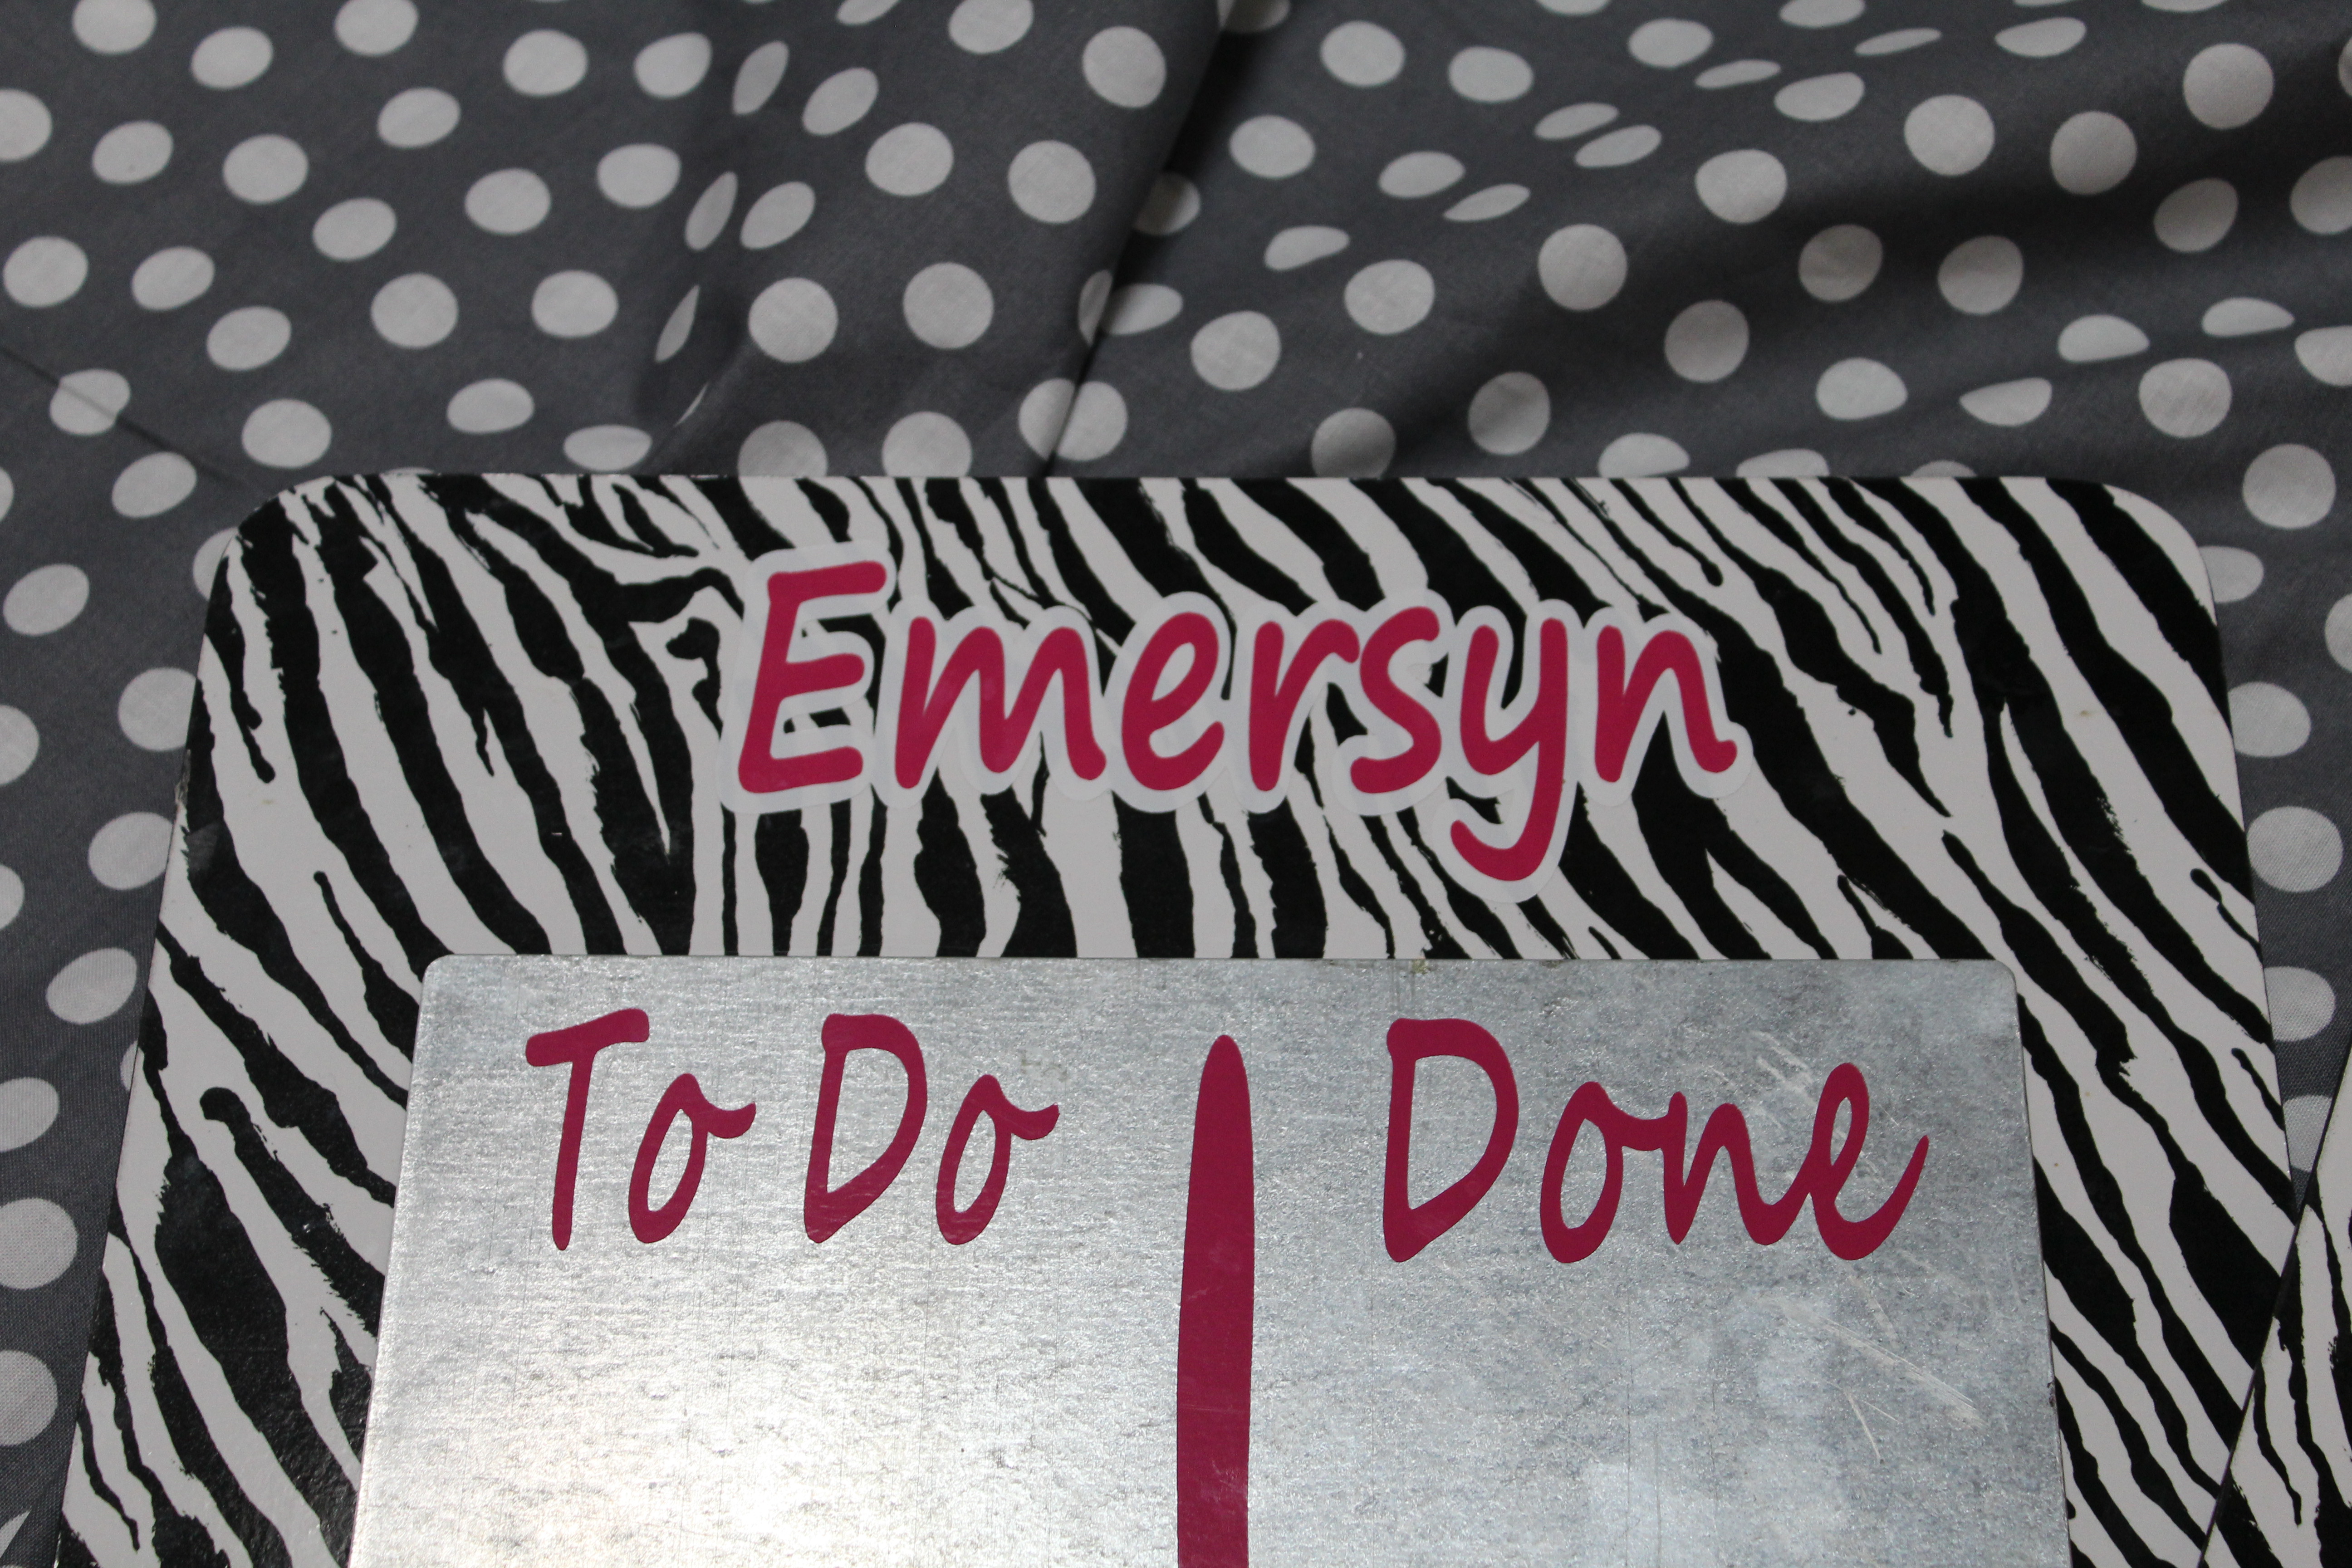
I then cut the names out using my cricut and their favorite color vinyl. I like to put the name on a solid background shadow when there is a busy background. So I used white for the shadows. The name measures 2.25″ x 6″ The font is called Segoe Script. I like this font for anything I want to look kiddish. Then using the contact paper center the name on top of the shadow and then the entire piece onto the board.

Cut out the words To Do (measured 1.5″ x 3″), Done (measured 1.5″ x 3″) & a line to divide. Then using contact paper, place the words.

Paint your wooden circles and glue on the magnets. I got the sticky magnets thinking I would just use those. Don’t bother! Go ahead and use a glue gun to glue on the magnets. They will fall off if you don’t I promise!


Now you’re ready to hang your chore charts and put your kiddos to work!
I used the 3m Hangers that I got at Michaels.

Father’s Day Craft Roundup
I really can’t believe the year is already halfway over. Which means it’s almost Father’s Day! This day always seems to sneak up on me since it’s right at the beginning of summer break.
I always have the hardest time coming up with gifts for all the important men in my life. But these I think any of them would love! I especially love the BBQ rub. My hubby loves to grill and is always looking for new recipes. I hope you find the perfect gift!


Last Day of School 2014 – 2015 Free Printables
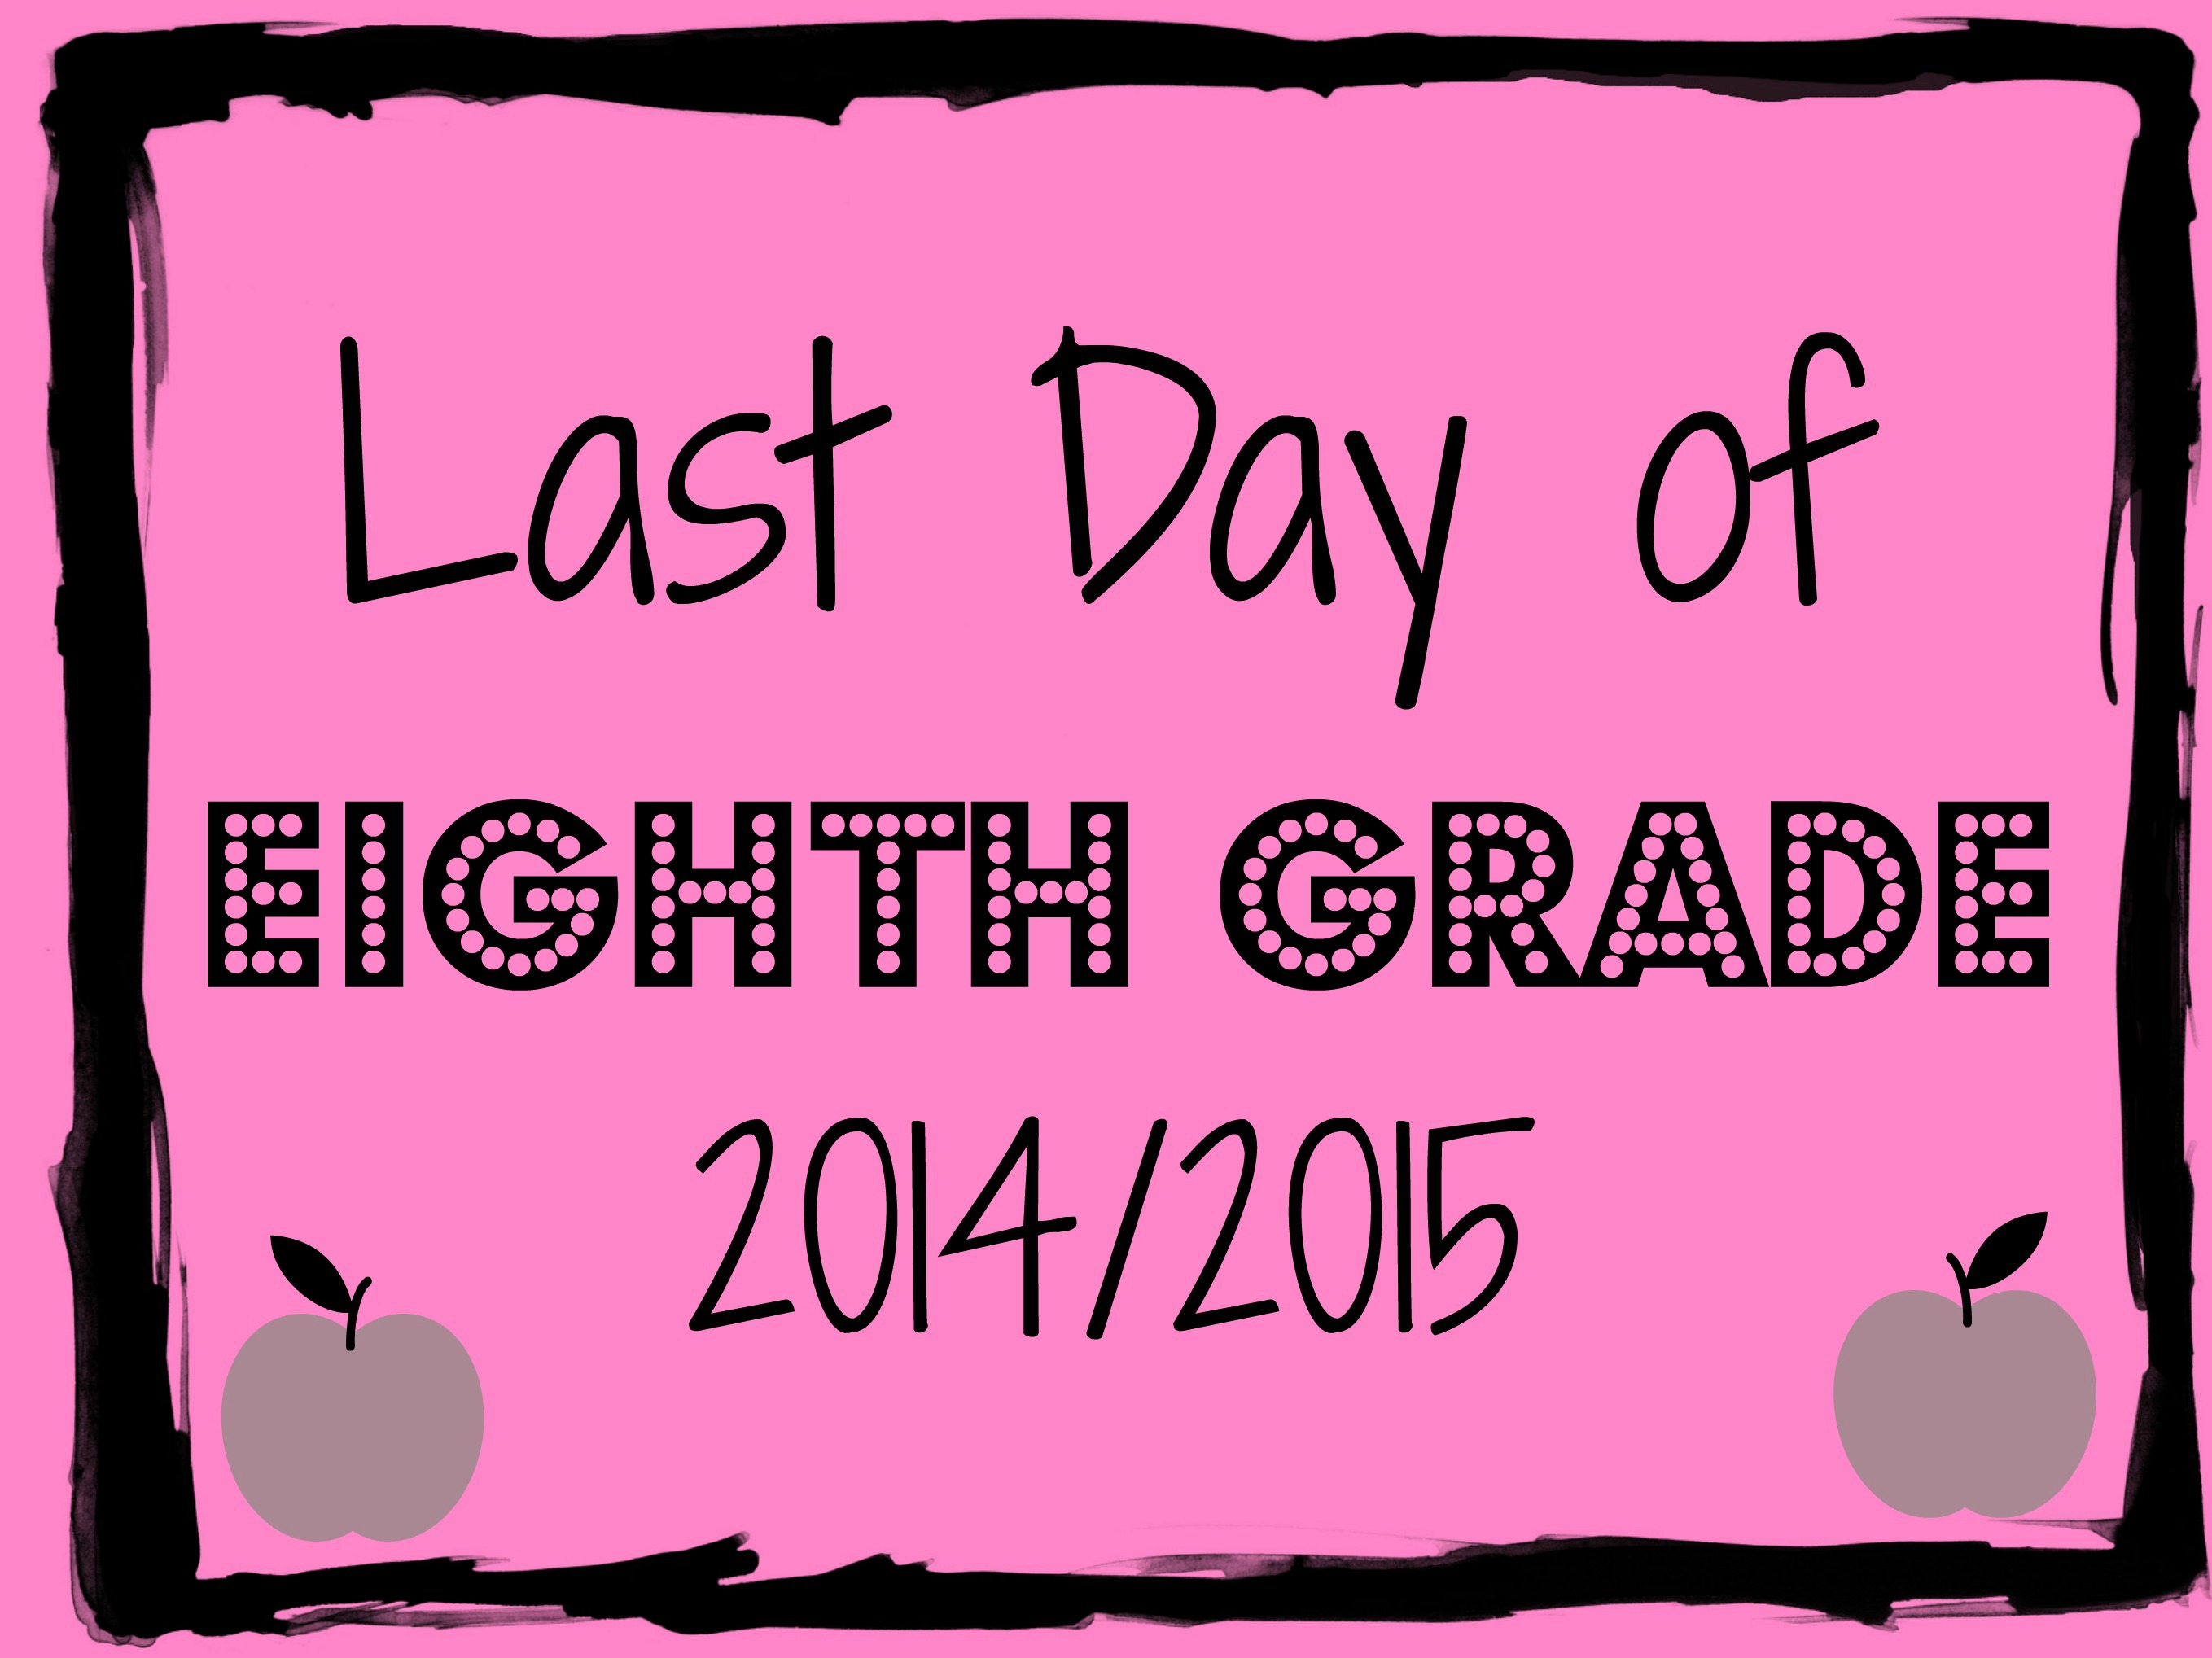
This year has absolutely flown by! Maybe it is because it is my first year with all 3 of my girls in school. How do they grow up so fast? With Hadley finishing 4th grade and the twins graduating Kindergarten, I love the printables that have the end of school and the year. But I couldn’t find exactly the one I wanted. So PicMonkey is where I went.
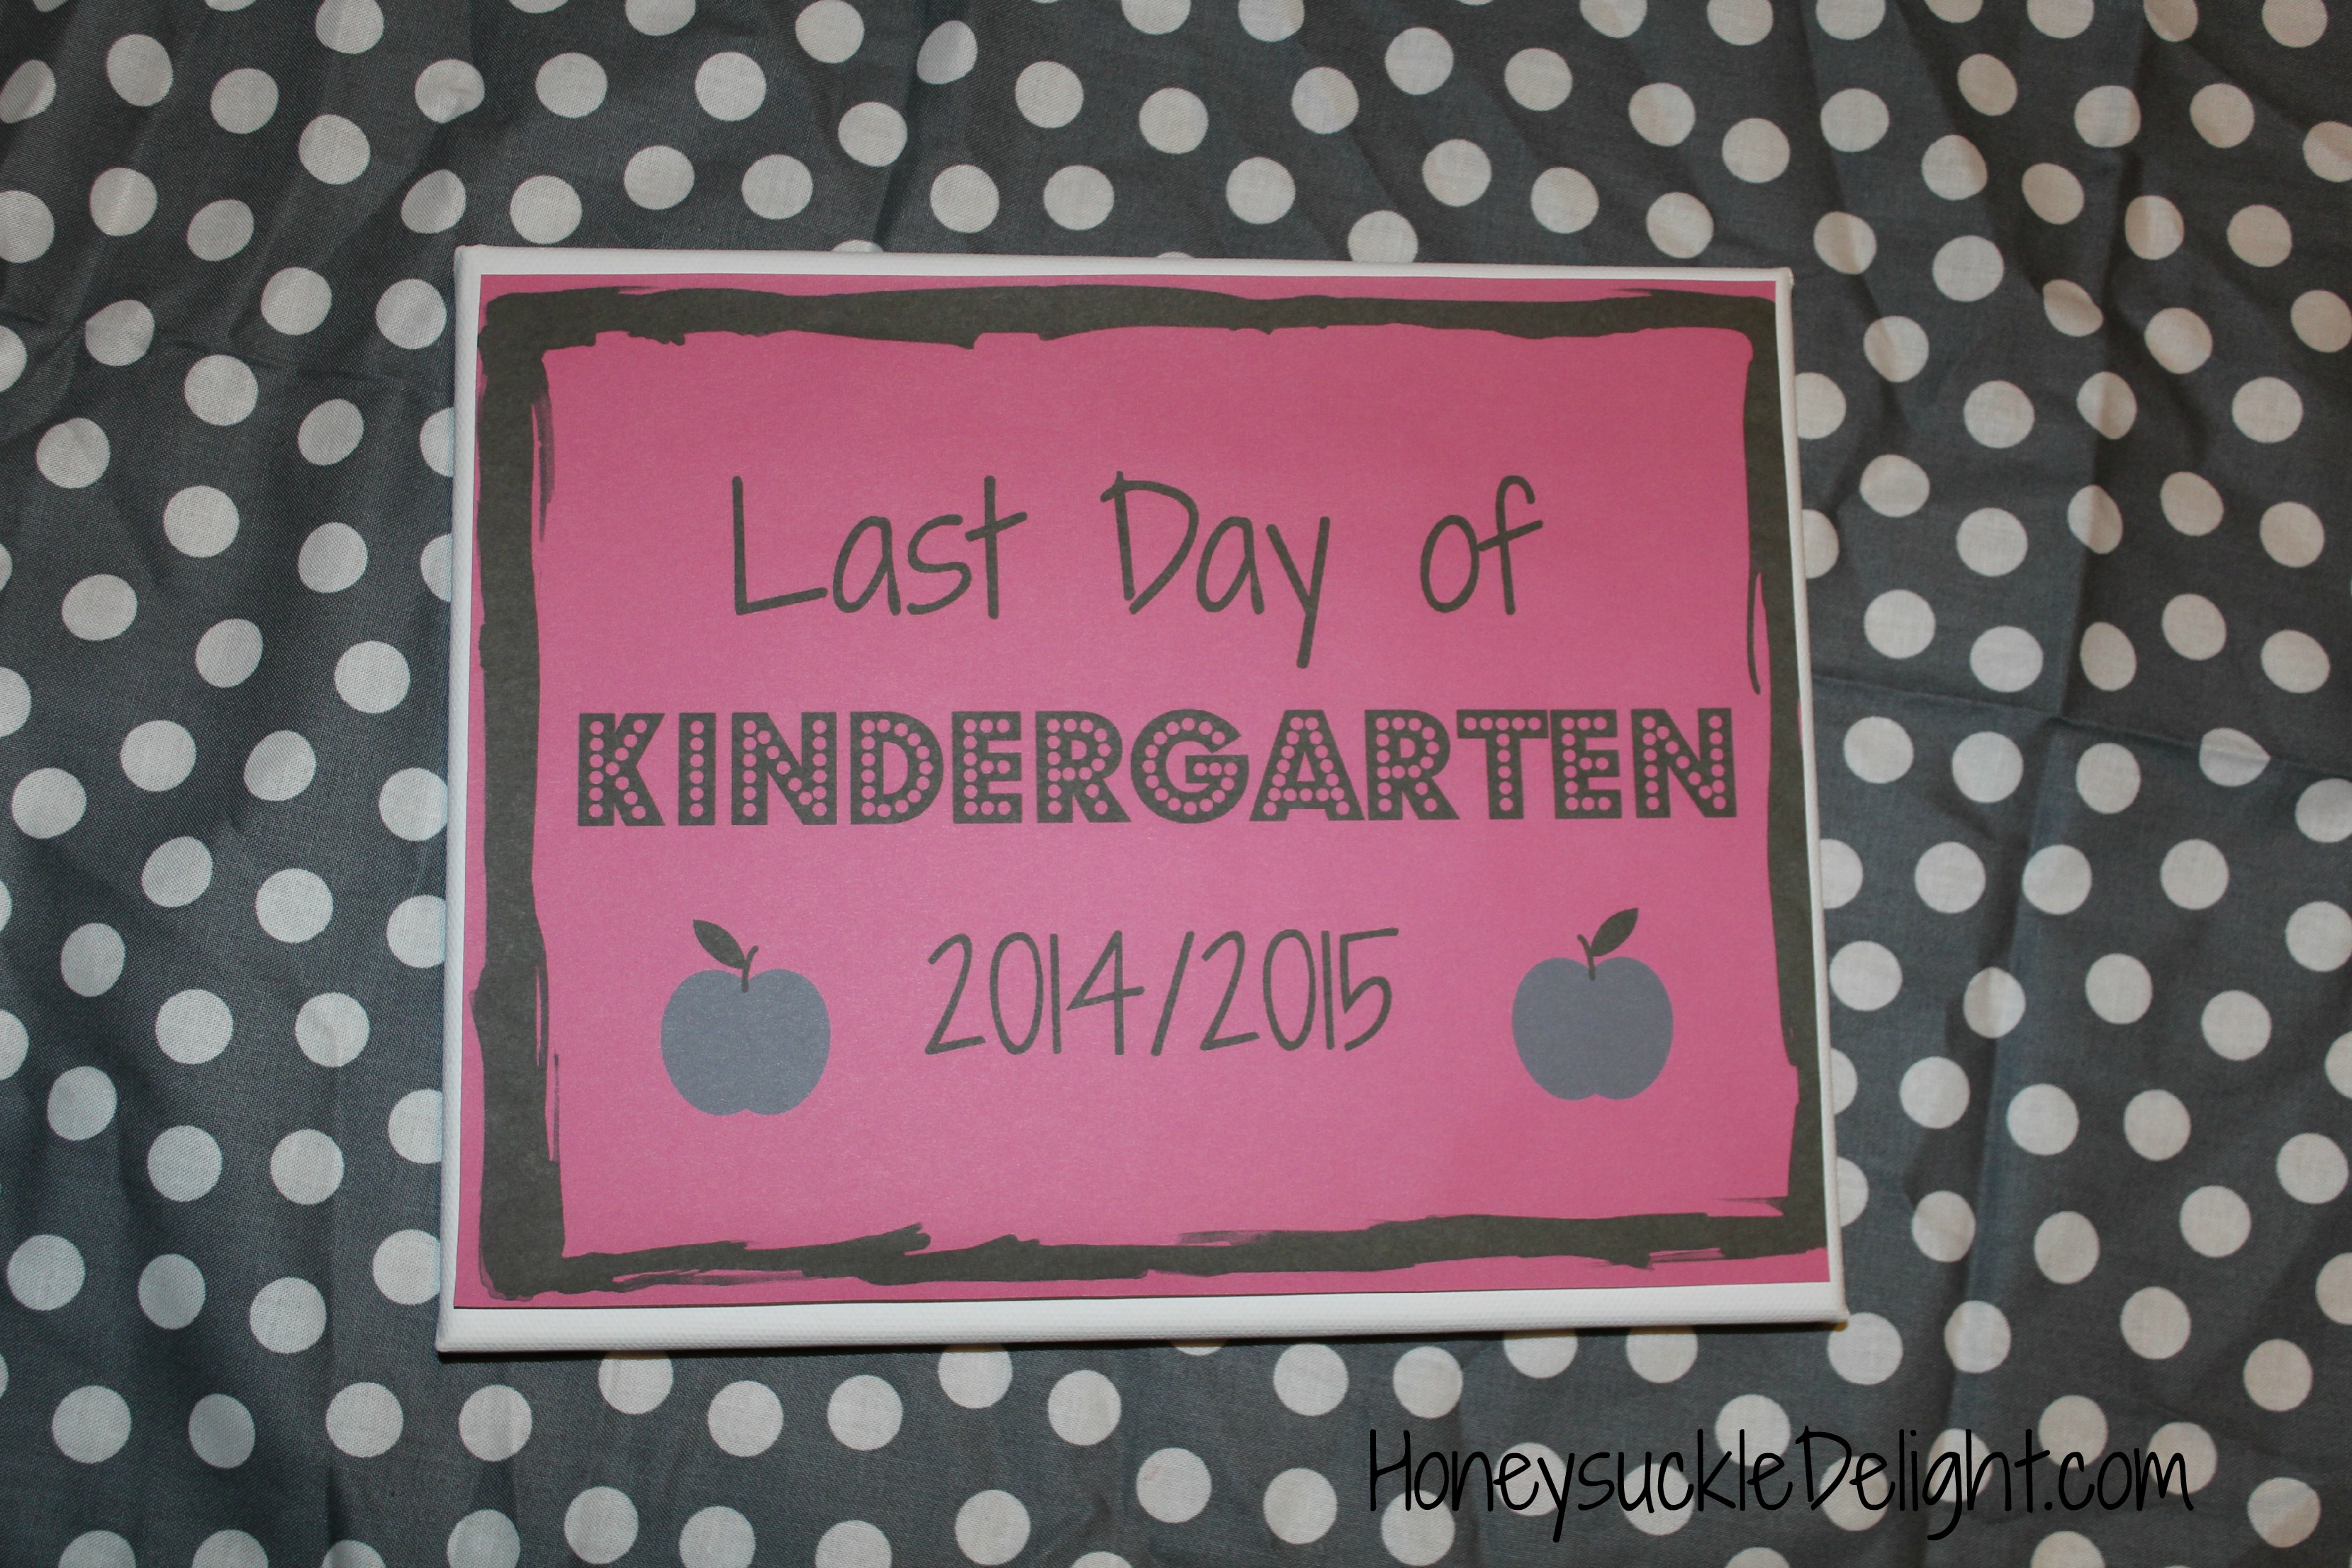 In years past, I have printed the picture and put it in a picture frame. While that is cute, I wanted to do something a little different this year. So while I was rummaging in my craft room ( or area…I wish I had a craft room!) I found a white canvas. PERFECT!

Supplies needed:
Printable (available here!)
Scissors
Tape
Canvas
Start by cutting the edge off the picture. Then place tape on the back edges of the picture. Tape it to the canvas. If you are wanting to keep this as a memory, then you can use ModPodge to glue it on the canvas. Since I only wanted something for pictures for one day and want to be able to use this canvas for something else, tape is a better option for me. Now you are ready to take pictures with your kiddos!


 I would love to see your pictures if you decide to use this printable!
Ribbon Storage
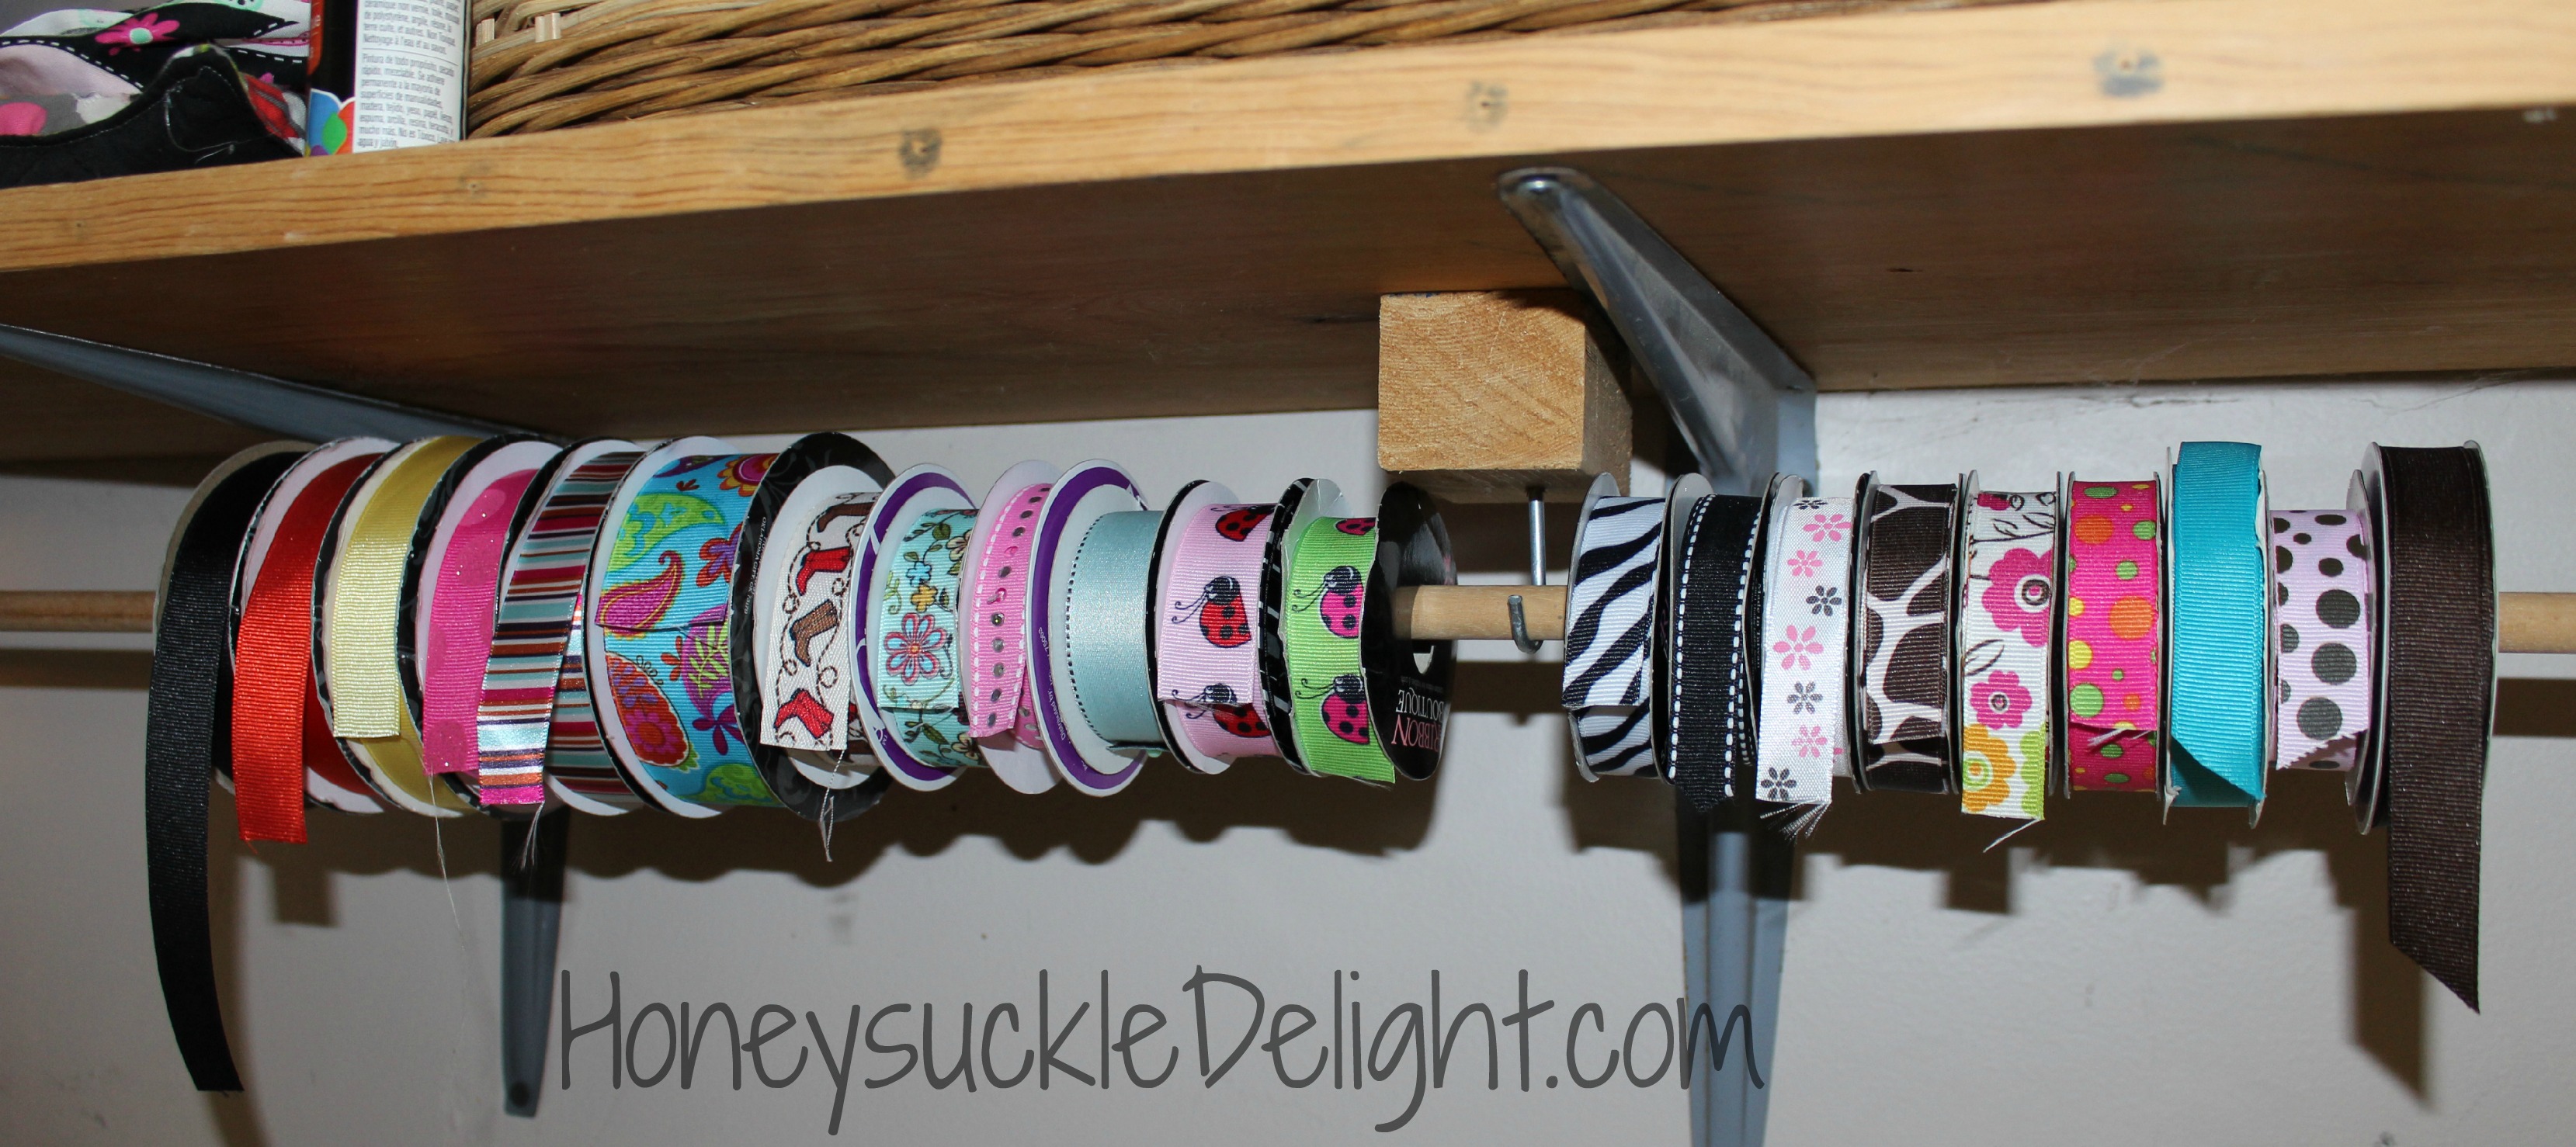
I am always looking for better ways to organize and store my craft supplies. So when my grandparents were helping me put up my shelves, my Grandmother & I came up with a great way to easily store my ribbon. Now I know exactly what I have just by looking. It doesn’t get unwound and messed up. It’s exactly what I needed!
Supplies needed:
Small boards
Hooks
Dowel Rod
Electric Drill
Screws
We started by adding a small piece of wood in order to make the hook hang low enough to allow the ribbon to hang properly.
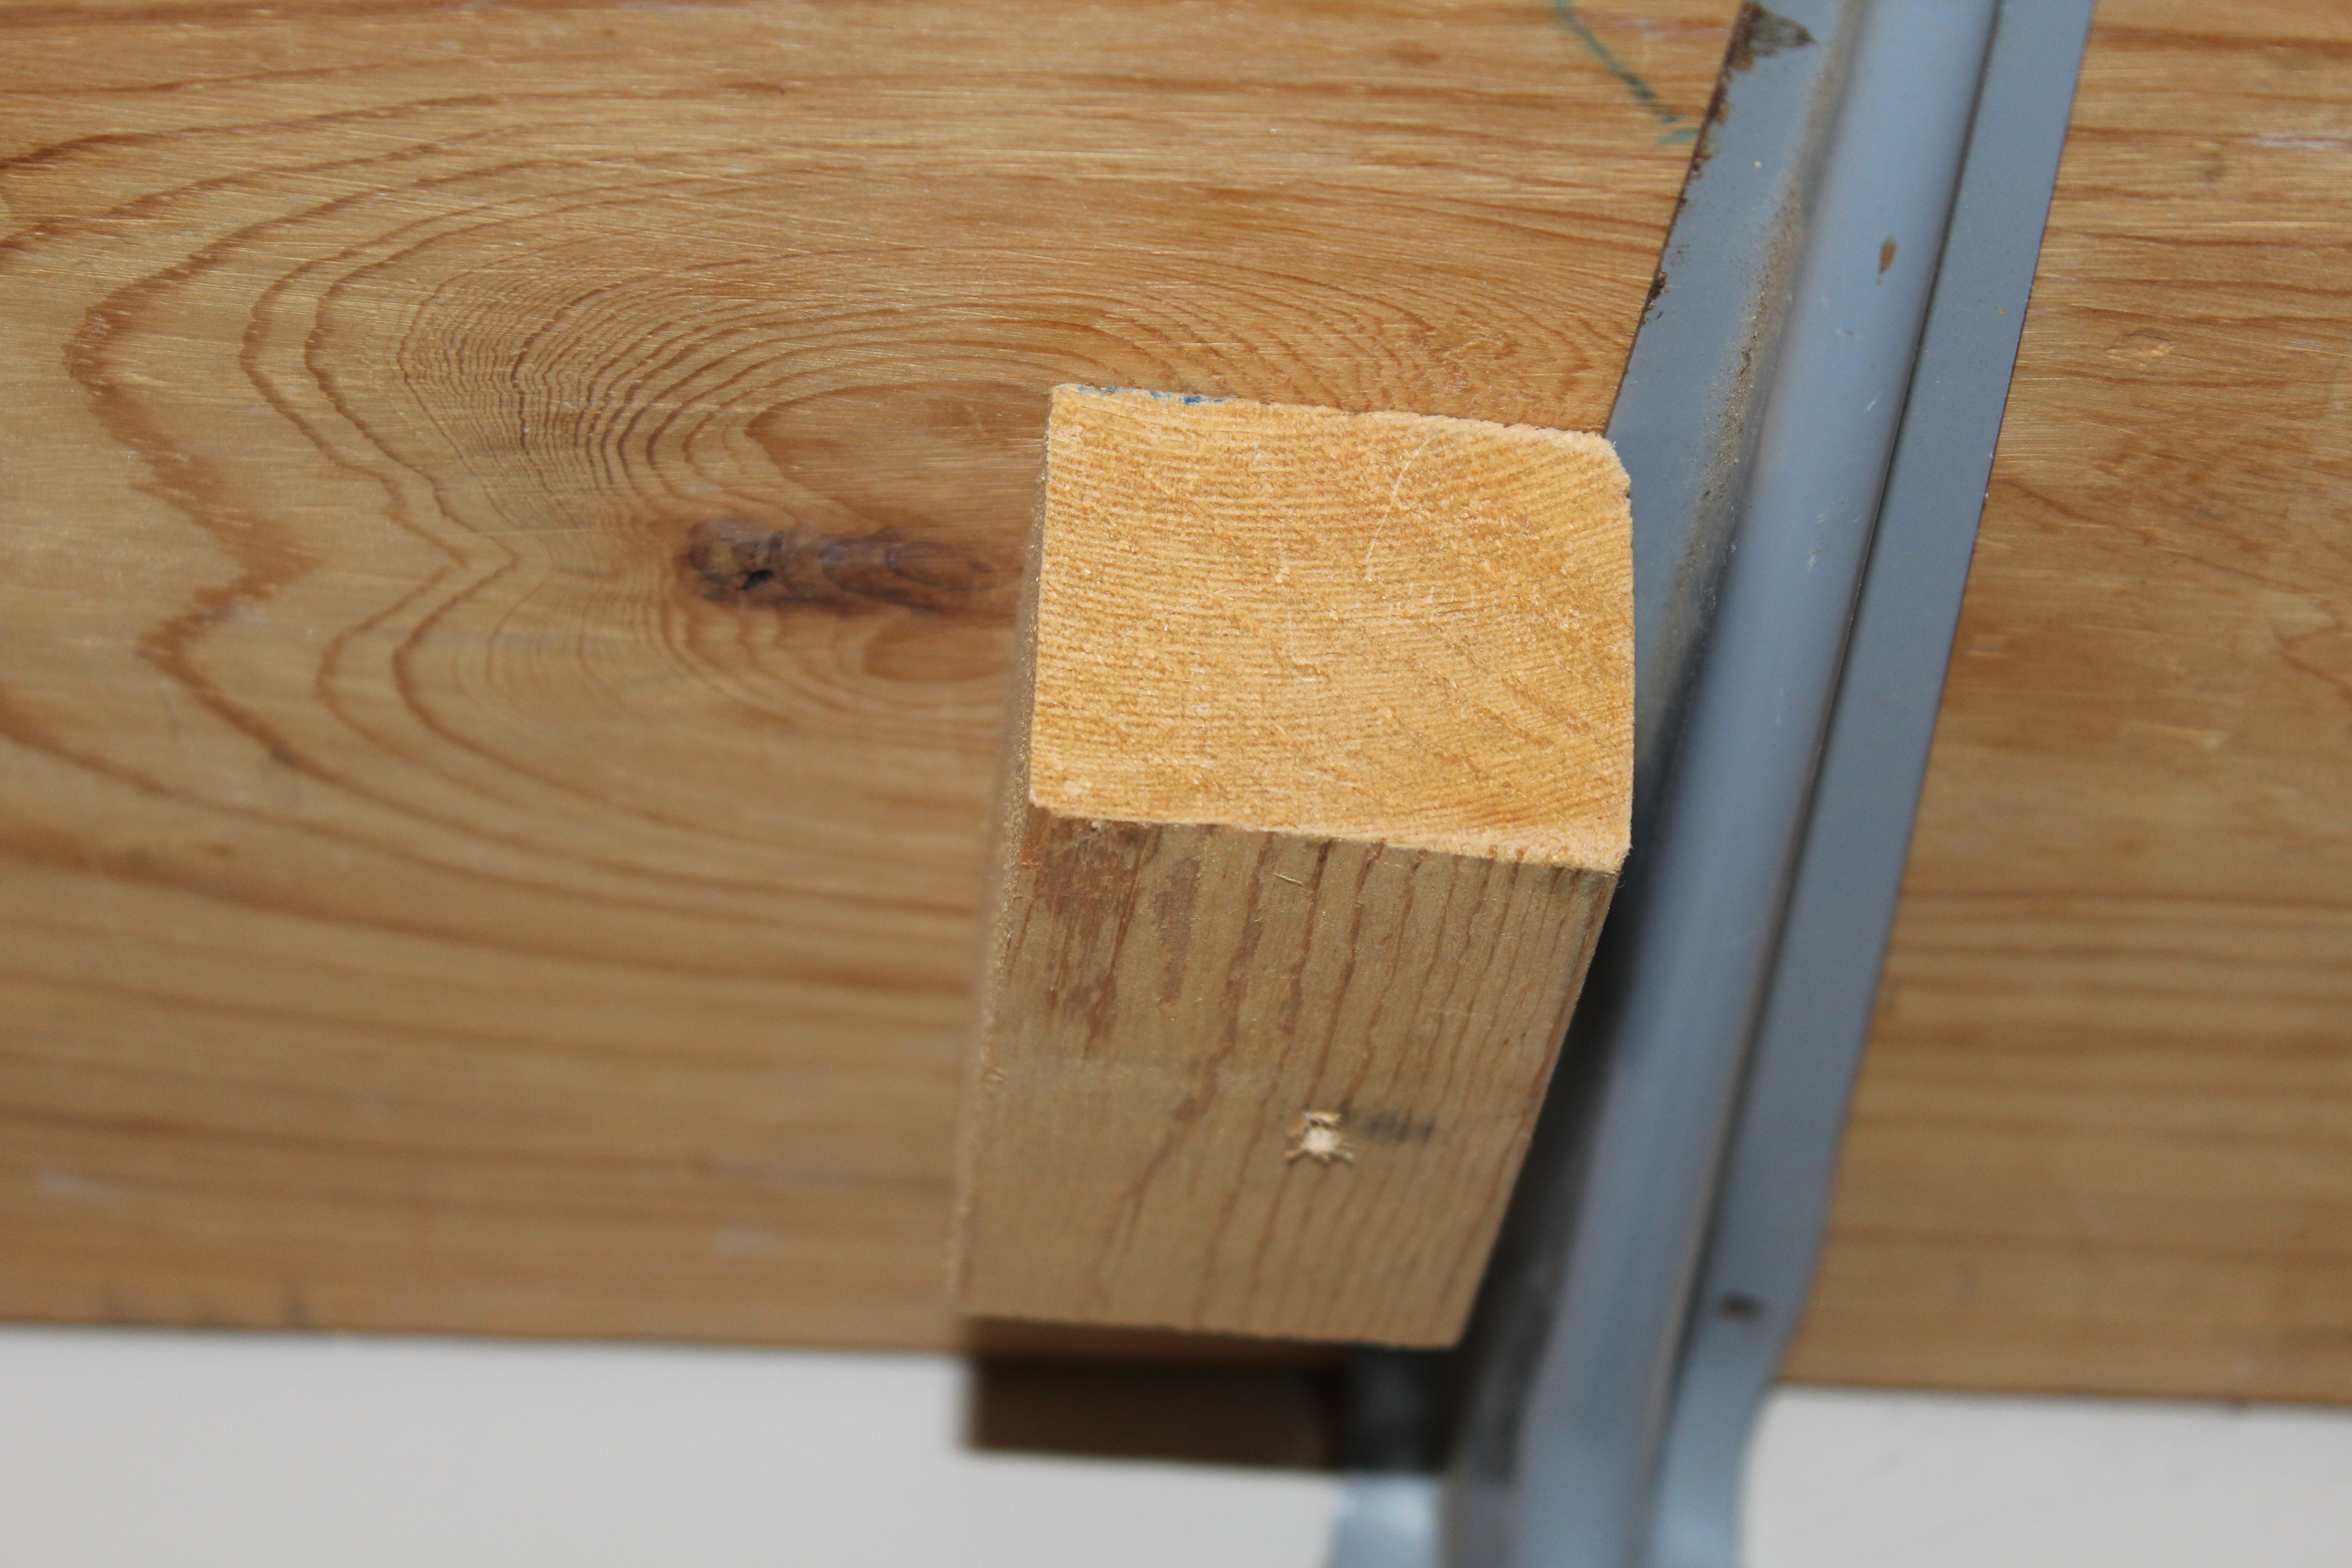 Use the drill and a screw to connect the small piece of wood. I needed 2 pieces of wood. But if yours is longer you will need to decide how many hooks you will need accordingly. Then add the hook into the piece of wood.
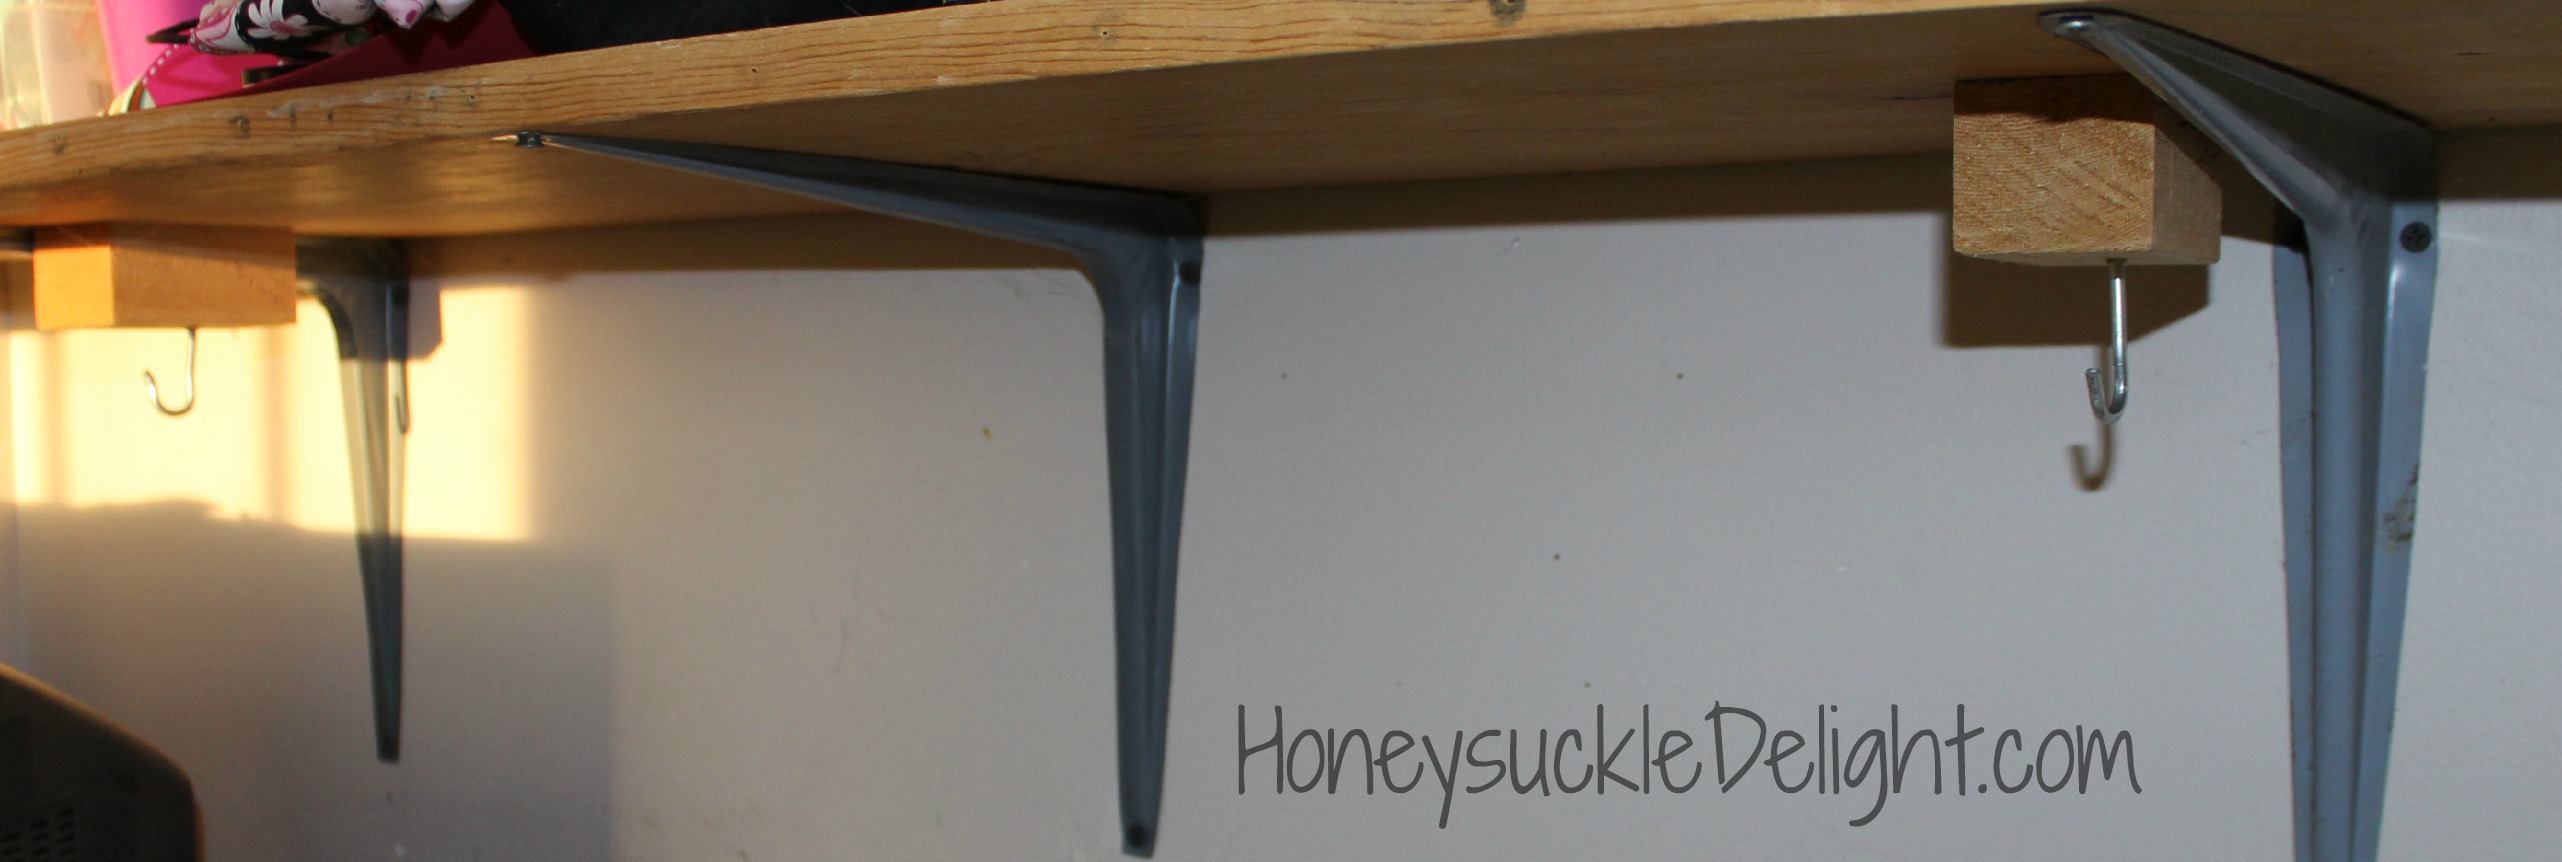
Now just add your dowel rod into the hooks. Done!

Now it’s ready for your ribbon!
End of Year Teacher & Bus Driver Gifts
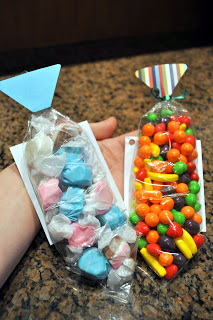
I can not believe I will soon have 1st graders & a 5th grader! Time flies by so fast. This year I wanted to give the teachers and bus driver something they could use over the summer. What is more perfect than a Redbox gift card? Since they even have one in the little town where we live I know they all would have a good chance to use it. So here’s our idea of a movie & snacks in a basket!

Supplies needed:
Basket
Candy
Popcorn
Card
Ribbon
Cellophane wrapper
I bought everything at the Dollar Tree! Place all of your candy into a basket. My girls always love a chance to craft so they were super excited to contribute by making cards for each teacher and bus driver. Print off your card onto cardstock.
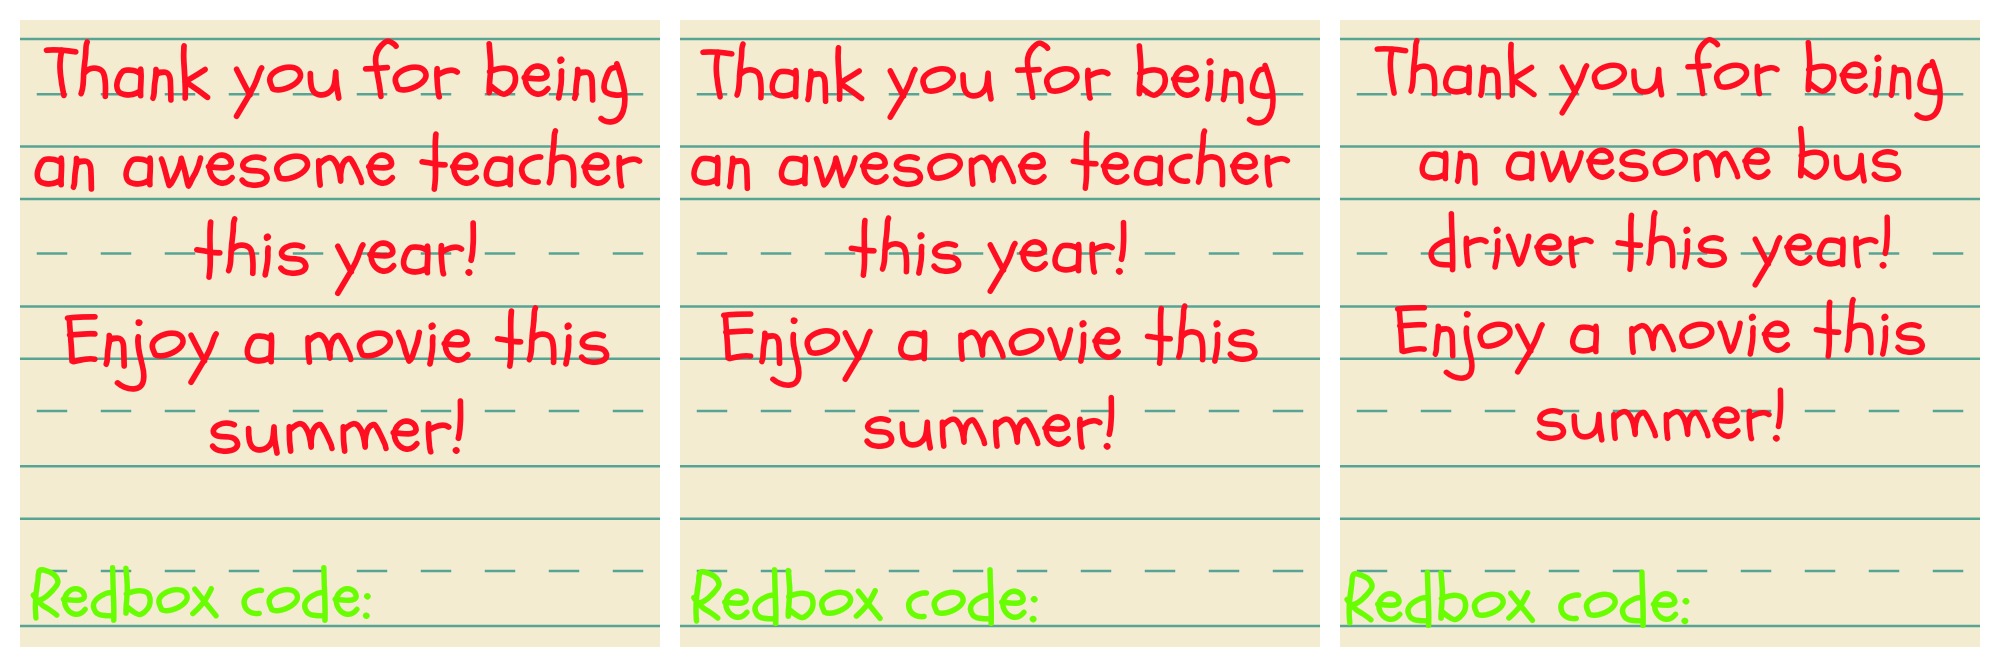
Let your kids sign the bottom of the redbox card if they didn’t make one. Then take a hole punch or scissors and make a hole so you can thread your ribbon through. Tie to the handle of the bucket. You could also wrap the basket in cellophane if your kiddos are delivering the baskets. That way nothing falls out!
I’m sure your teacher and bus driver will love this as much as I hope ours do!

American Girl Craft Ideas
It’s almost summer here. My girls spend tons of time playing with their American Girl dolls. So I can’t wait to have them home so we can make some more fun things for them to play with. Here is a start to the things I hope to get made x3 soon!


Can’t wait to show you all what we come up with. One of our favorite things to do is craft! They get it honest.
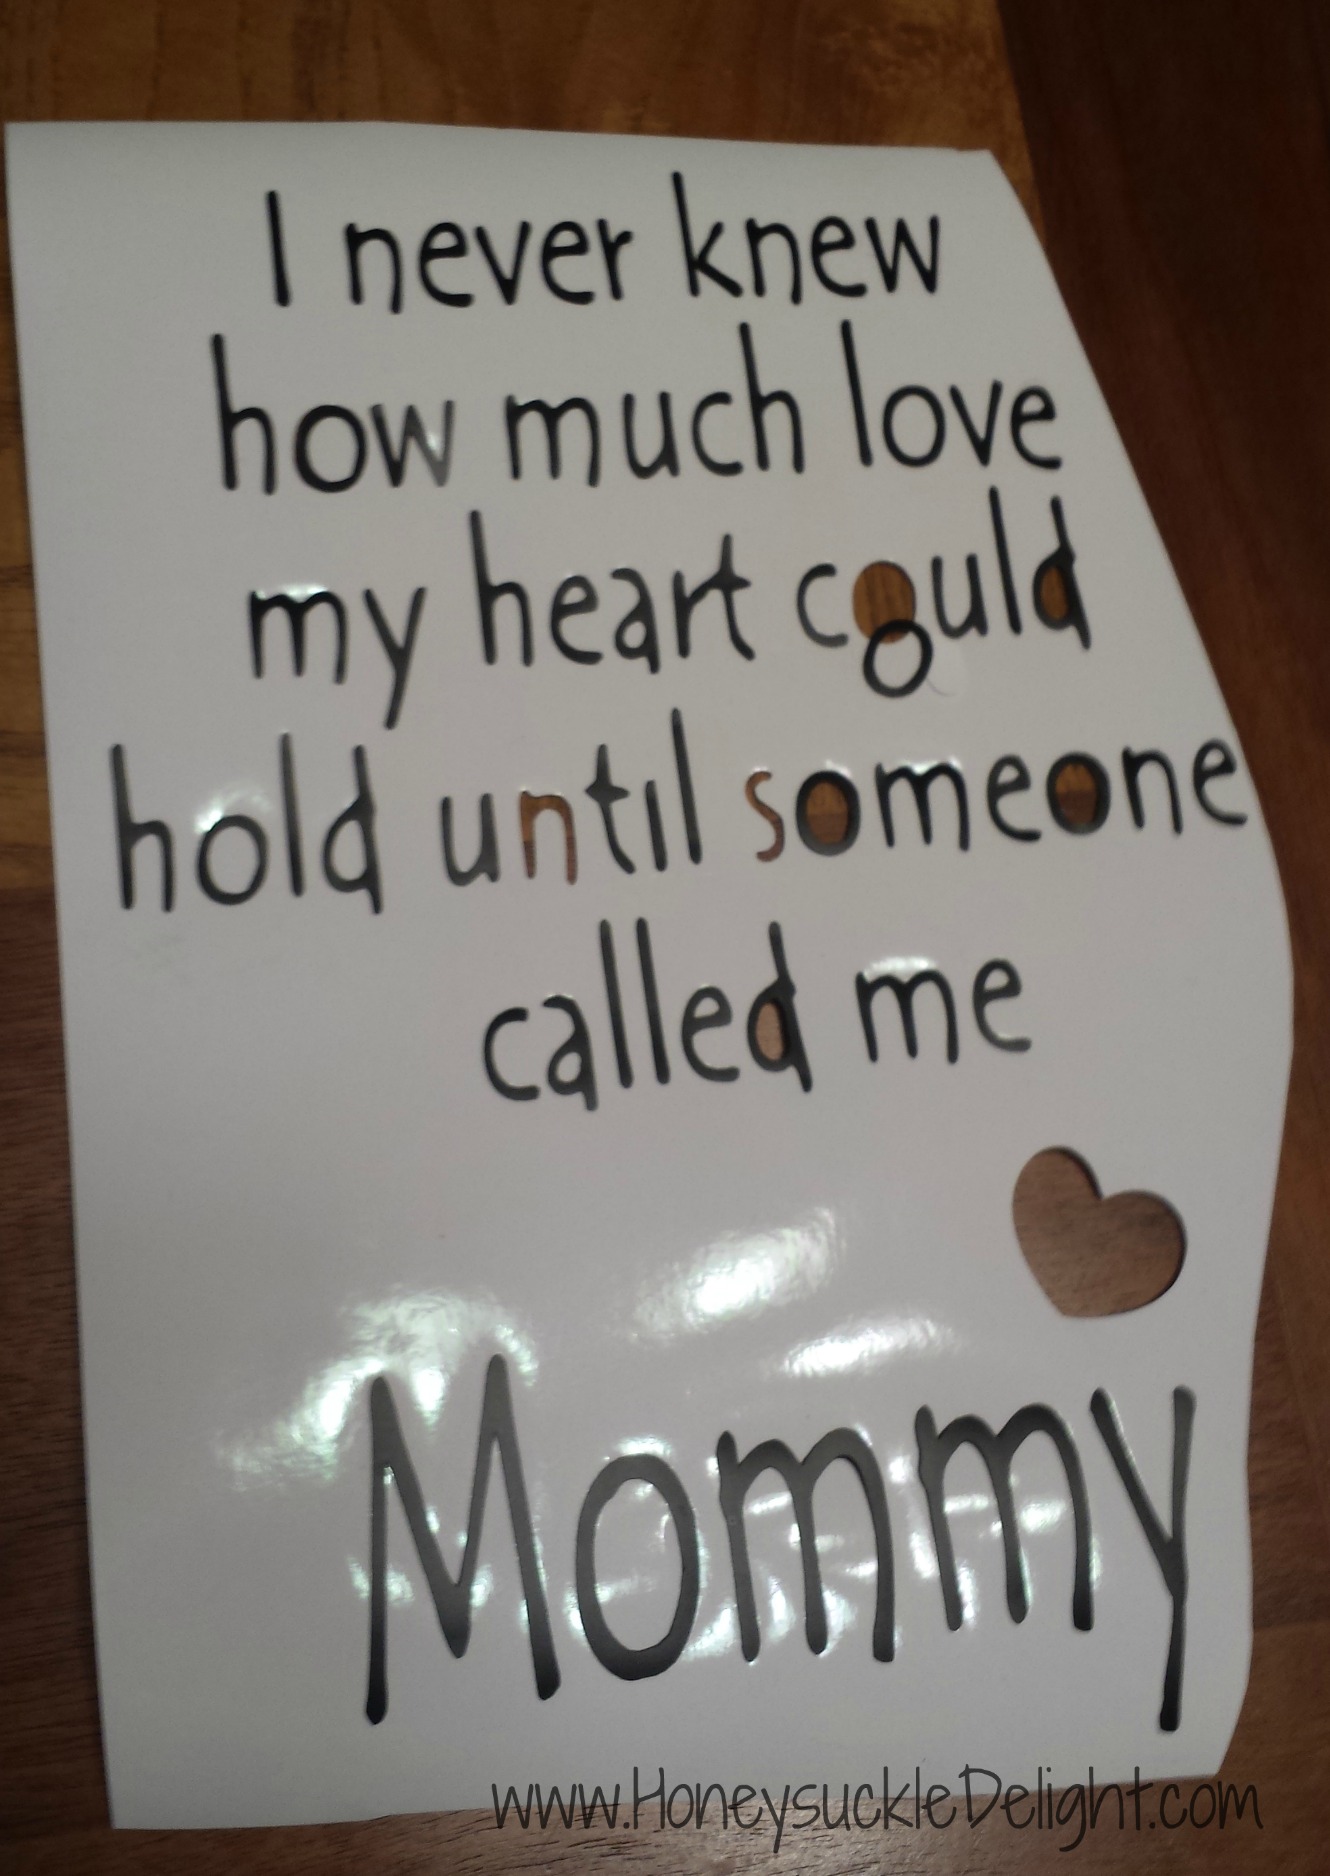
Mother’s Day Frame
I was contacted a few days ago by a high school friend’s Mom for a Mother’s Day gift for her daughter. She sent me 2 pictures. Told me how she wanted to combine the ideas and she wondered if I could help her do it. I didn’t have to think twice. OF COURSE!!
 Supplies needed:
Picture frame (this one is an 8 x 10)
Paint for the handprint
Vinyl
Contact Paper
Cardstock (I used white)
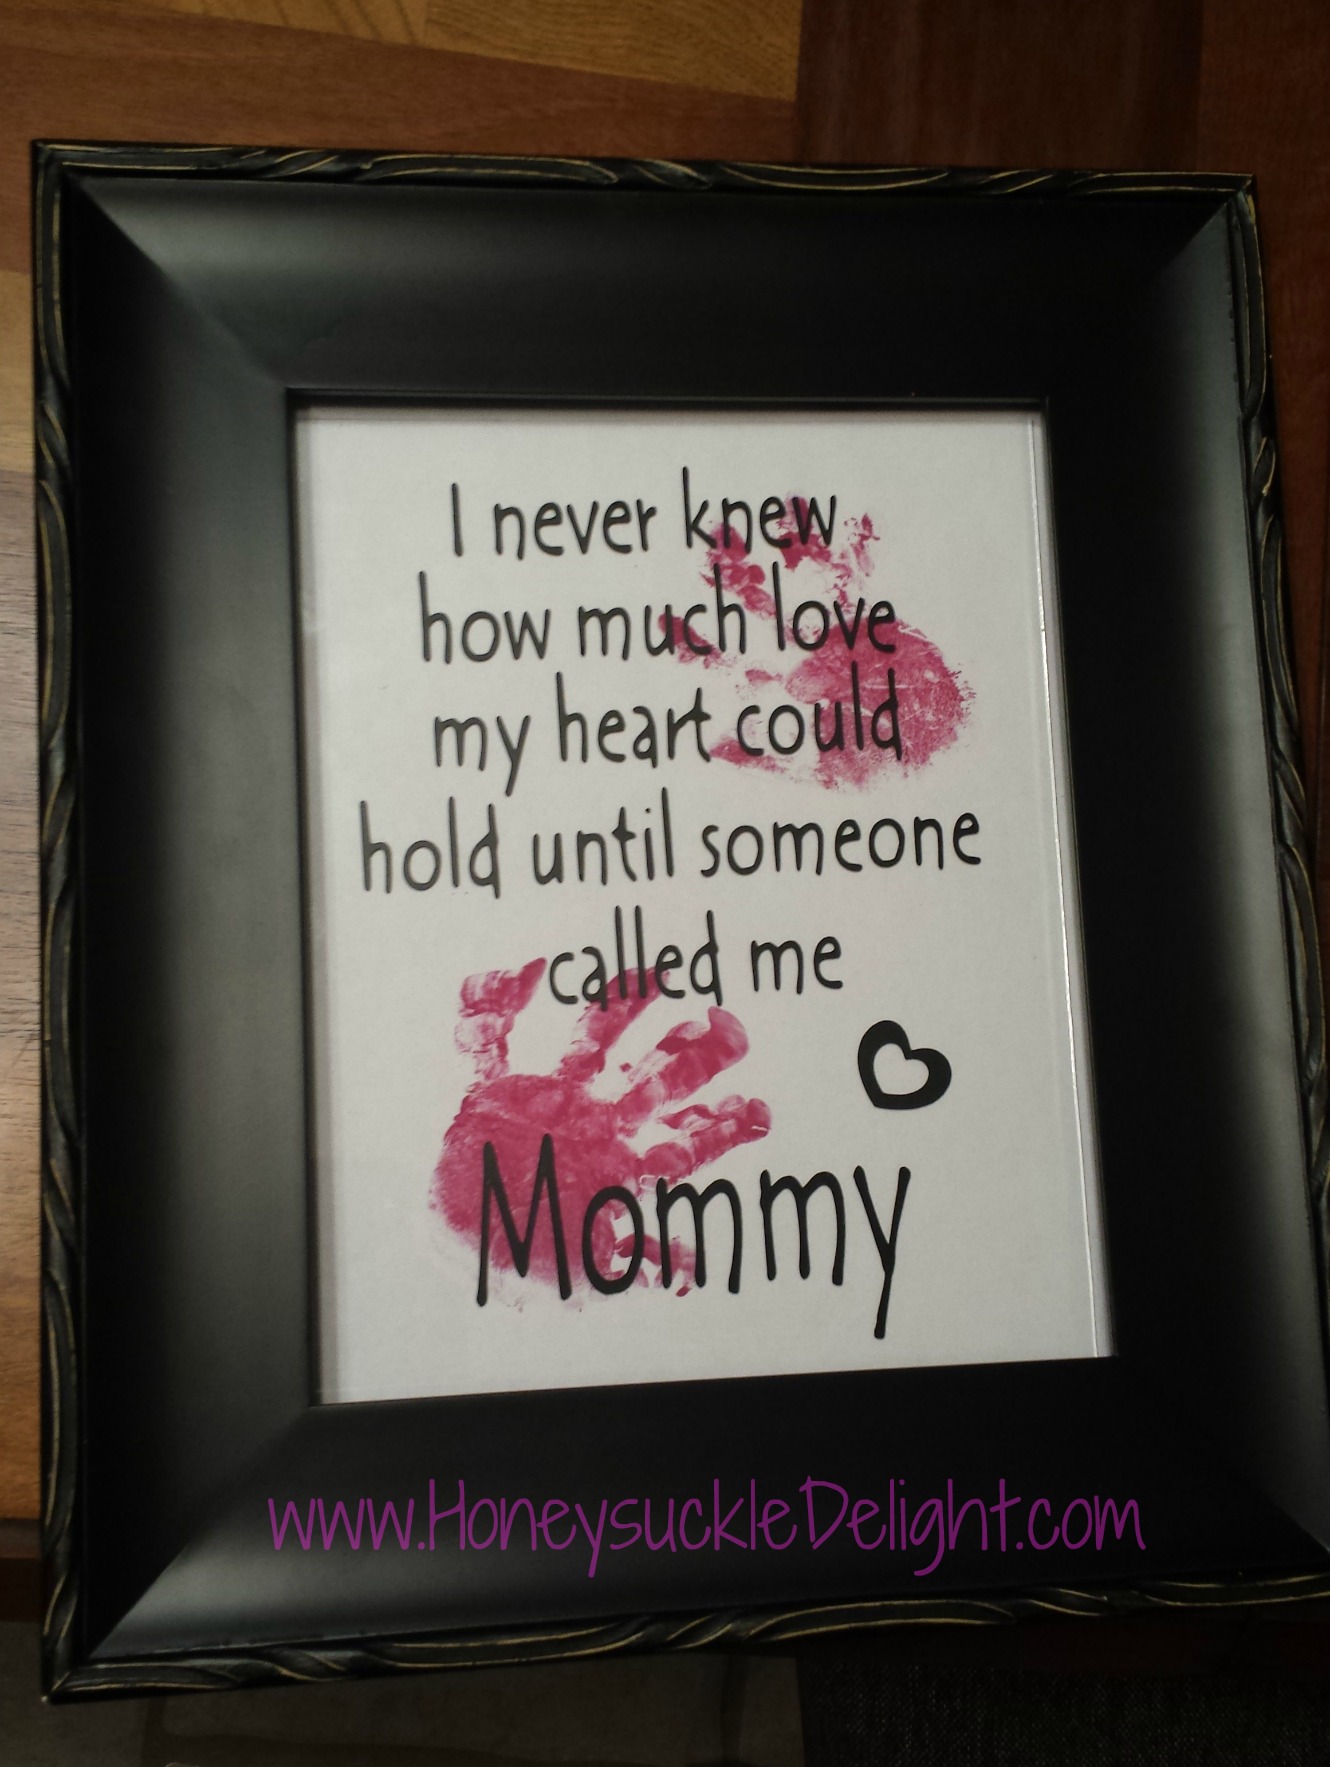
She did the hard part in my opinion! Lol she had to get her sweet one year old granddaughter’s handprint. Just dip their hand in the paint or paint it on there with a paintbrush. Just make sure you have plenty of baby wipes handy. I promise you will not do this in one try. But it will be well worth the hassle in the end! Place the hand prints on the back of the glass. You could also do it on the paper you intend to use as backing but placing the handprint on the glass will allow you to change the color of paper if you choose later on to match decor. Sorry for the glare! But you get the picture.

Now get out your cricut and print out the saying. I used the font Tempus Sans ITC. The words measured a total of 9 x 6.25. This allowed just the right amount of space on each side in the 8 x 10 frame. Make sure to pay attention to your settings on your cricut or you will cut too deep like I did. Since it was only the heart and one o I was still able to make it work.
Use your contact paper and transfer the vinyl onto the front of your glass. Cut your cardstock you plan to use for the background and you’re ready to go!
Teacher Appreciation Gift
I must say my girls have the most awesome teacher this year. I am so very grateful for that! Just think about how much time and energy they all put into loving on and teaching our kids. The time that I am unable to be with my girls I am so thankful knowing they are still taken great care of. For that, I think anytime is a great time to say THANK YOU! But since it is Teacher appreciation week, I figured this was the perfect time to give their teacher and the aide in their class a gift! So since vinyl is one of my favorite things, I made them each a cup and filled them with candy. Because who can’t use a cup and candy! Right?

I use a program called Sure Cuts a Lot along with my cricut. If you don’t have that program, you could still use your cartridges to accomplish the same thing. But I’ll be honest I don’t know how to do the shadow without it.
Start by typing your word for the saying. I used the font Segoe Print. It measures 3.61 x 3.22. The word TEACHER is a shadow blackout rounded. Make sure to group your words and then meld them so they will cut out together where they overlap. I cut out my saying and the teacher’s name in turquoise. Once it cuts, use your contact paper to transfer onto your cup. Press down hard to get out all the bubbles before you pull off the contact paper.
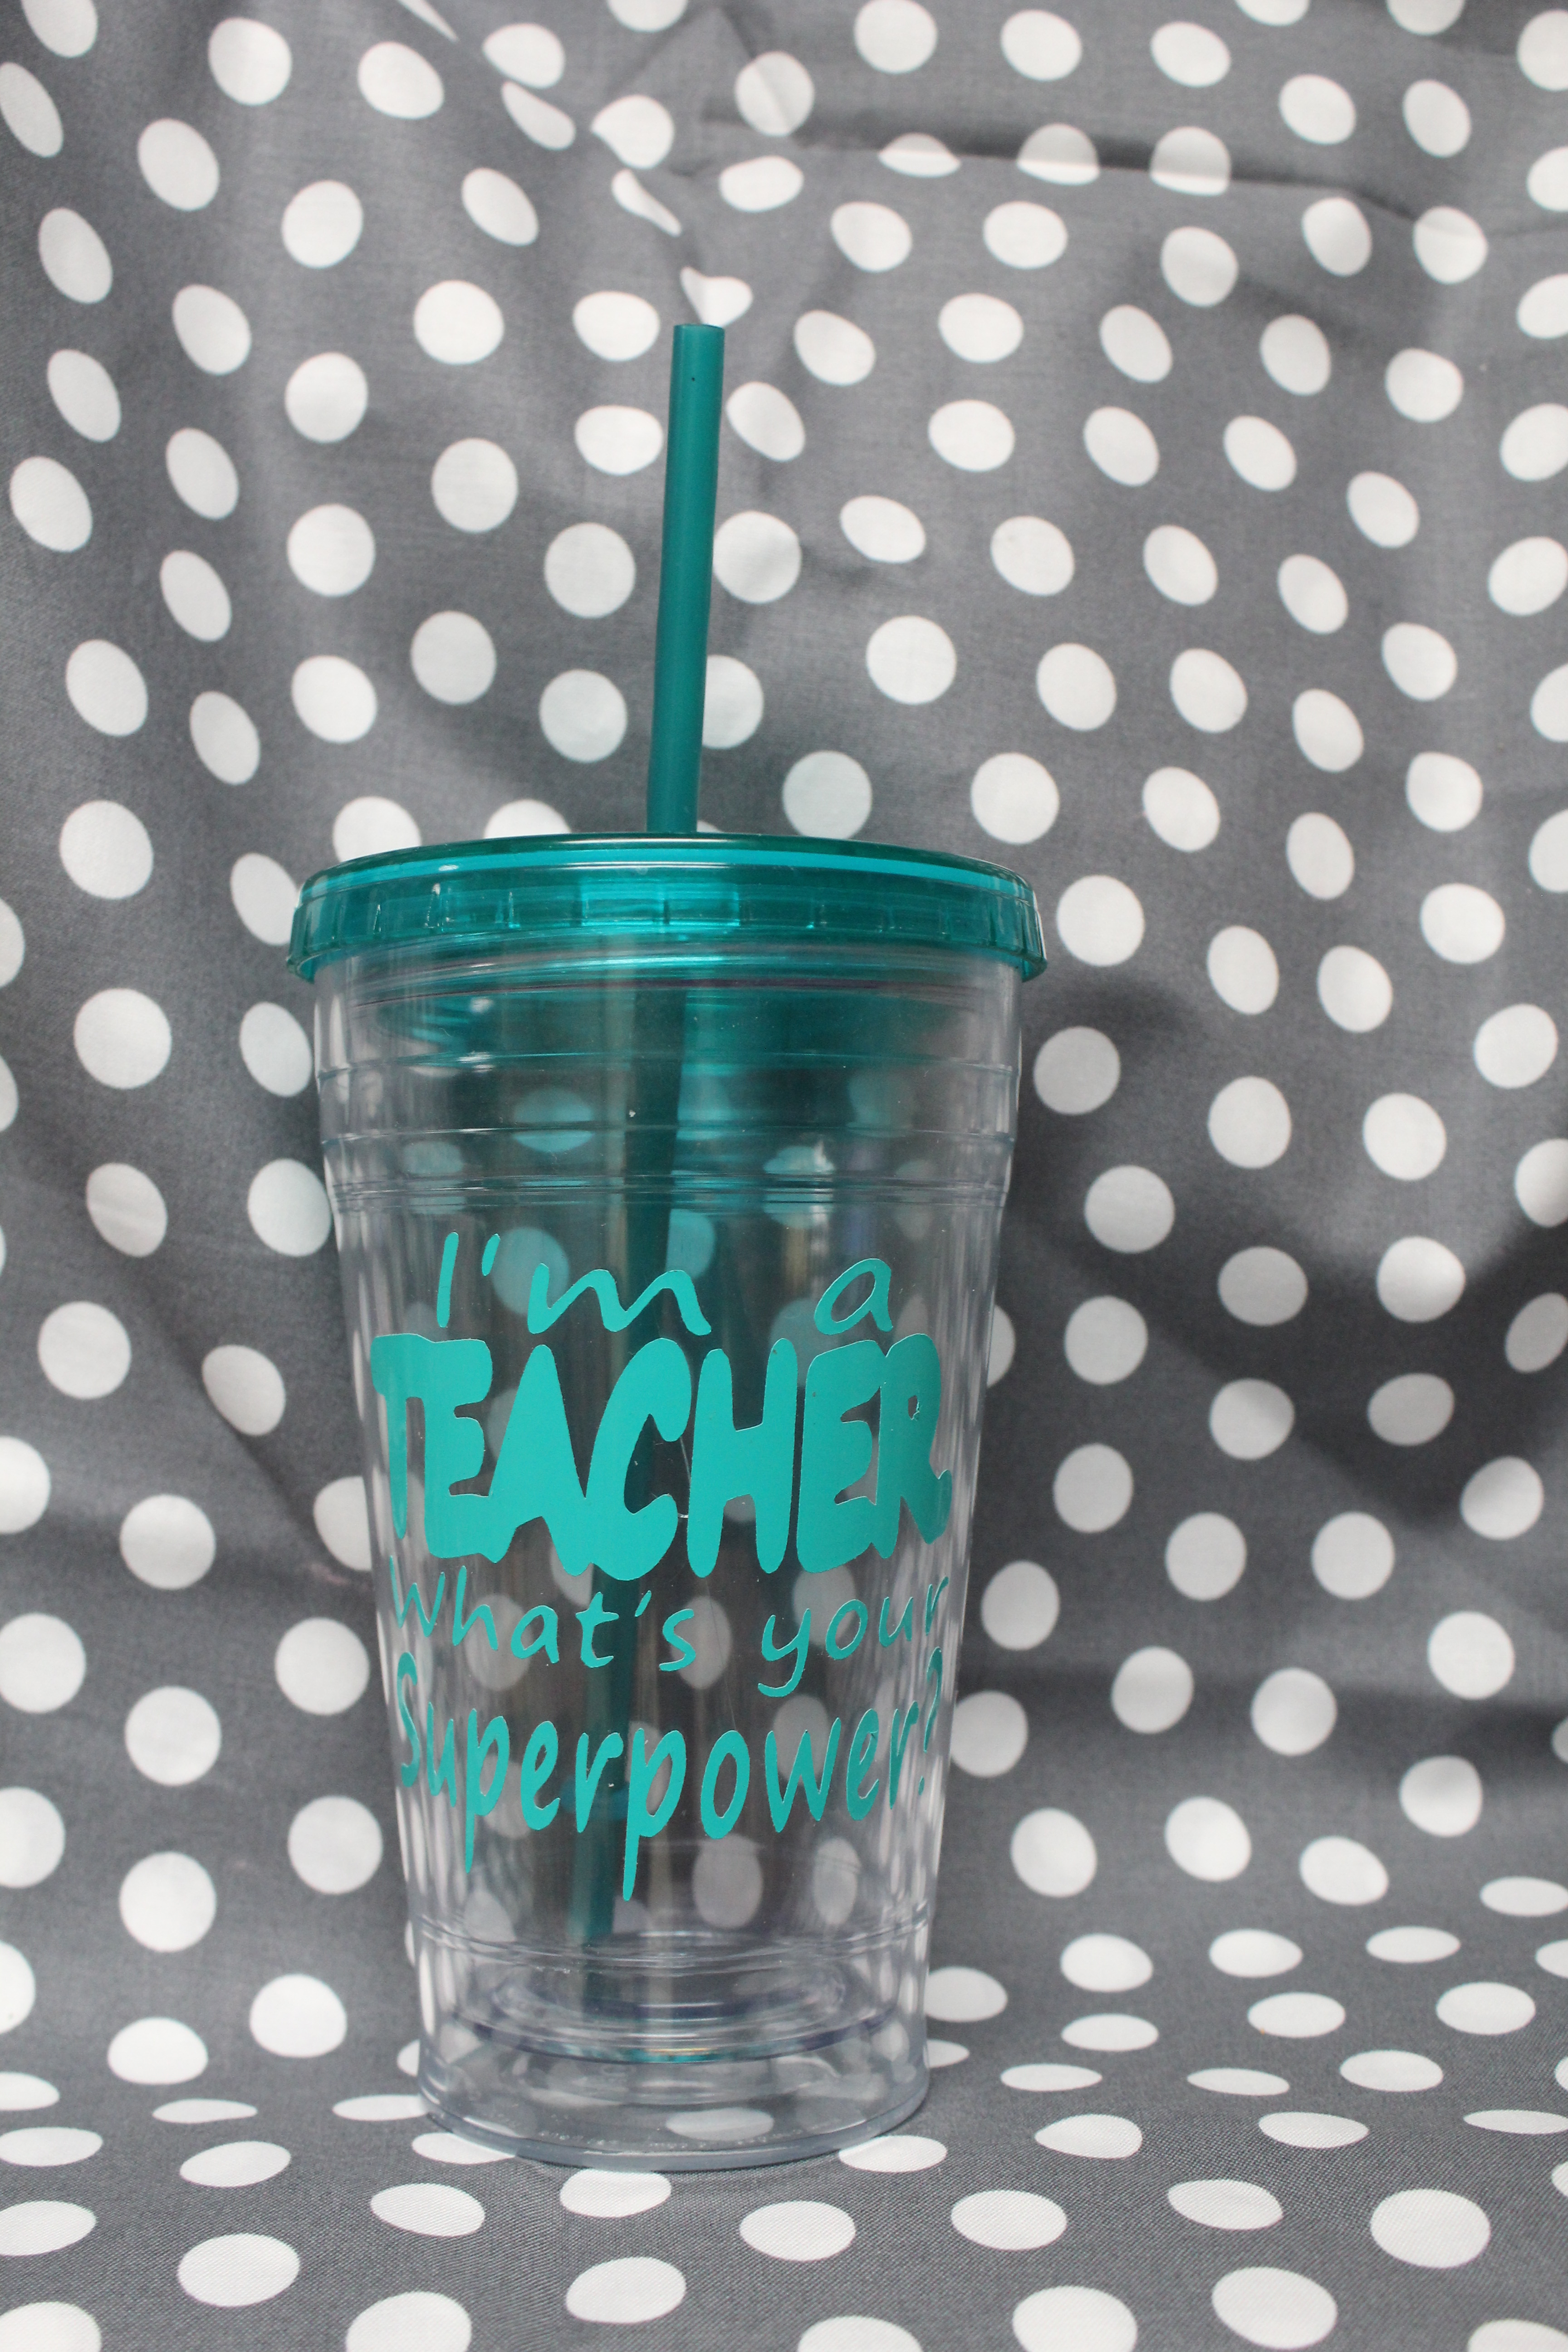 I used white for the shadow for the teacher’s name and also for the word TEACHER so it would stand out more. I cut these out together and then used my contact paper again to transfer them onto the cup. You can use any size and font that will fit on your cup. I made the shadow on the teacher’s name 3 x 3. Then used 2.77 x 2.74 for the name. This is just what size it ended up when I made the shadow a 3 x 3. Again I used a shadow blackout rounded measuring a 10 since I thought it matched the font well.

Now do the same starting with the white shadow teacher’s name and follow with the teacher’s name. Super easy but so special!
Fill it with candy and let your kiddos make a cute card! A perfect teacher gift!
Chalkboard Countdown
My crew & I are more than ready for summer break! So I thought it would be perfect to get out my countdown to count the days until summer break! Last year I was the craft leader in my MOPS group. This was one of the most loved crafts we’ve done! Hope you love it too!
 Supplies needed:
2 x 6 board (24″ wide)
Sandpaper
Vinyl (any color)
Contact Paper
Chalkboard Paint (not spray paint)
Paint Brush

Cut your board 24″ and sand the front and edges with your sand paper.
I already had chalkboard spray paint on hand but after trying it out decided that regular chalkboard paint would work better. So I painted on 3 layers of paint. You don’t have to wait very long between layers. Just make sure it’s dry to the touch. Don’t forget the sides since you will want those the same black color.

Now it’s time for your vinyl. I used my cricut to cut it out and chose a font named Pupcat. The vinyl measured 4″ x 11″.

Cut a sheet of contact paper the same size as your vinyl. Rub it down over your letters so you can transfer it onto your board. A credit card is a good thing to use in case you don’t have a tool to use. Just something with a straight hard edge will work fine.

Now pull up the contact paper making sure your vinyl is pulling up at each letter. I started my vinyl about 5″ from the edge. Make sure each letter stays on the wood well. Otherwise you could tear the letter.

Now you’re ready to go! I’m happy to count down the days with the girls until summer break!

The white vinyl board is the one we did in MOPS. This picture shows how many we had to have for our meeting. It was quite a bit of prep work since we had to sand and paint a layer of black. But it was well worth it. Everyone loved it! I cut the boards 18″ to save money . Then I used white vinyl and cut it 4″ x 9″. If you end up doing this for your MOPS group let me know. I would love to hear from you!
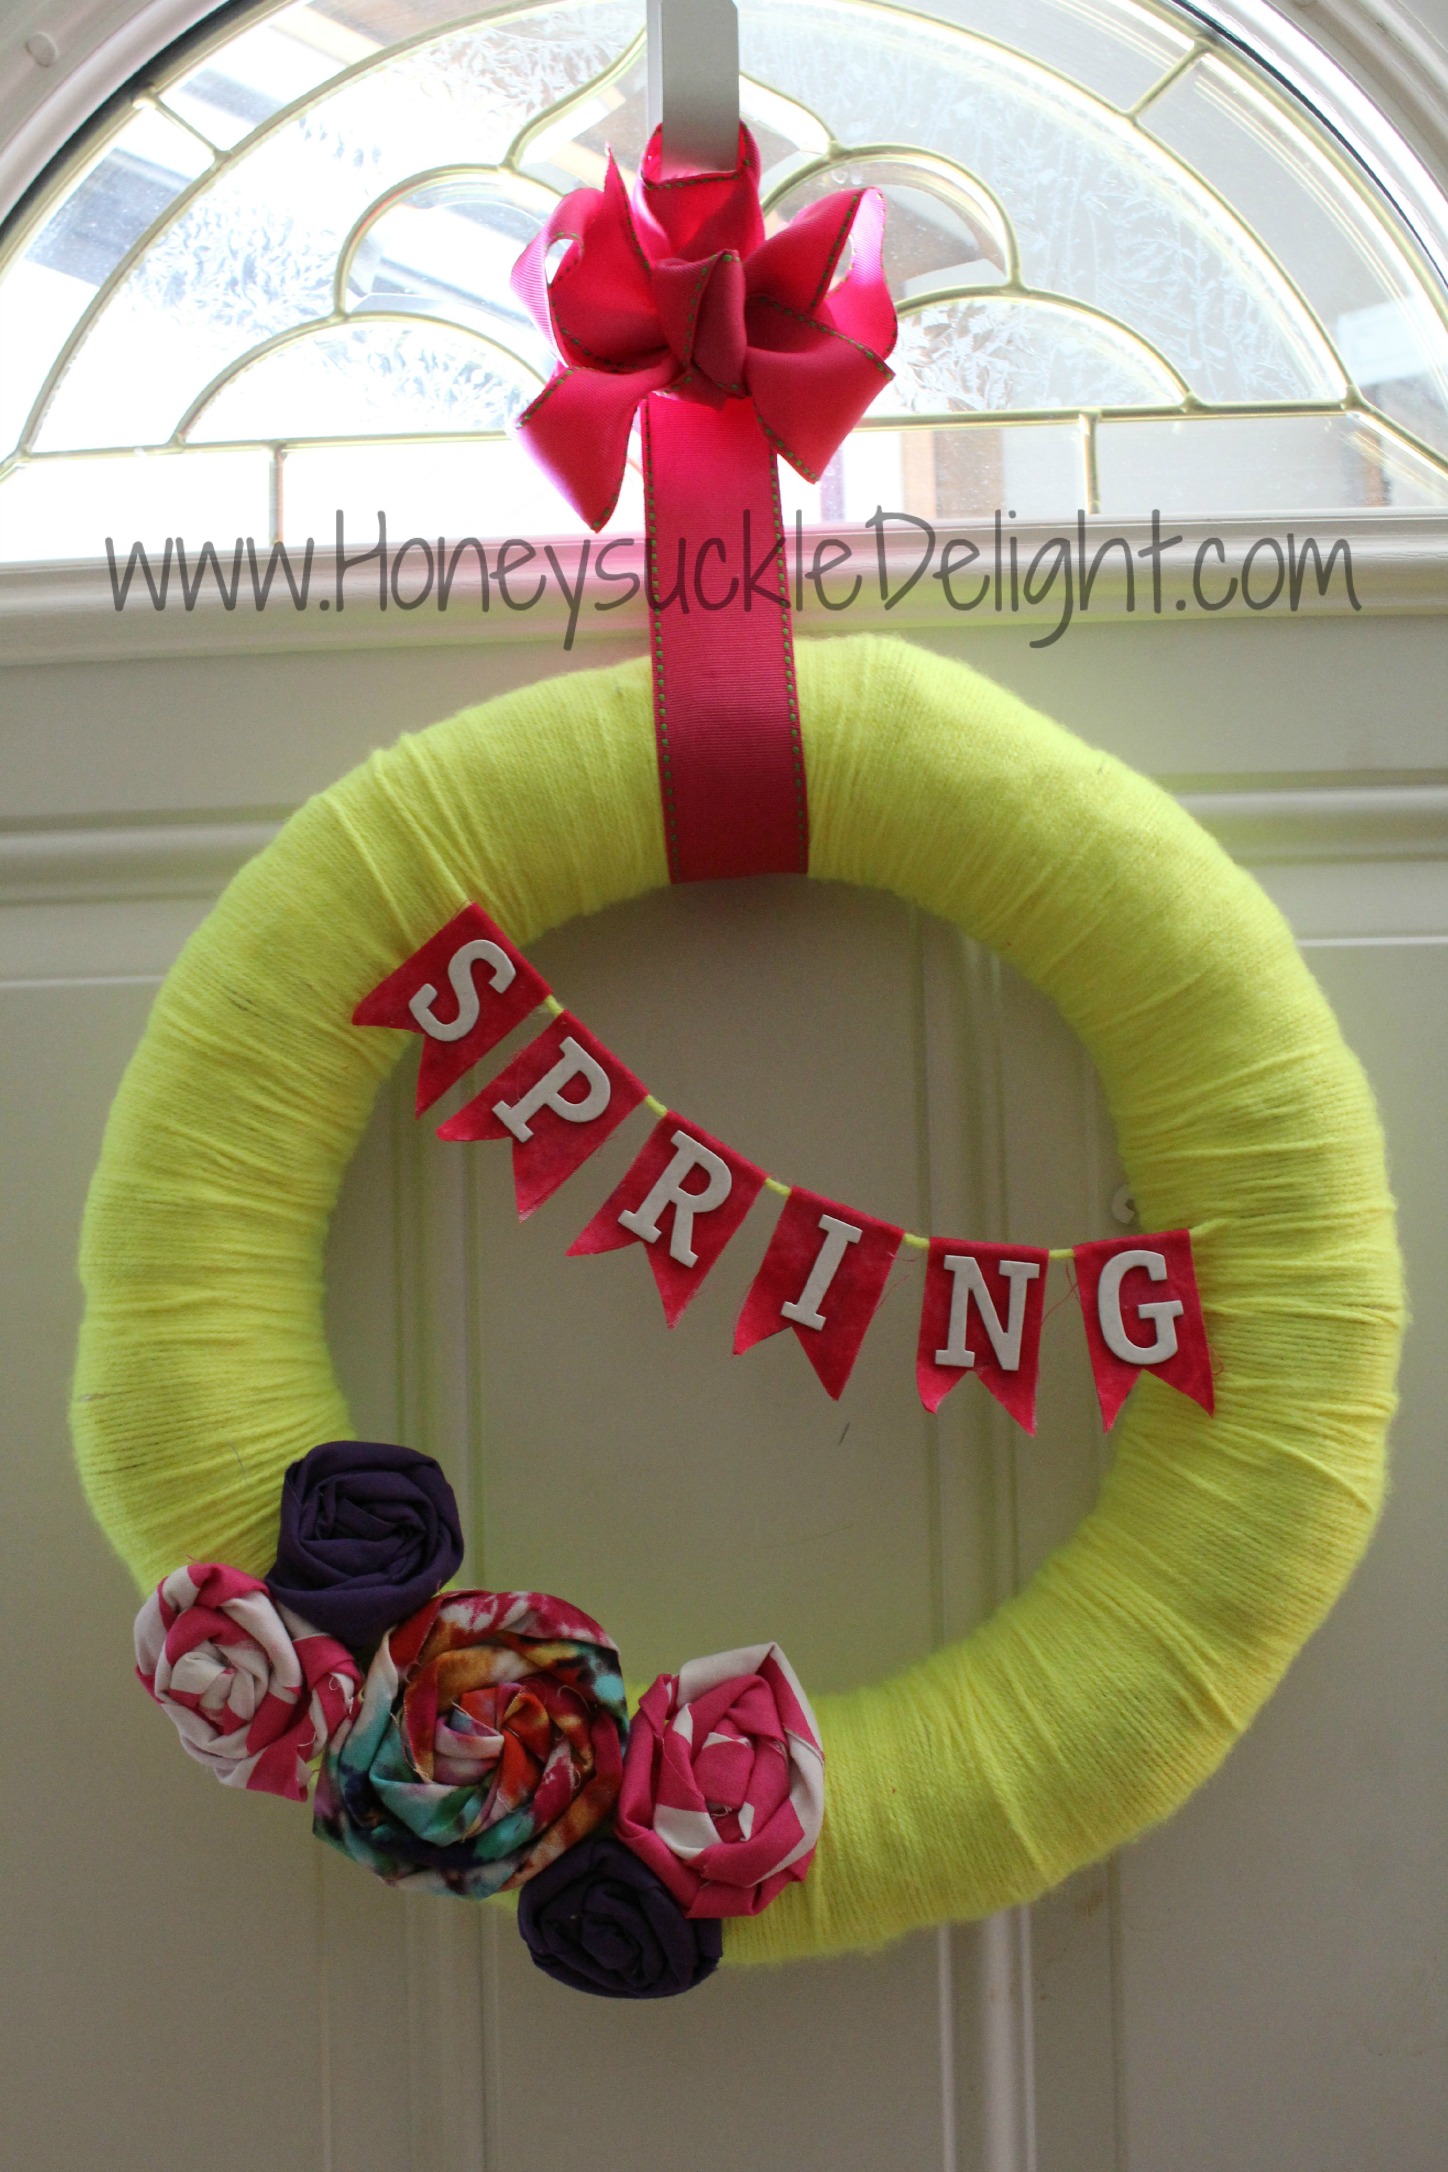
Fun Spring Yarn Wreath
Are you ready for a fun spring wreath? I was desperately in need of a new one.
So here’s what I came up with.
Supplies needed:
Wreath Form
Skein of Yarn
Scrap Fabric
Ribbon (I used 1 1/2″ wide)
Chipboard Letters
Glue Gun
Glue Sticks
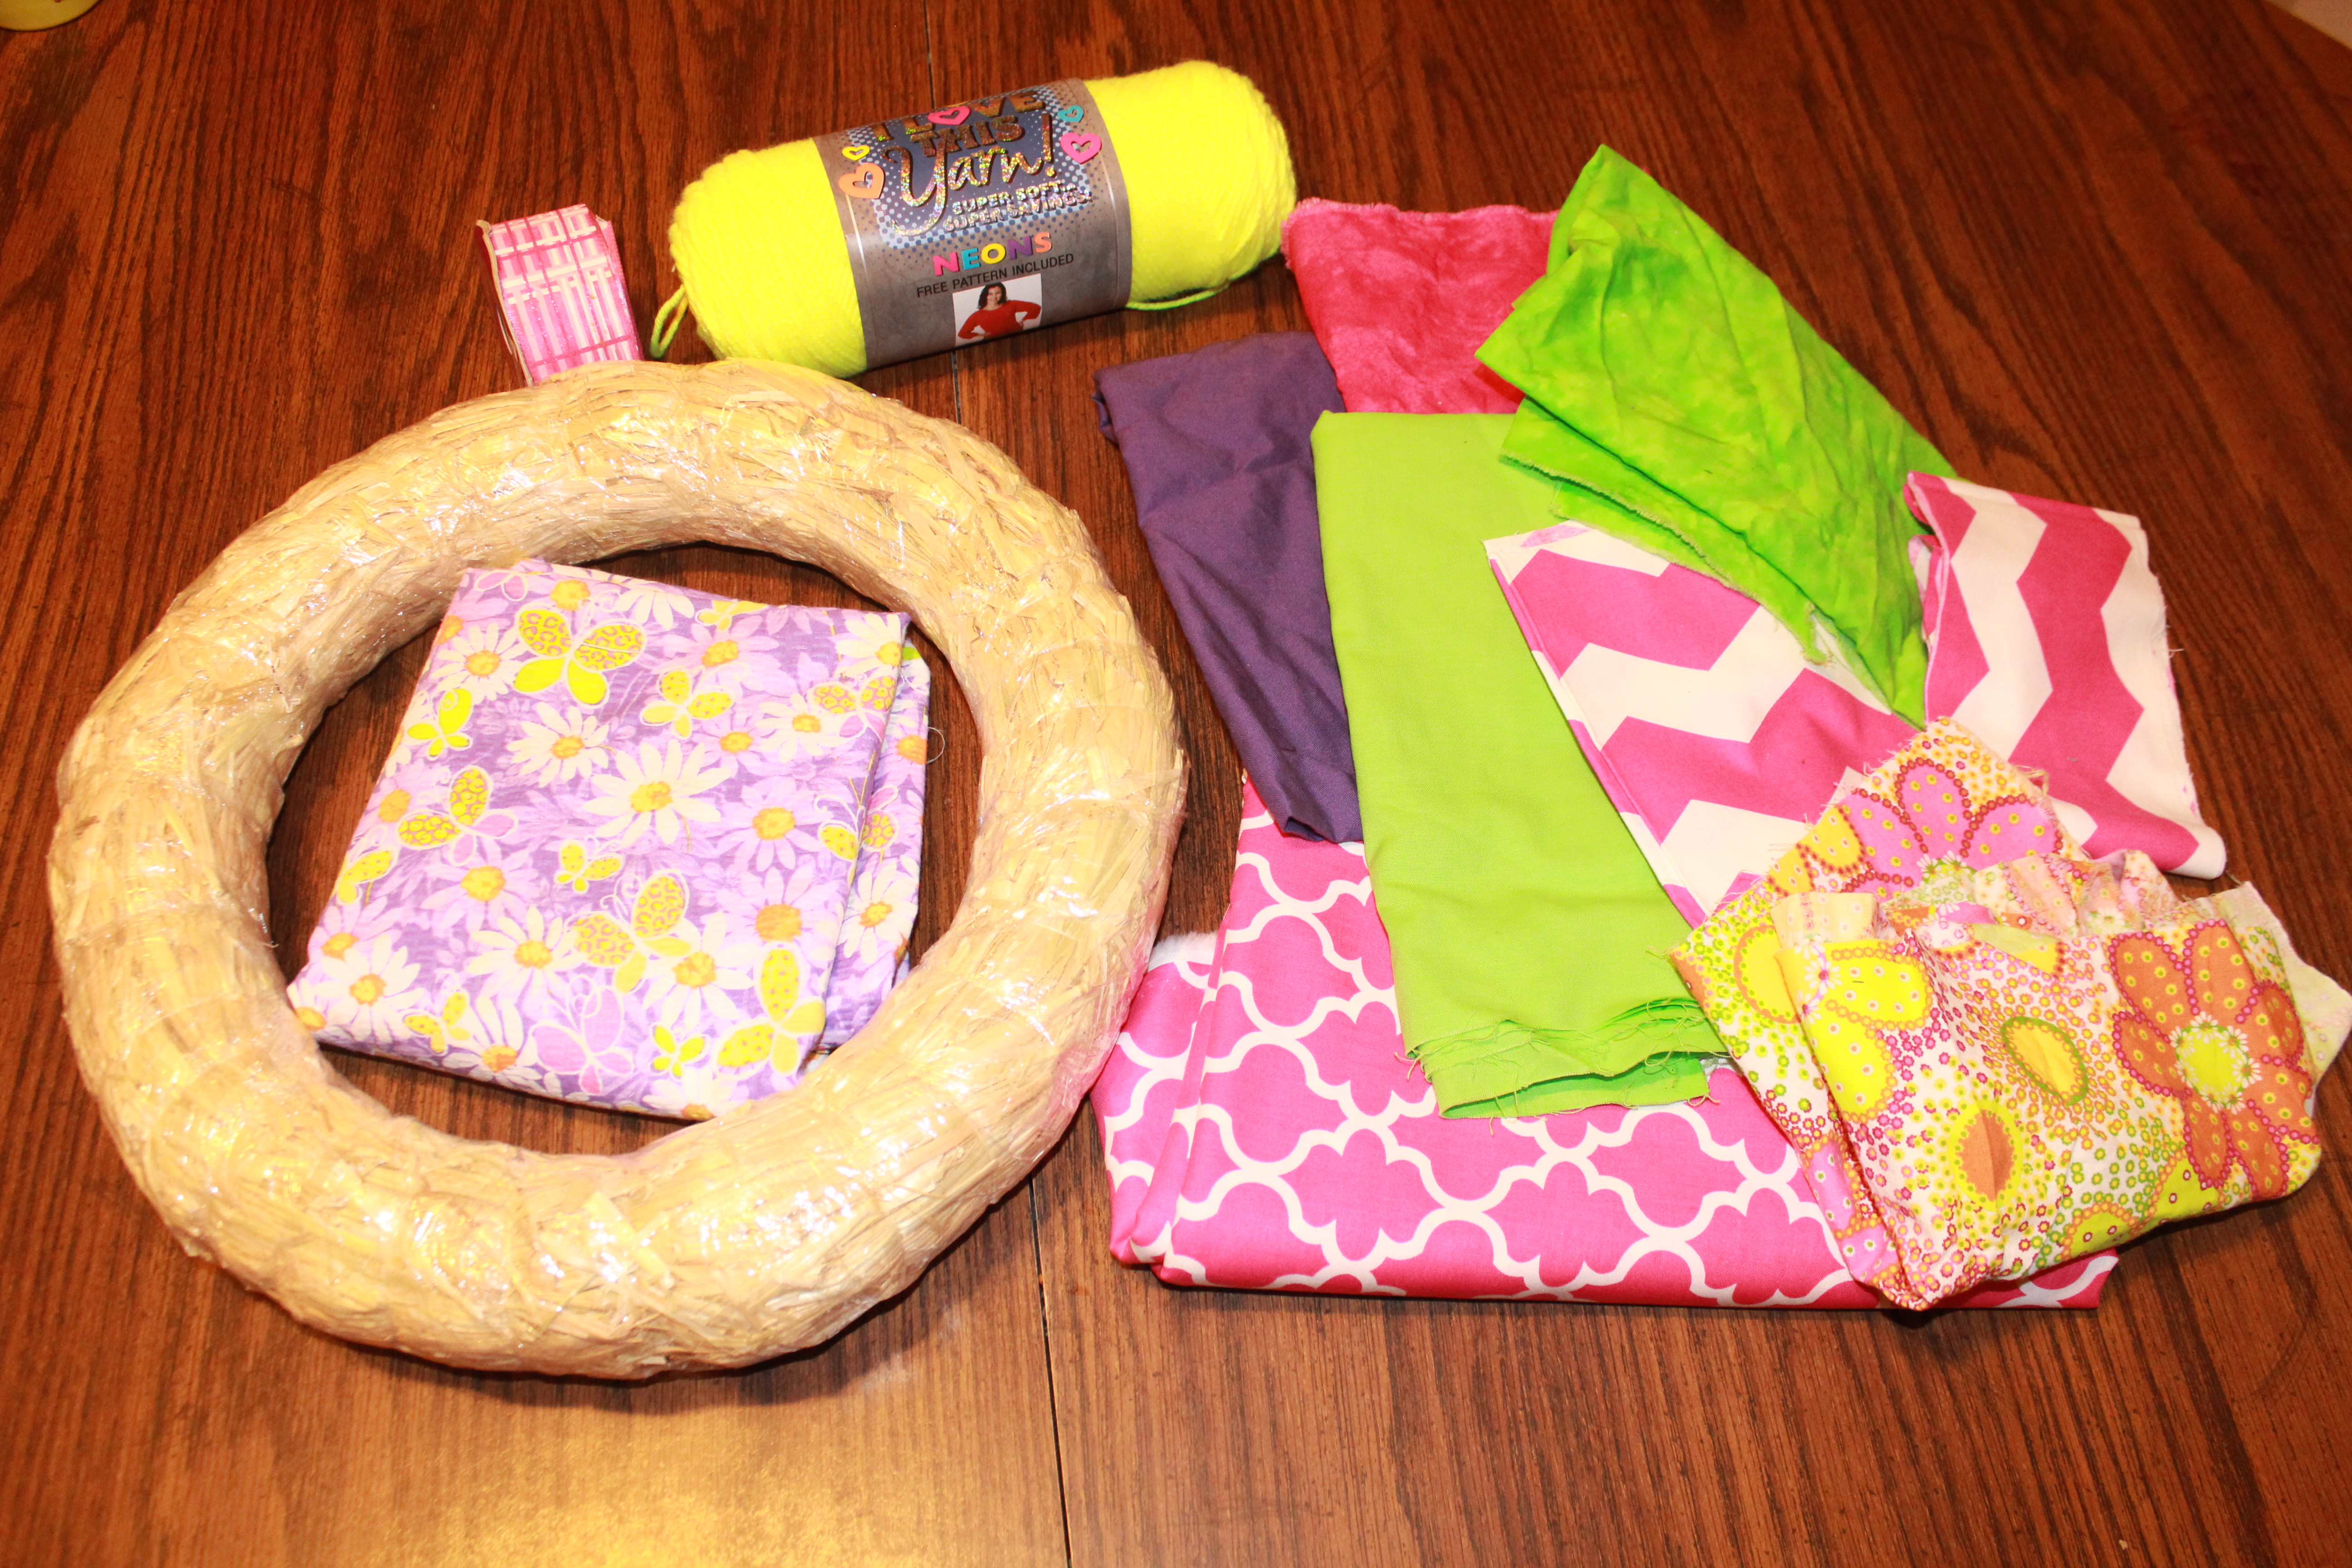
First start by wrapping your ribbon around your wreath form. Knot the first end and put a dot of glue to help hold it. Make sure you’re watching a good show. This will take a little time. Don’t worry about making it too perfect though. I promise you will be the only one that notices it anyway! When you get to the end, put another dot of glue on the end. Just make sure it is on the same side of your wreath as the glue where you started from otherwise one of the glue dots could show.

Now take a strip of fabric and make your fabric flowers. Glue them on wherever you like. You can make as many or as few as you prefer. I made one large flower for the center and 4 smaller flowers for the sides.

Now to make your banner. Cut a long string of yarn that is long enough to wrap around each side of your form and hang down in the center. Mine was about 60″. For the letters you will need six rectangles of fabric measuring 1 1/2″ by 4″. Fold your fabric over the yarn and glue. I left about 1/4″ in between each one. Make sure you start in the center of your yarn so you still have plenty to wrap on the sides to hold it on. Then I glued on some chipboard letters that I had leftover from a scrapbooking project.
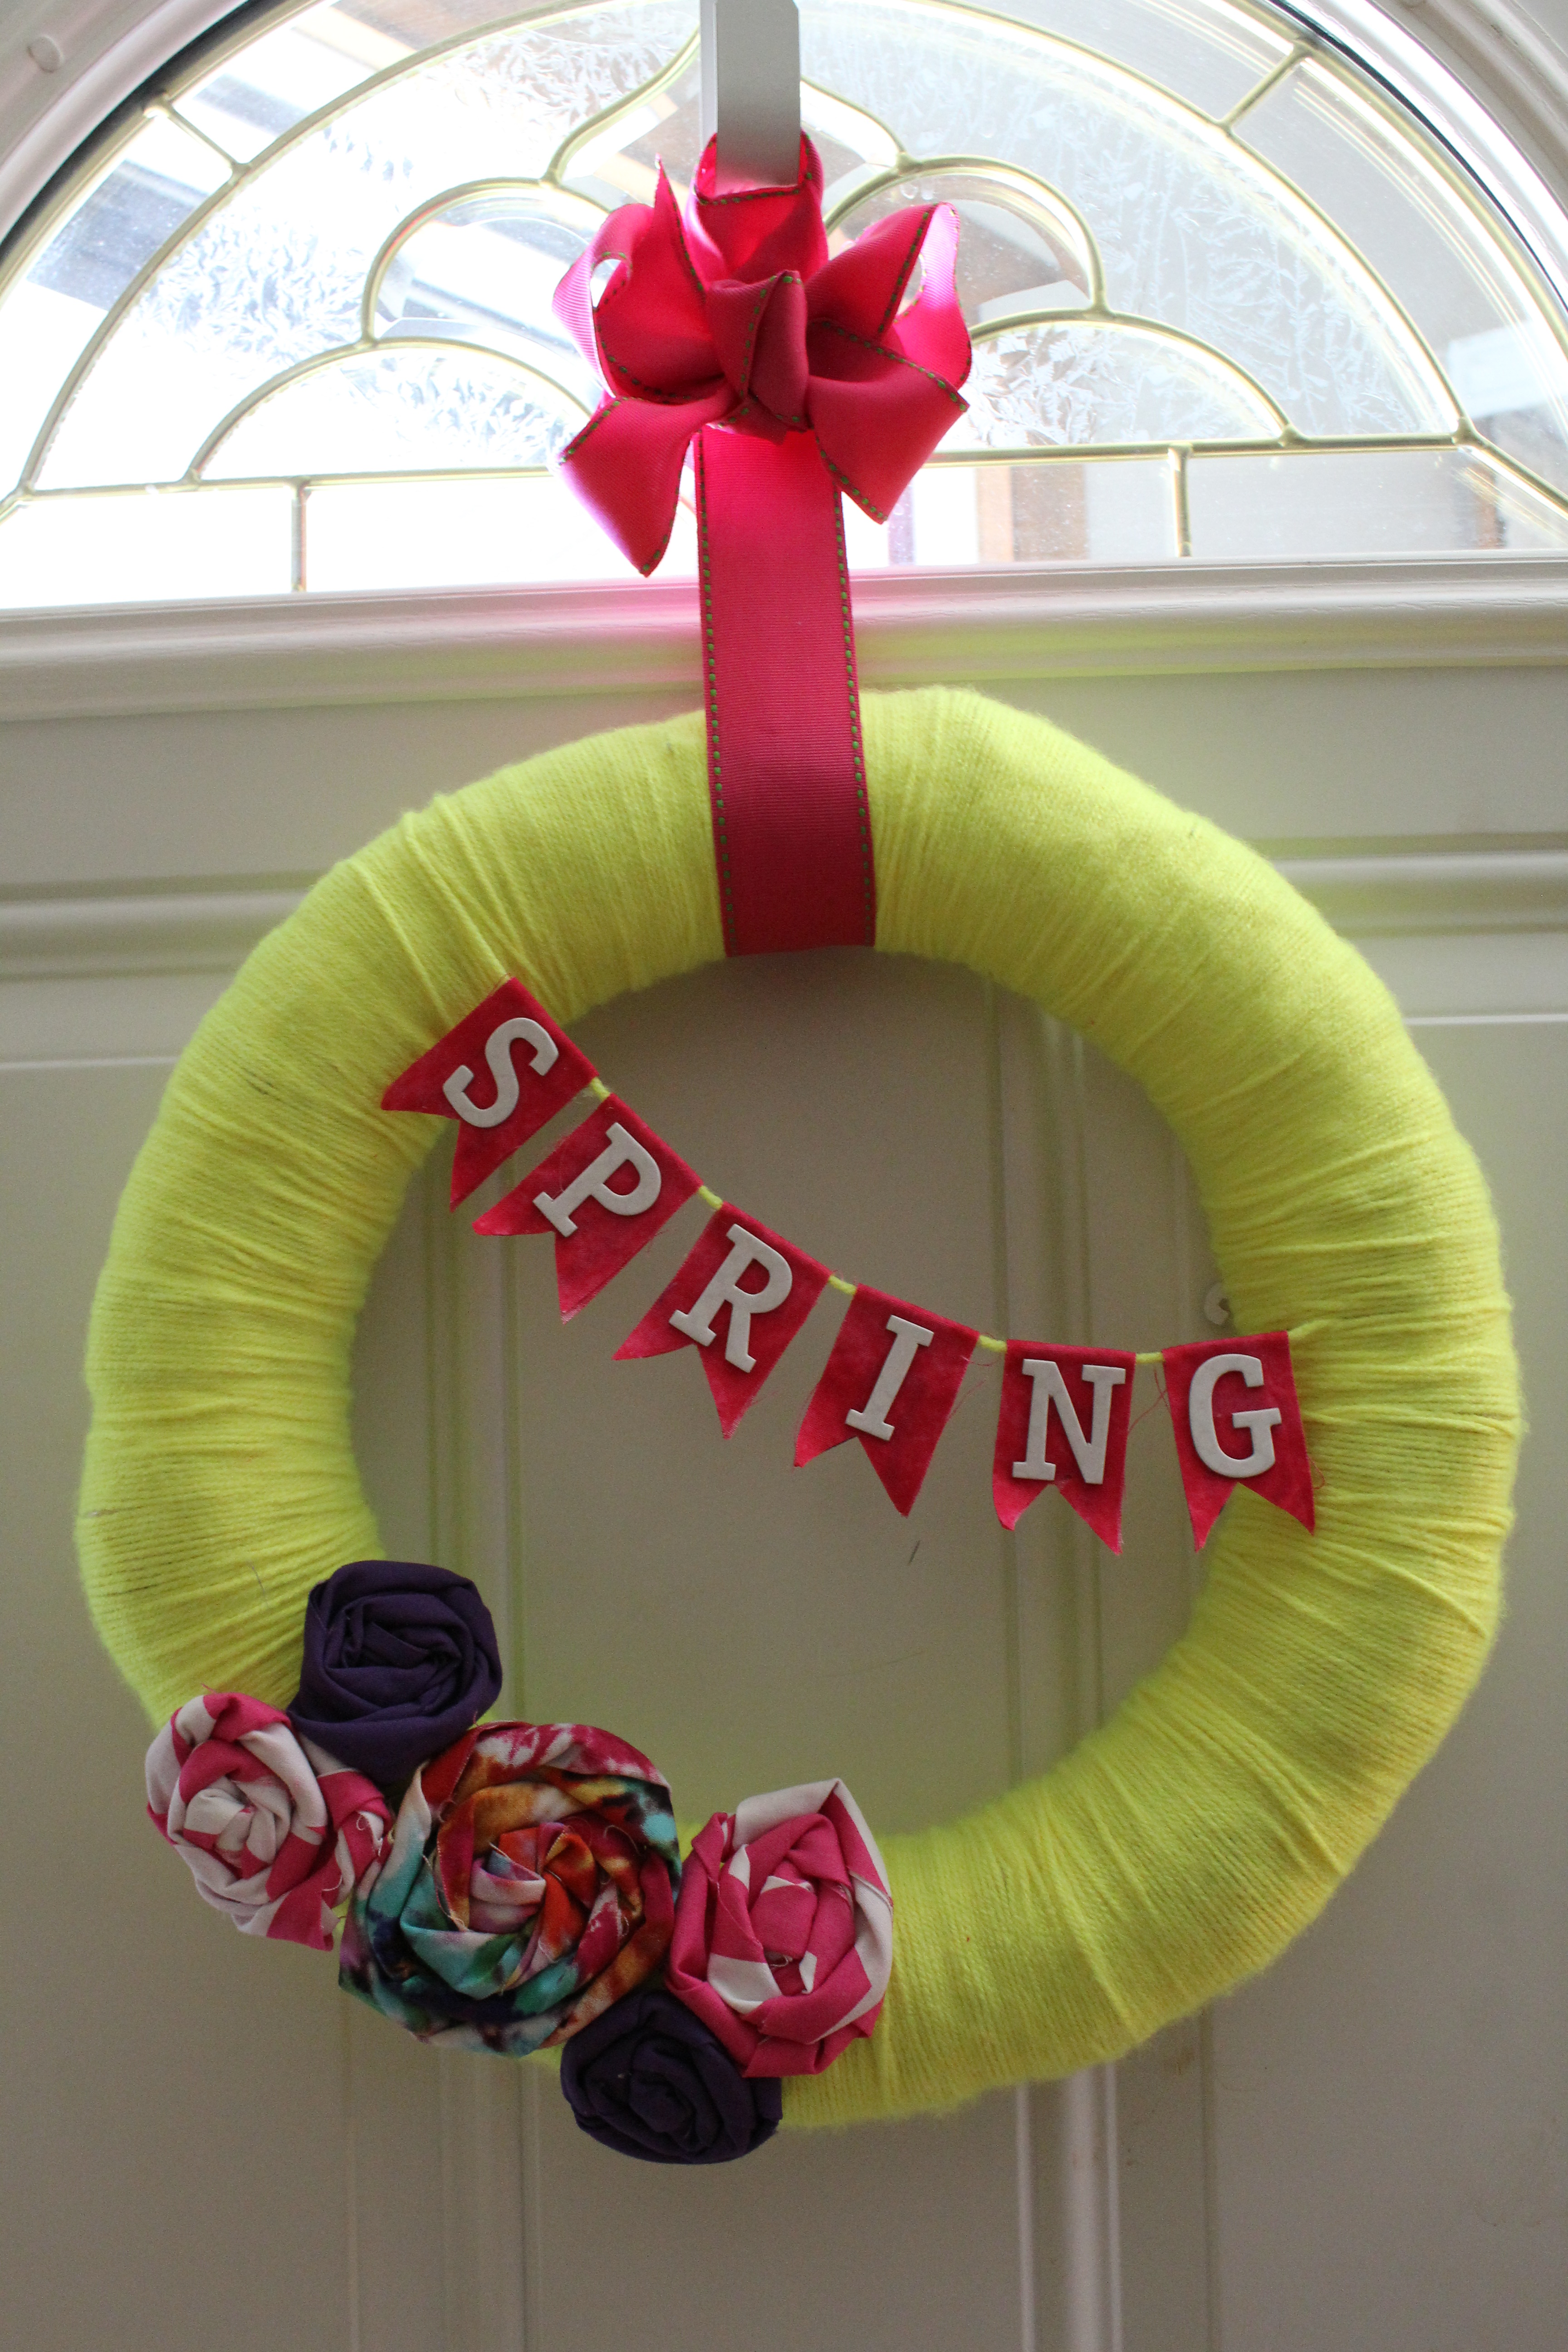
I then added a ring of 1 1/2″ ribbon to hang it by and a cute bow on the top!
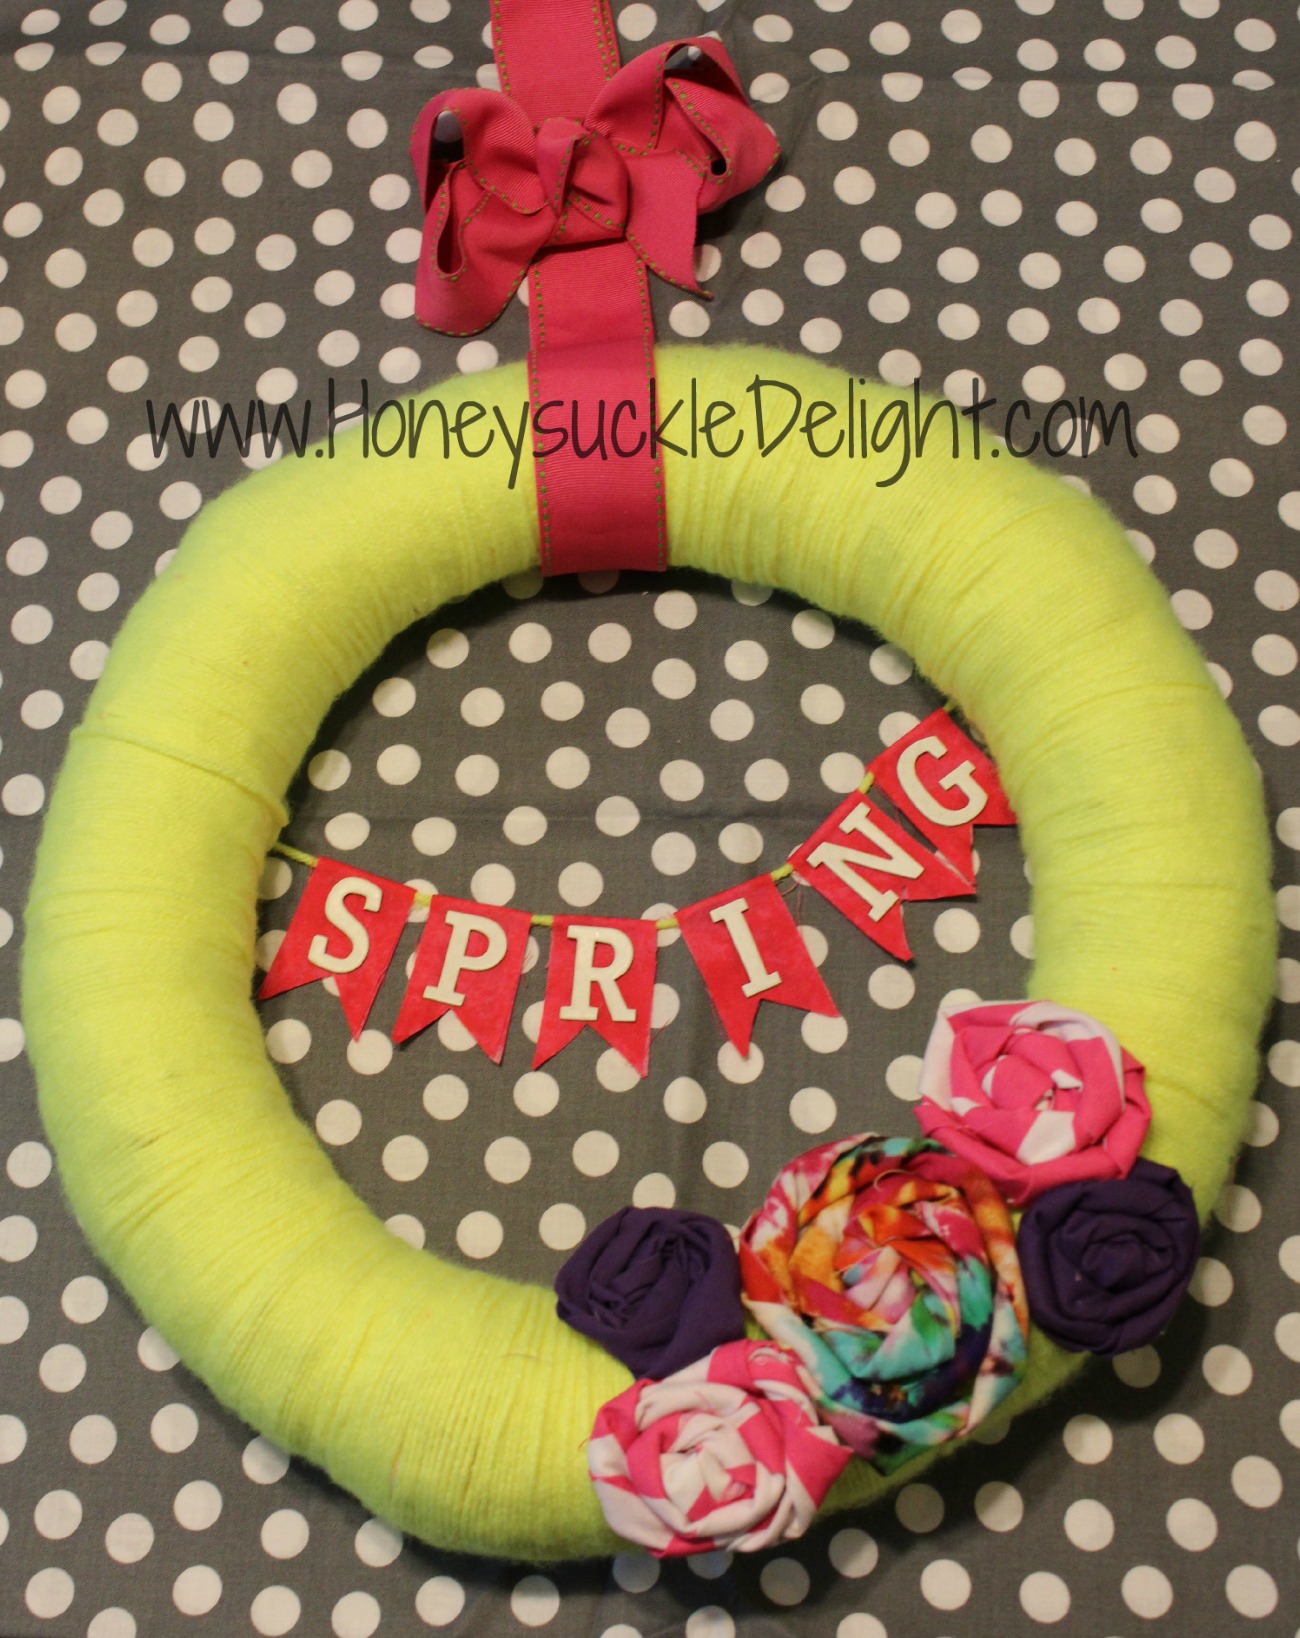
Now hang it on your door and you’re all set!
- ← Previous
- 1
- 2
