Mother’s Day
Teacher School Supply Bouquet
 Today my girls had their first day of school! The summer flew by this year. It seems like they just got out but they were all 3 super excited to go back! Which makes it much easier on Momma. I’ve been thinking about doing a school supply bouquet for a teacher gift for a while but just never sat down and tried it. Until now. Because what better gift to give the teachers on the first day than new school supplies? It was also so much easier than I thought it was going to be. Which is always a plus. I see many more of these bouquet gifts in the future!

Supplies needed:
Bucket
Floral Foam (Bought at Dollar Tree)
Ribbon (21.5″ is what I needed along with making a bow)
Popsicle Sticks
Washi Tape
Scissors
Glue Gun & Glue
Vinyl or Letter Stickers
School Supplies (And chocolate. I promise your teacher will thank you!!)
 Start by cutting your foam to fit in the bottom of your bucket. Then using the glue gun, glue this in the bottom. Use plenty of glue. This is going to hold all of your supplies and needs to be very sturdy or it will come out.

While your glue is setting on your foam and before you start adding in your supplies, add your ribbon, bow and any decorations you want on your bucket.

Now it’s time to personalize. I used my cricut and vinyl but if you don’t have that available, Hobby Lobby and Michaels have really cute stickers that could be used instead.
 Now take your popsicle sticks. I found these colored ones at the dollar tree. Using your scissors, cut the bottom so there is a point.
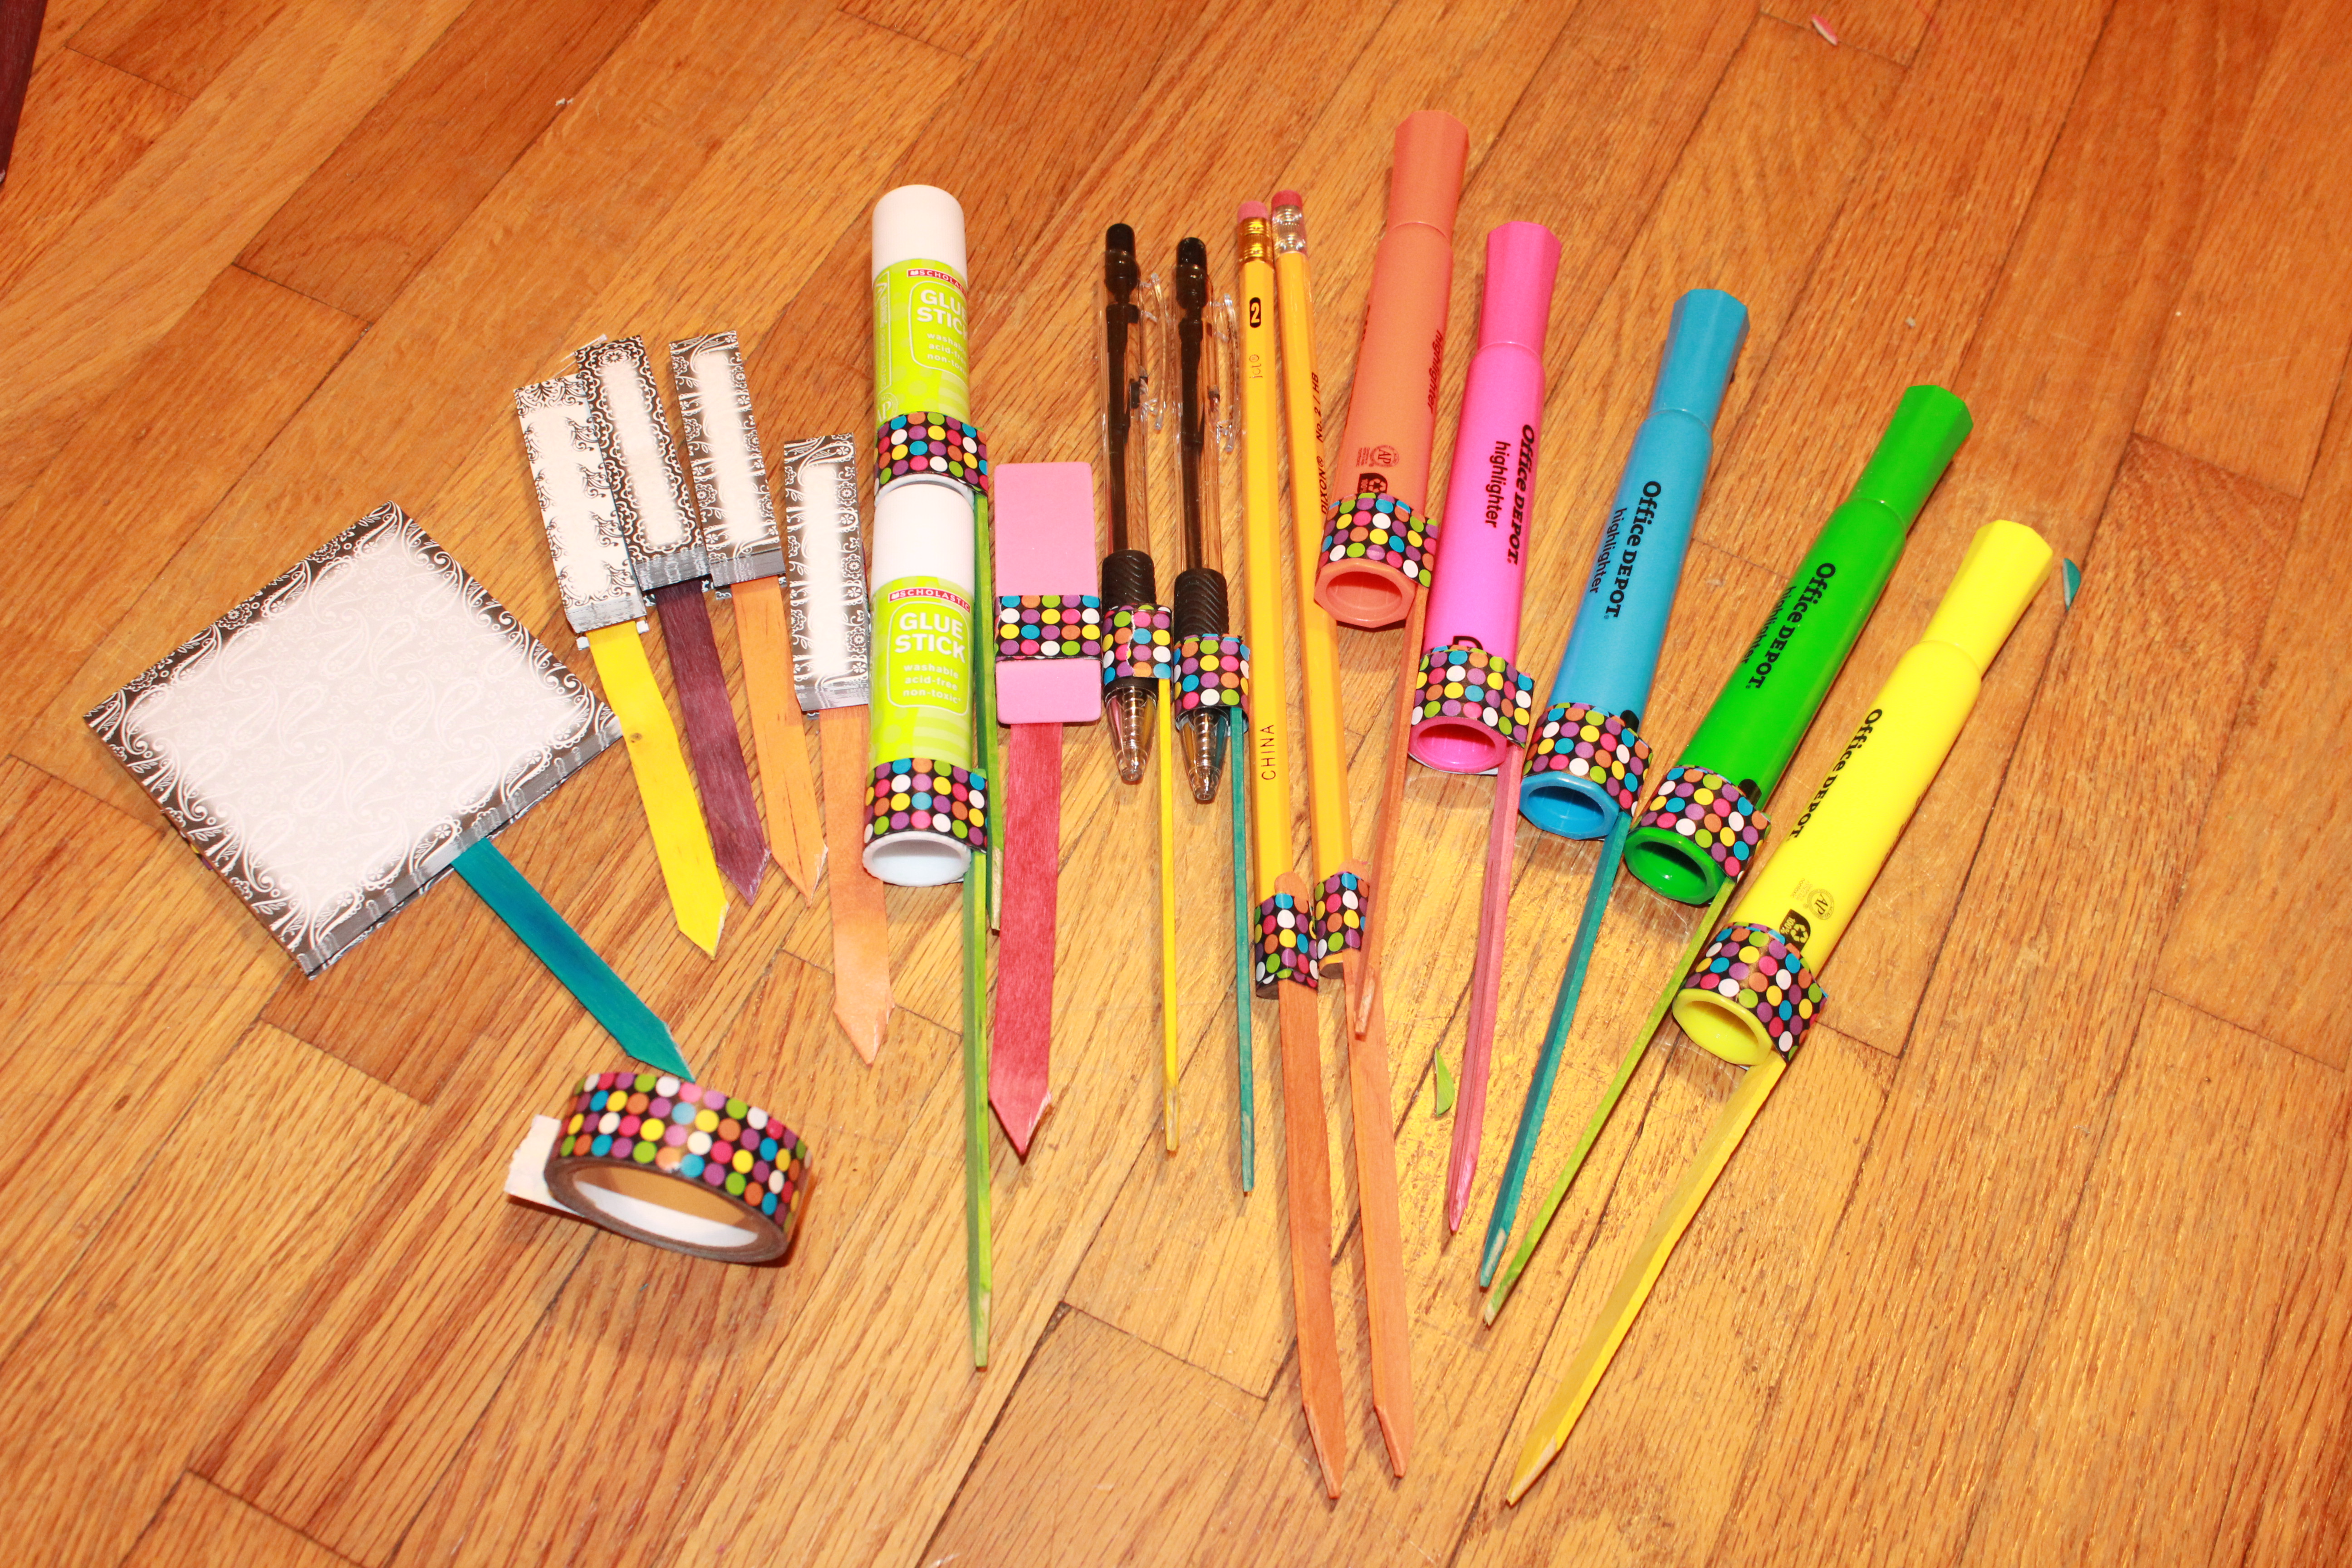 Using the tape, tape the popsicle sticks on each piece with the pointed end down. You could also use BBQ Skewers here instead.
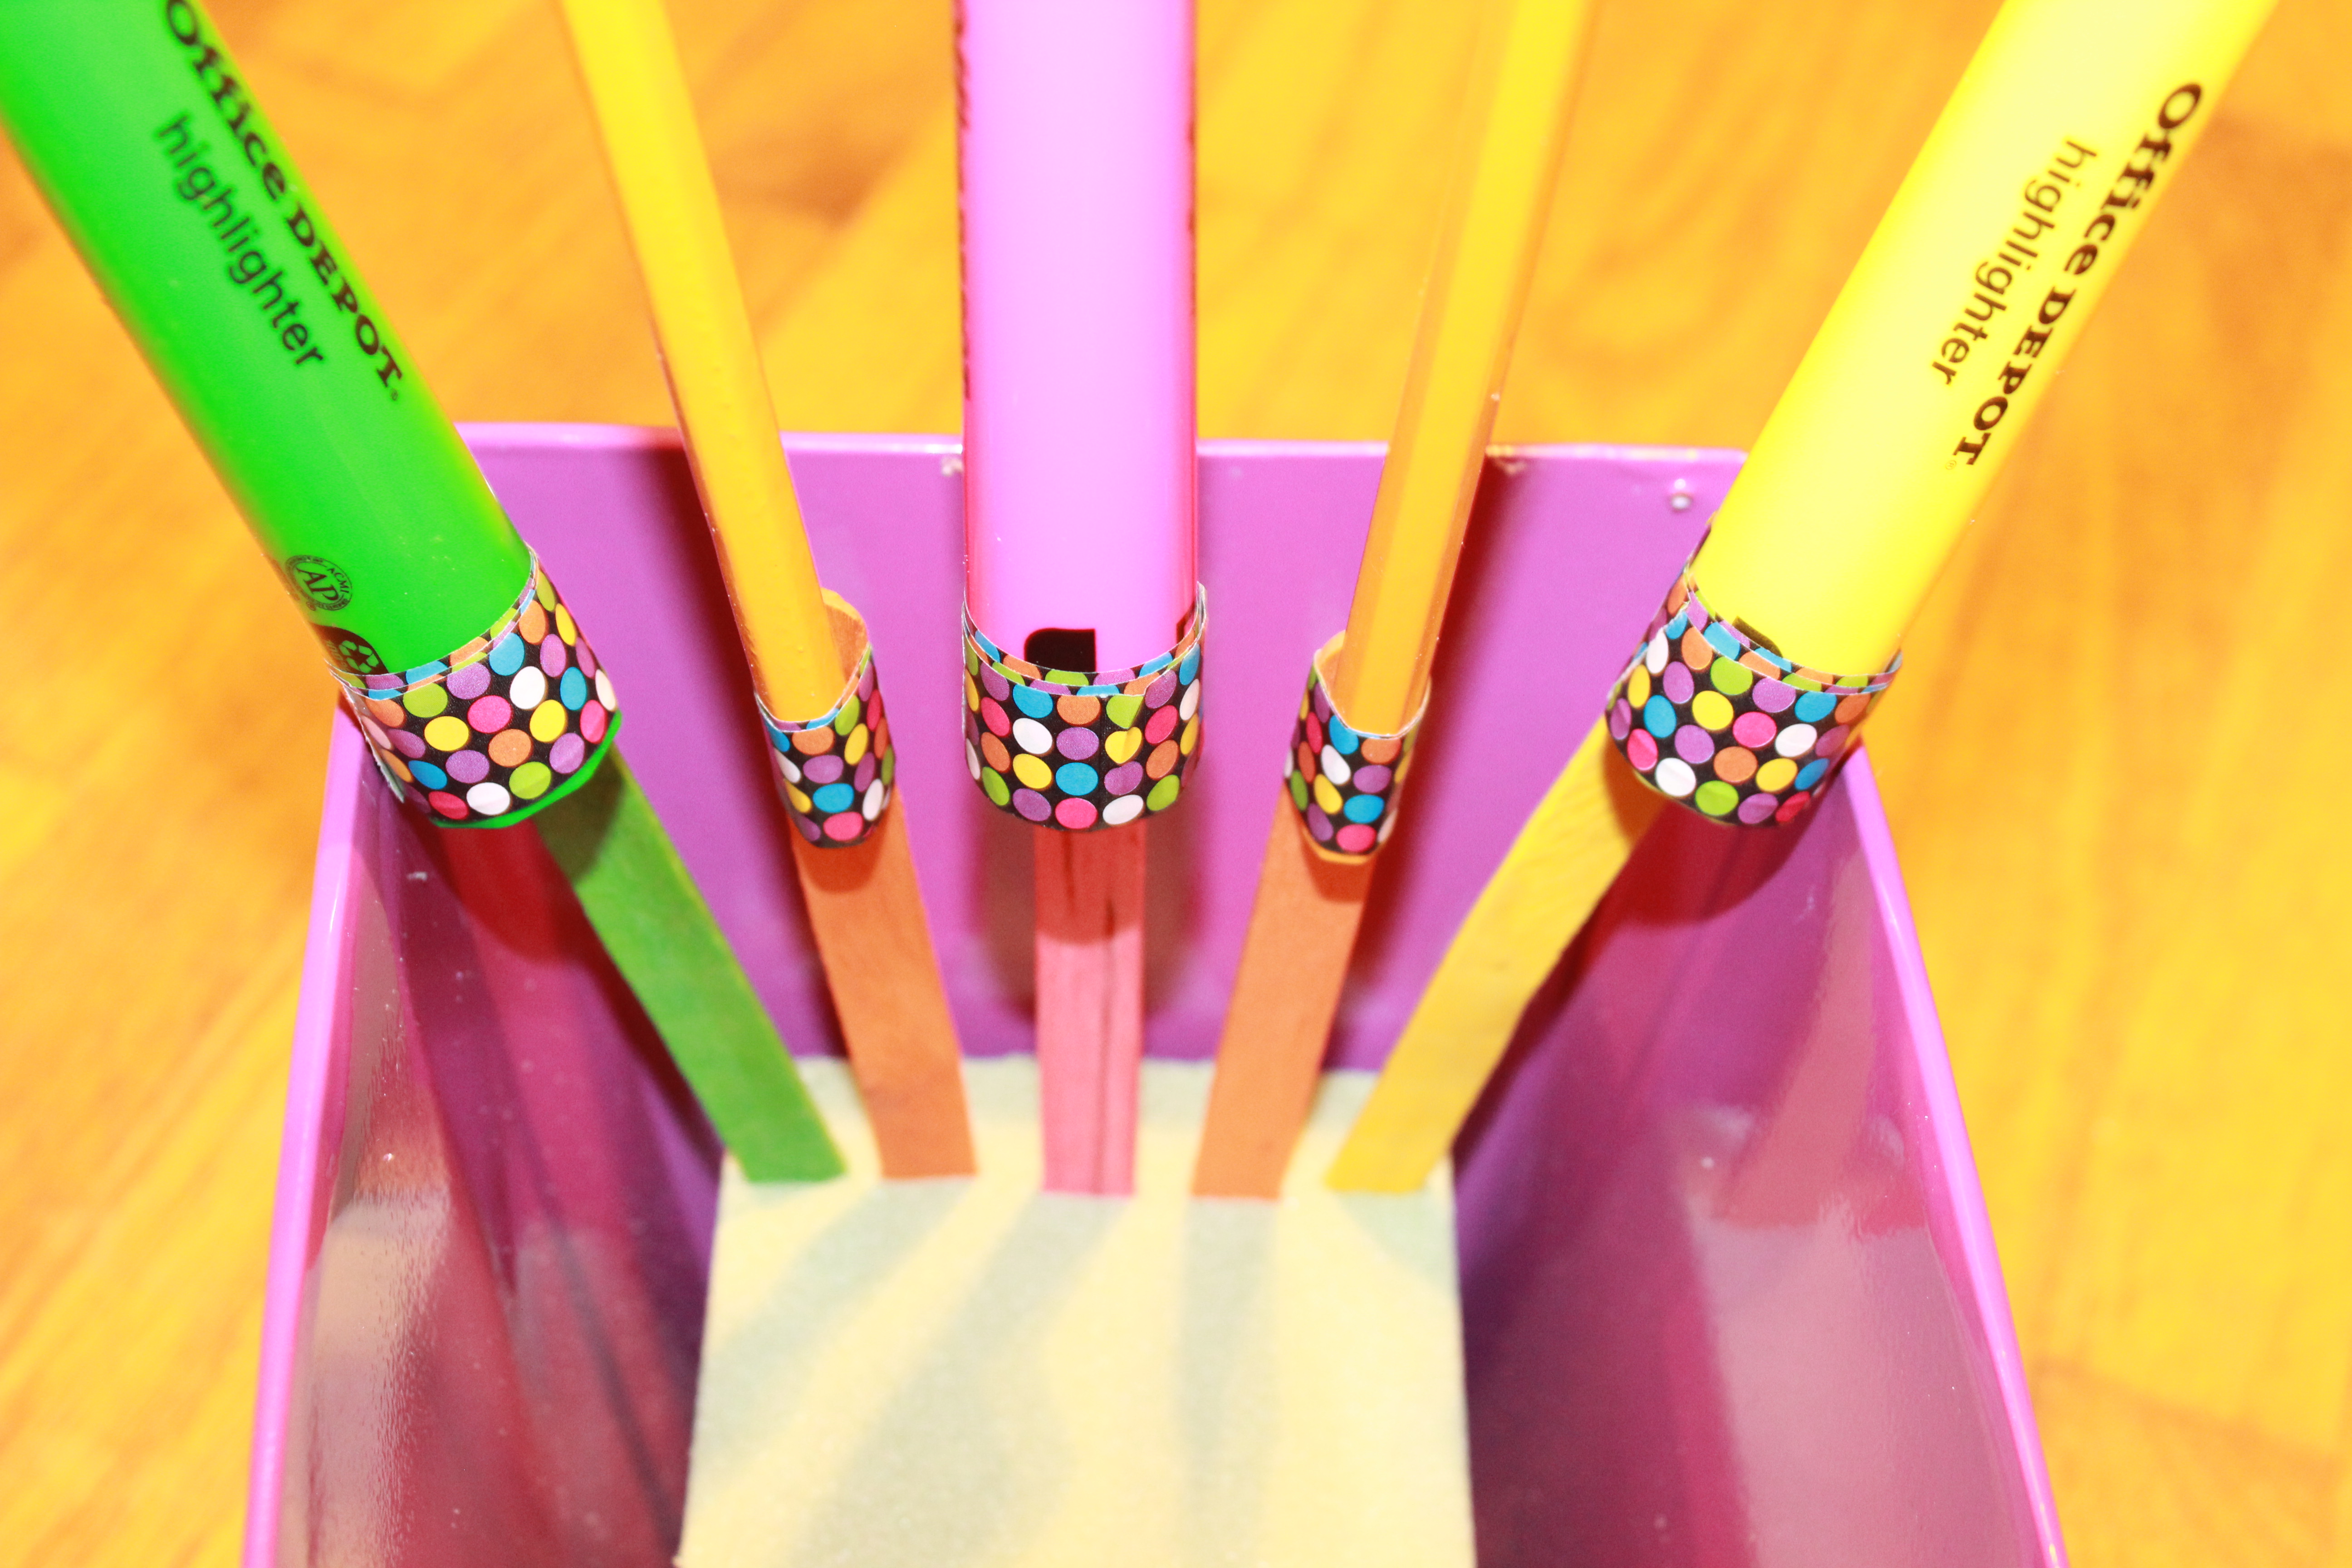
Now for the fun part! Adding all the school supplies. Just push them in far enough they won’t go anywhere.
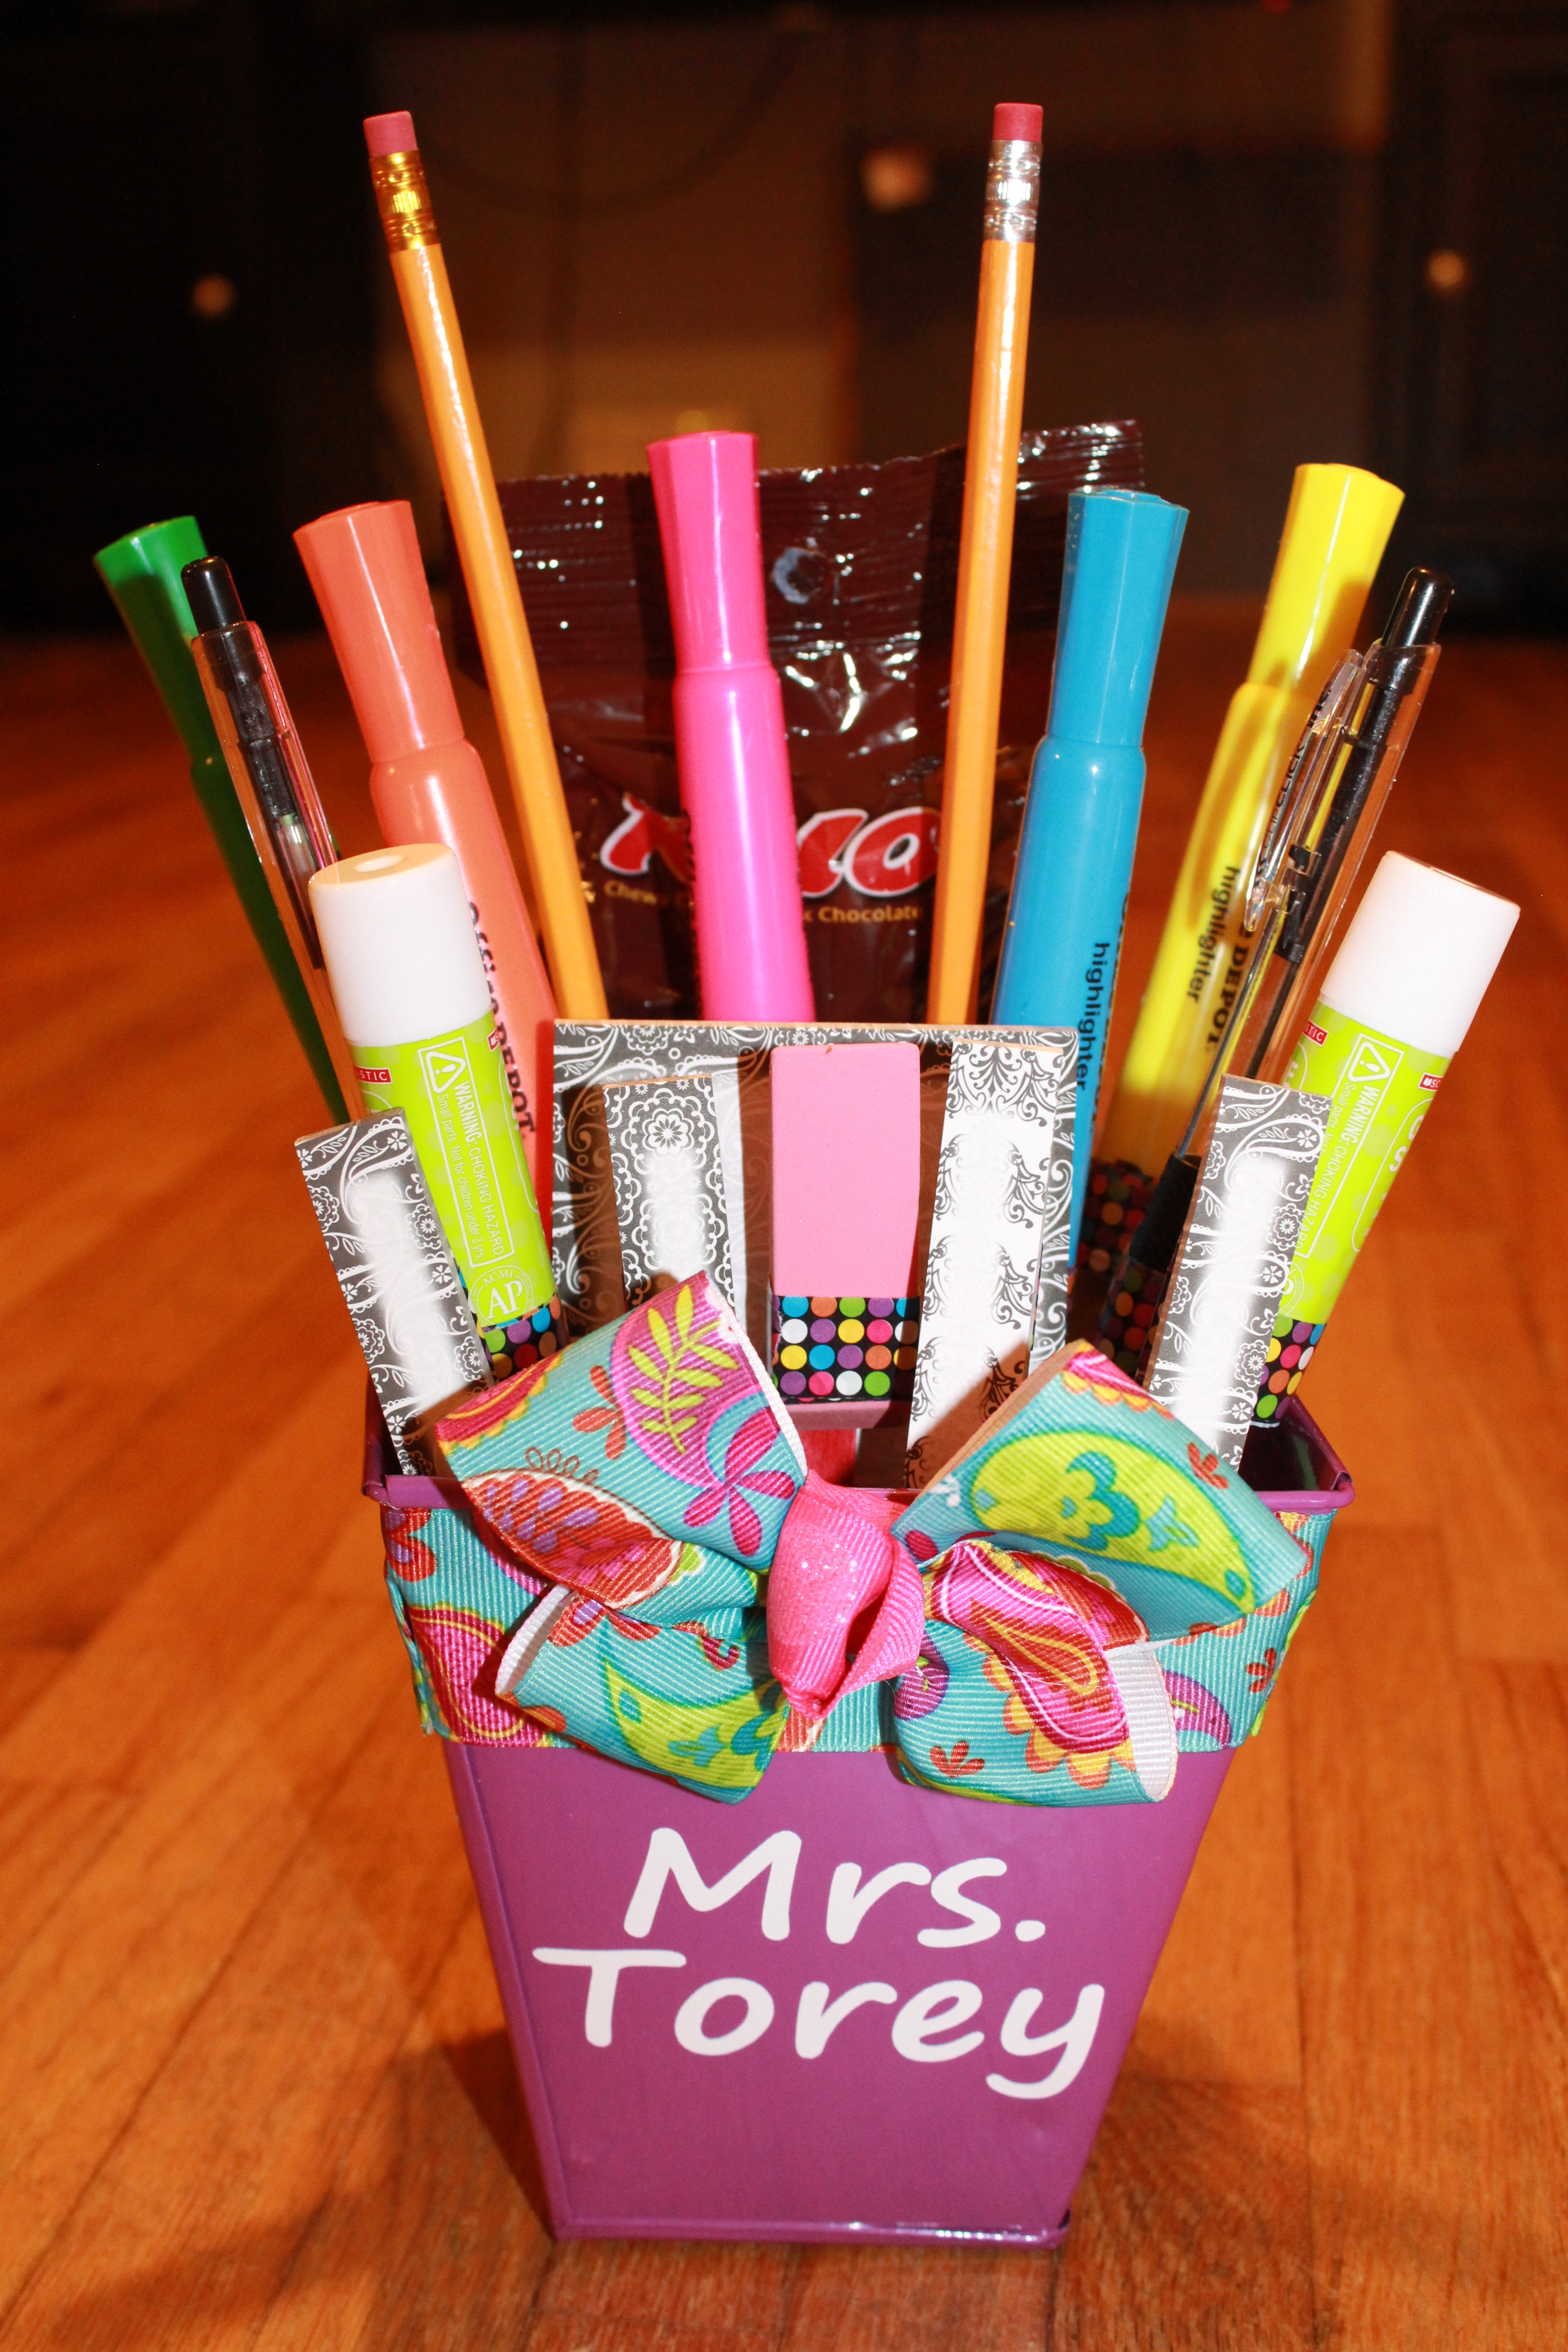
 The girl’s teachers loved them! And they were super proud to give them a gift on the first day of school too. This gift only cost me around $5 thanks to the amazing deals we have here for back to school sales! Would love to see your finished project if you make one!
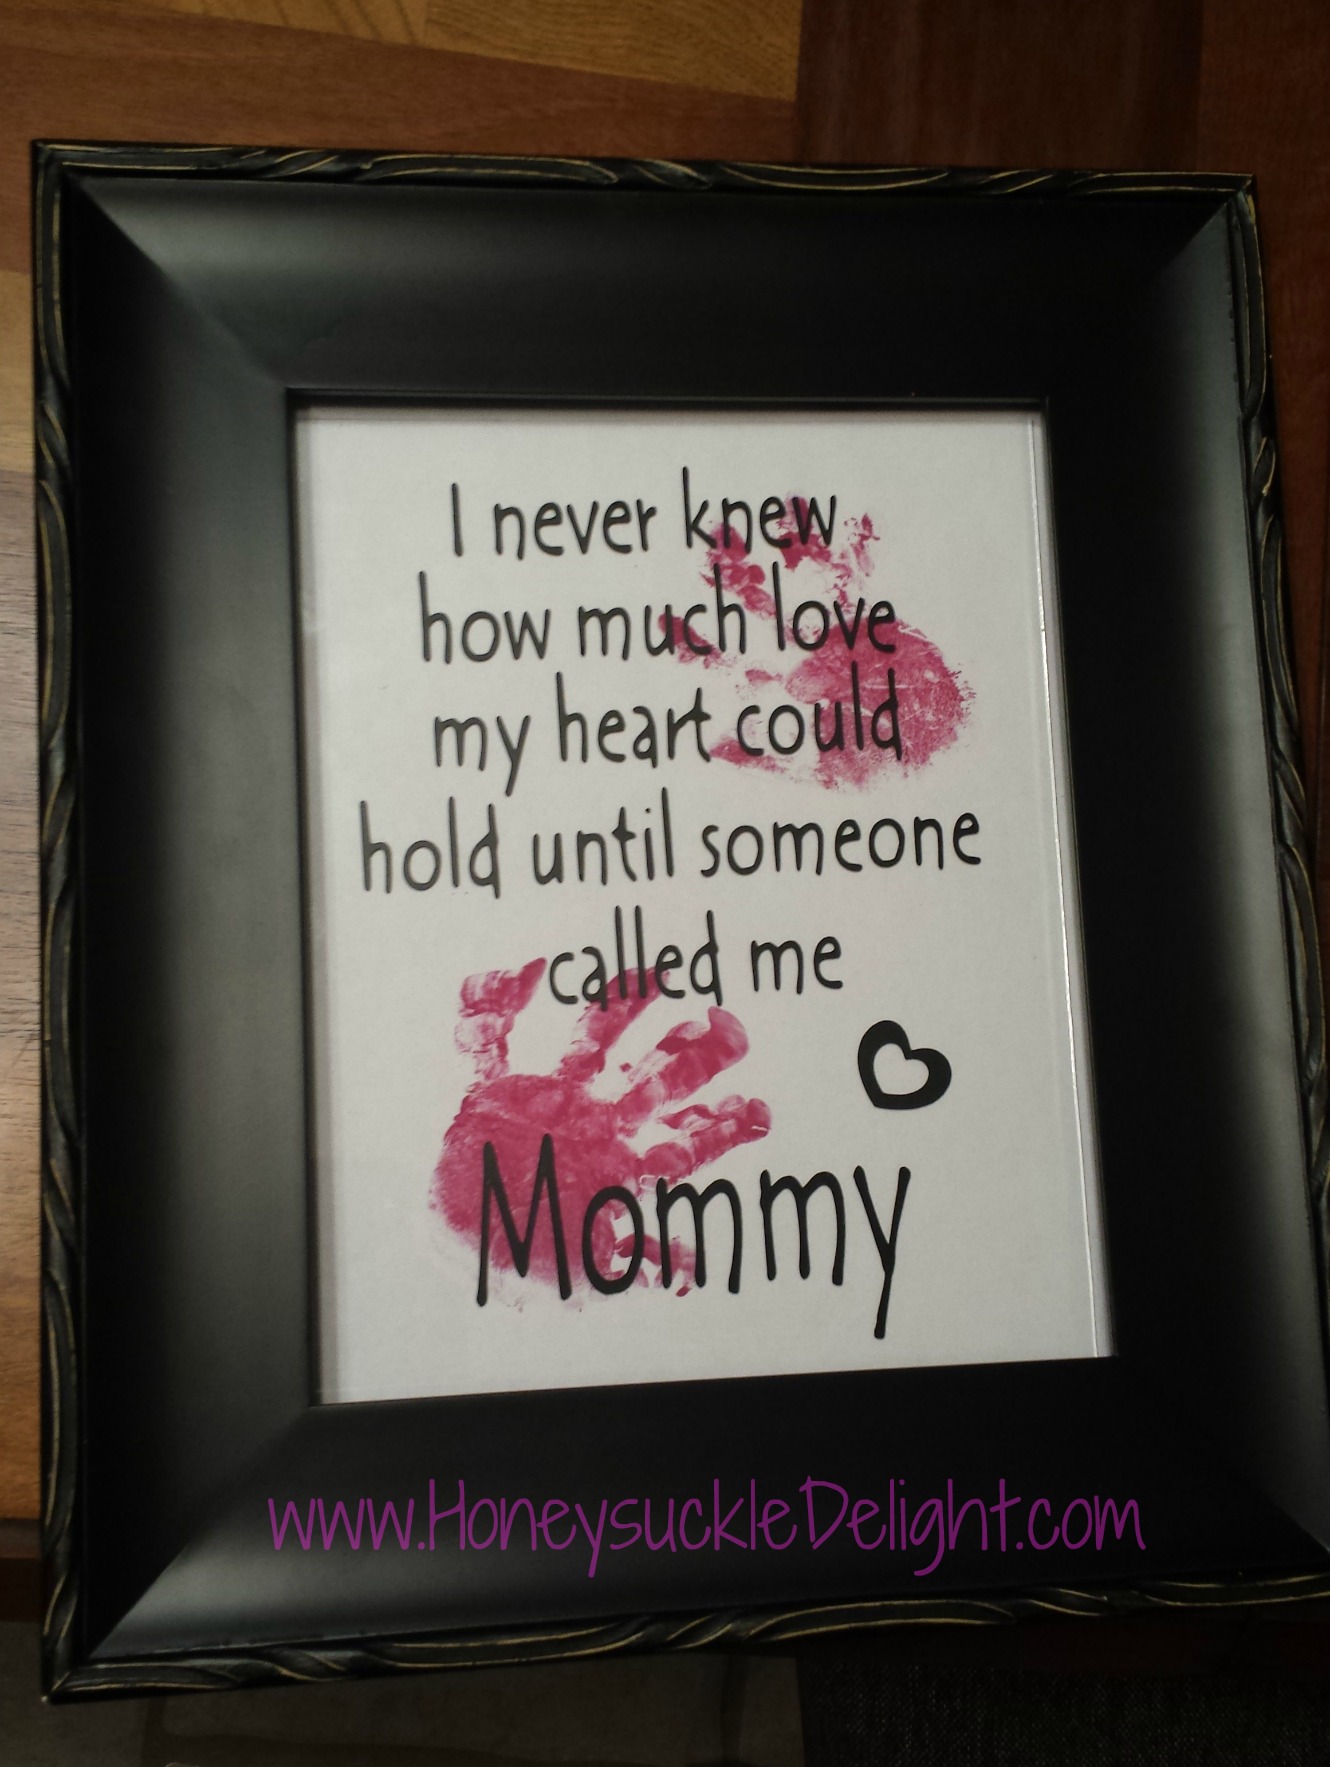
Mother’s Day Frame
I was contacted a few days ago by a high school friend’s Mom for a Mother’s Day gift for her daughter. She sent me 2 pictures. Told me how she wanted to combine the ideas and she wondered if I could help her do it. I didn’t have to think twice. OF COURSE!!
 Supplies needed:
Picture frame (this one is an 8 x 10)
Paint for the handprint
Vinyl
Contact Paper
Cardstock (I used white)
She did the hard part in my opinion! Lol she had to get her sweet one year old granddaughter’s handprint. Just dip their hand in the paint or paint it on there with a paintbrush. Just make sure you have plenty of baby wipes handy. I promise you will not do this in one try. But it will be well worth the hassle in the end! Place the hand prints on the back of the glass. You could also do it on the paper you intend to use as backing but placing the handprint on the glass will allow you to change the color of paper if you choose later on to match decor. Sorry for the glare! But you get the picture.

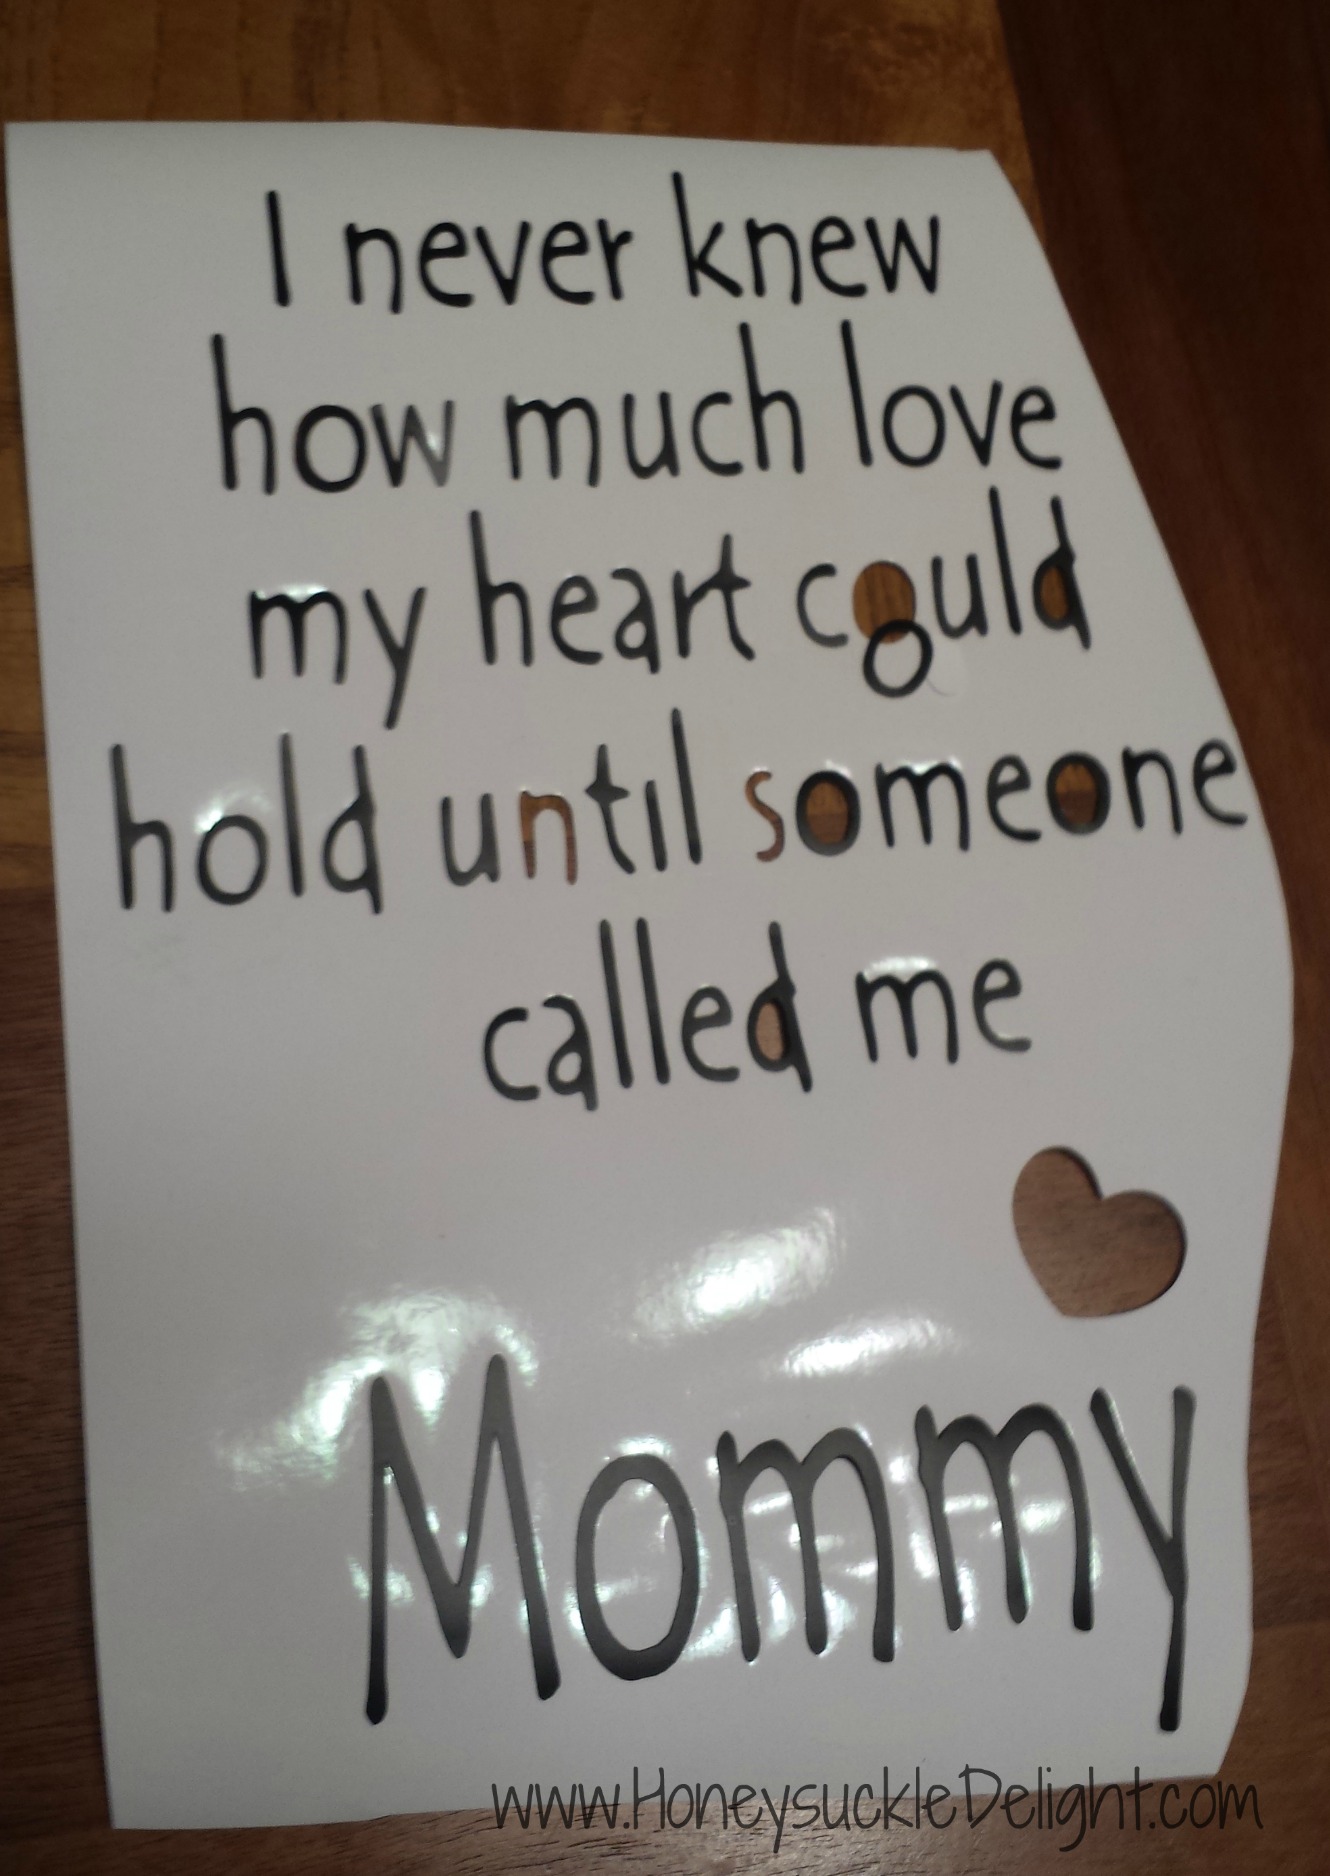
Now get out your cricut and print out the saying. I used the font Tempus Sans ITC. The words measured a total of 9 x 6.25. This allowed just the right amount of space on each side in the 8 x 10 frame. Make sure to pay attention to your settings on your cricut or you will cut too deep like I did. Since it was only the heart and one o I was still able to make it work.
Use your contact paper and transfer the vinyl onto the front of your glass. Cut your cardstock you plan to use for the background and you’re ready to go!
