Organizing
Circle Cork Board
Here’s a new project for my daughter’s room. One of these days I’ll finish all of the things I have planned for her. Then it’ll be time to start the twins room!
She has so much stuff she wants to hang on her wall that the cork board I got her from Hobby Lobby just wasn’t enough. So I came up with an idea for more! I’m not sure she could ever have too much room to hang all her drawings on.
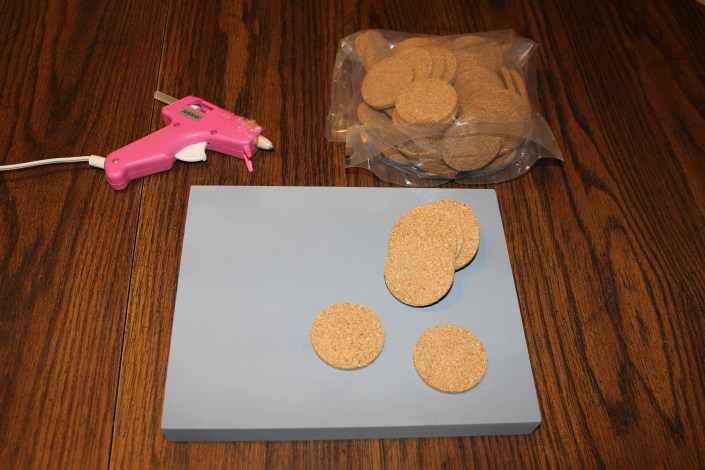 Supplies needed:
Wooden Board (8×10 is what I used. I wouldn’t use a canvas since it’s not going to be as sturdy)
Circle Cork Pieces (From Michael’s)
Paint & Paint Brushes
Glue Gun & Glue Sticks
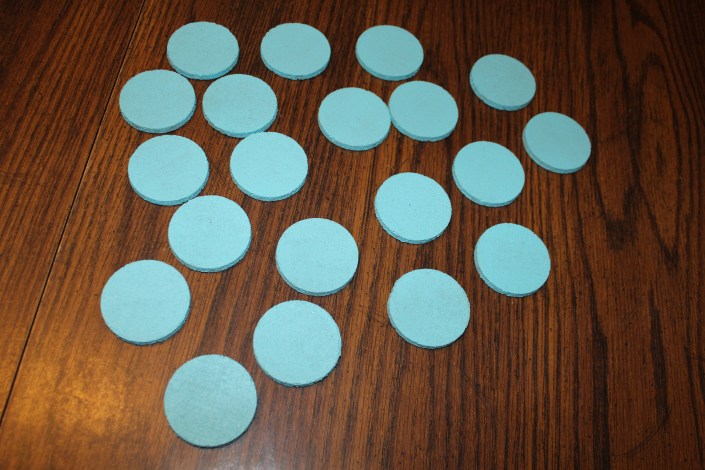
Start by painting the board and the cork pieces. Make sure to get it on the sides and top. It is very porous so make sure you don’t skimp on the amount of paint you use unless you plan on more than one coat.

Place the squares on the board and hot glue them to the board.

Now enjoy your adorable creation that perfectly matches your room! It’s really that simple! This is one of those crafts that you don’t have to be “crafty” to make it look amazing! My daughter was so excited to see this hanging in her room when she got home today!

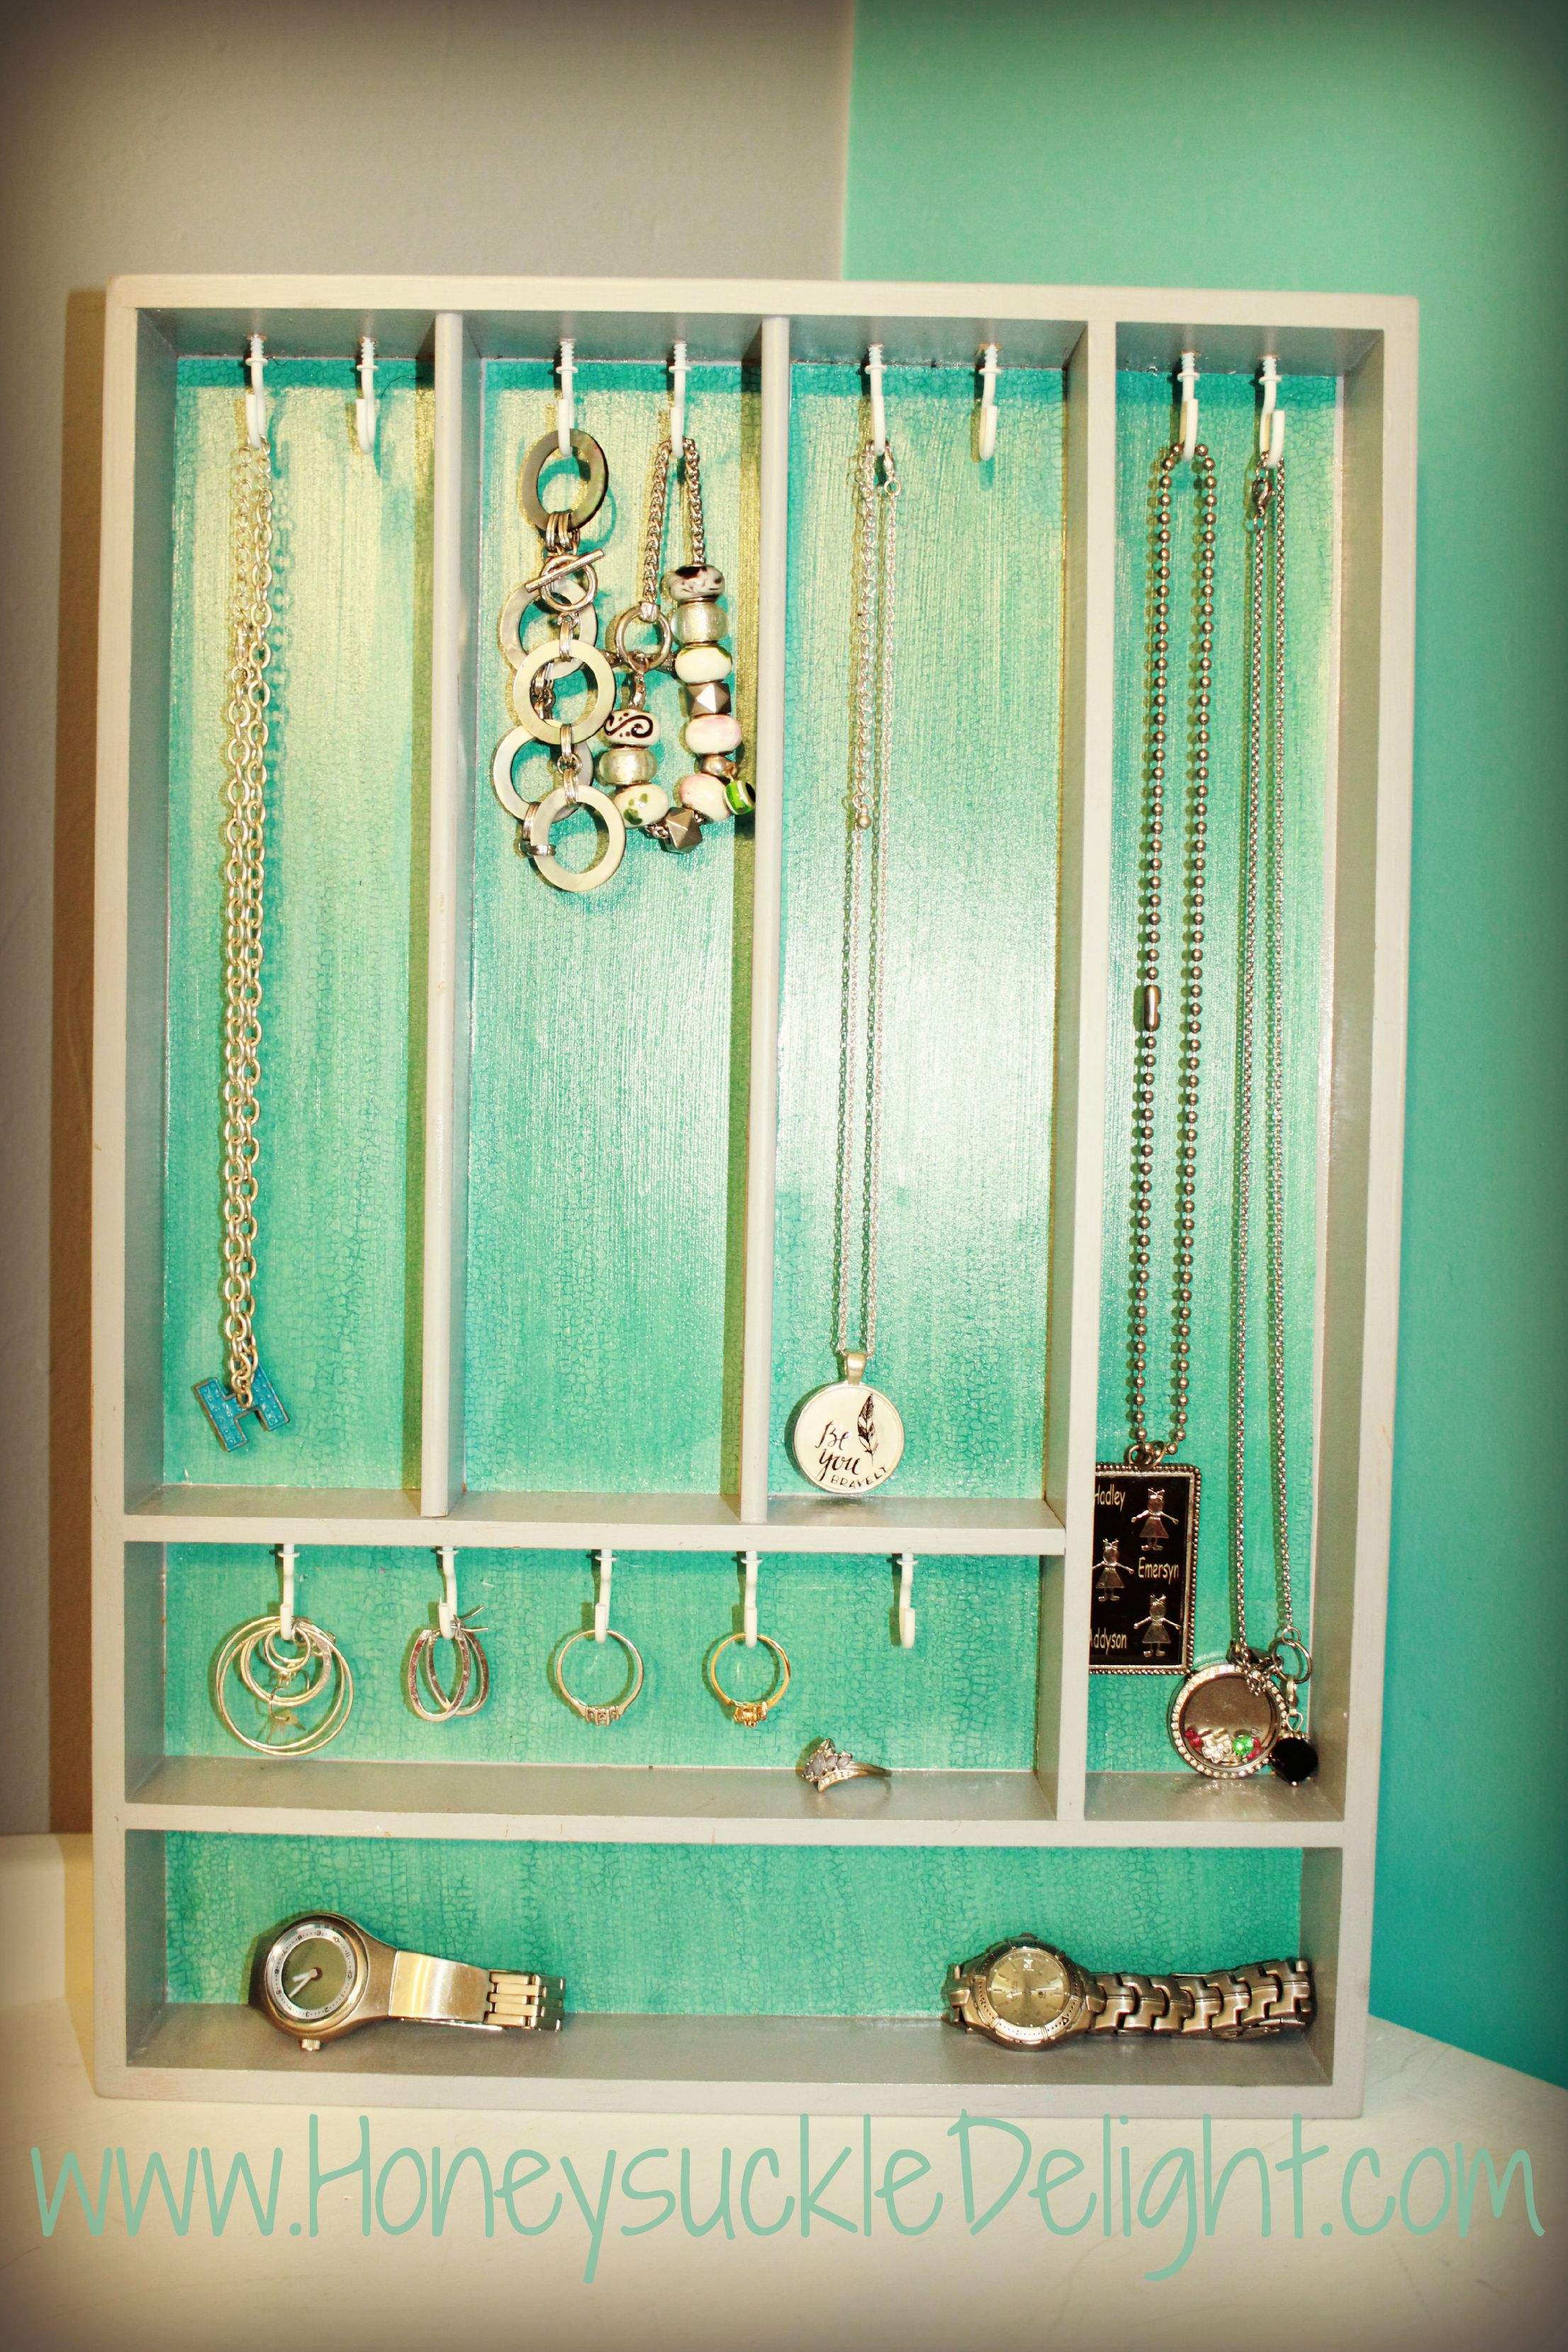
Jewelry Holder
 I’m in the process of redoing my daughter’s room. She’s 10 now and thinks her room shouldn’t be pink anymore. So after LOTS and I’m talking LOTS of shopping and looking online for a comforter we finally found what she wanted. So this Jewelry Holder is the first thing I’ve made to decorate her room with. And I’m completely in love with it!
I saw a yellow and gray jewelry holder at Hobby Lobby but it definitely wouldn’t match. So I was on the lookout. I finally found a wooden silverware organizer at a yard sale for $.50. Talk about luck! It’s super easy and here’s how I did it.

Supplies:
Wooden Silverware Organizer
Hooks (I got these at Michaels)
Mod Podge
Scrapbook Paper
Paint & Paintbrush
Start by painting the wooden silverware organizer. I chose gray because we had planned on hanging it on a blue wall. You don’t have to worry much about the bottom since you will be putting scrapbook paper over it. But make sure to cover the front edge and all sides well. While it’s drying cut your scrapbook paper to fit inside each cubby hole.
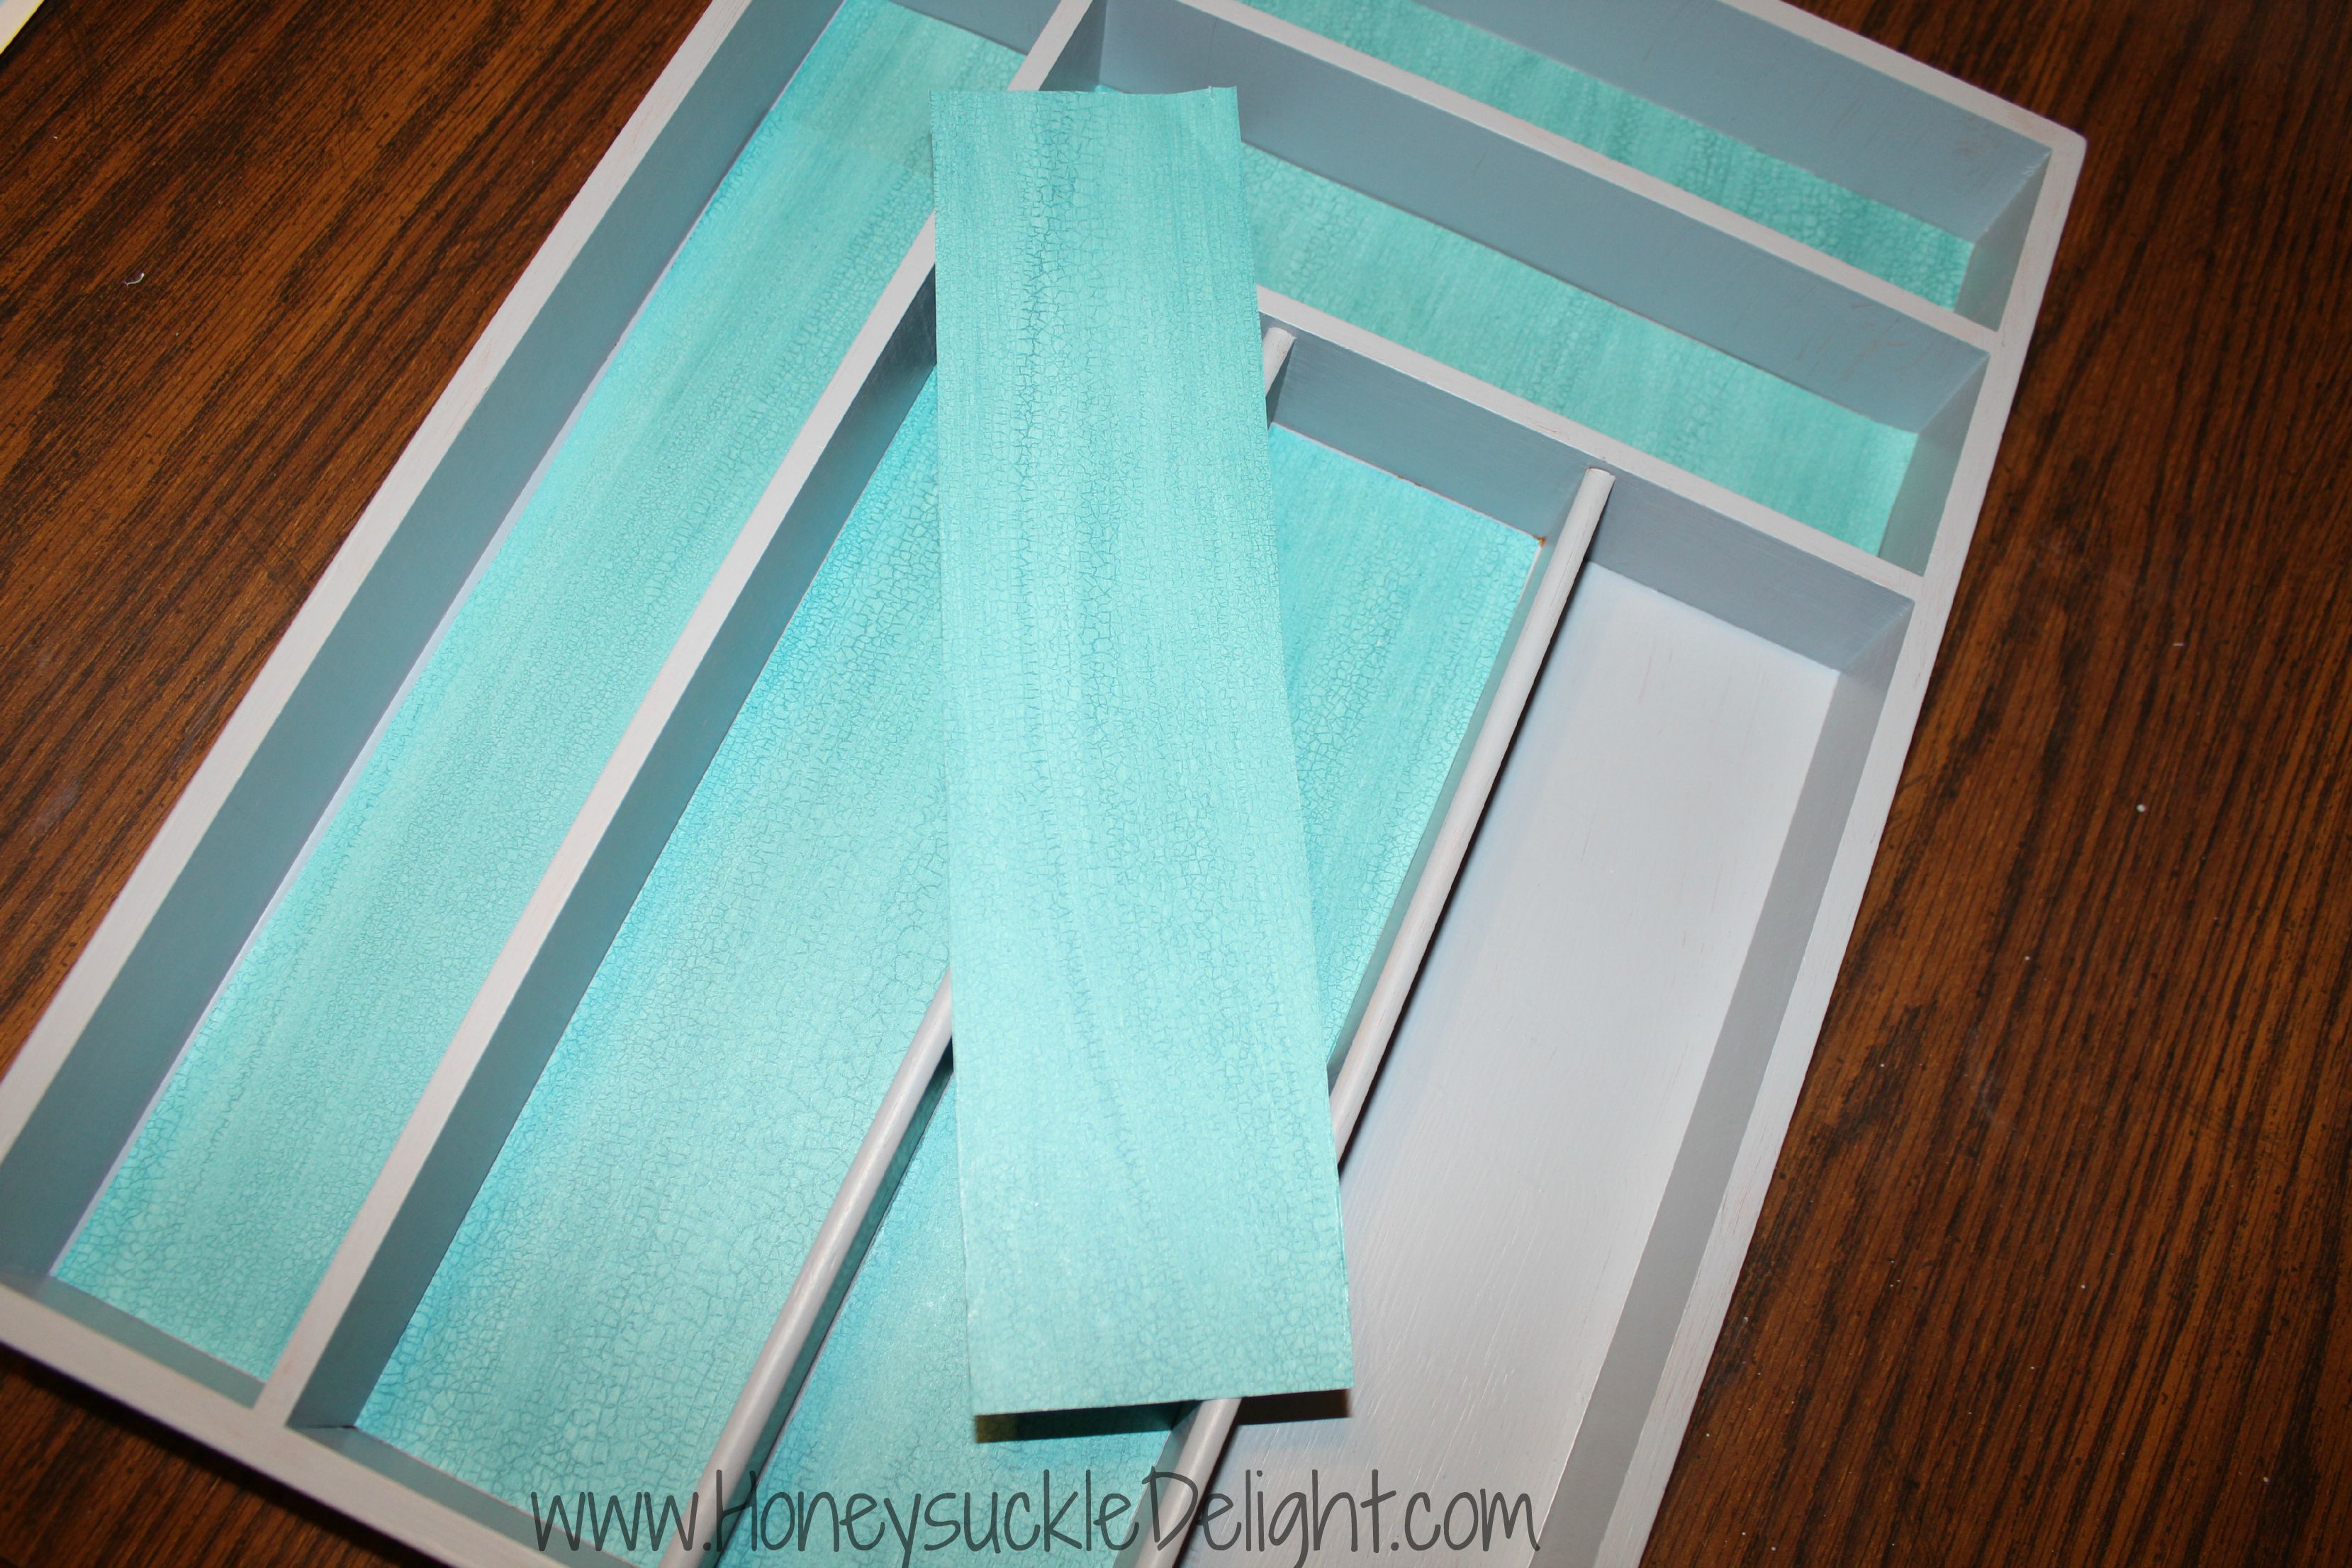
Once its dry, it’s time to get out the mod podge.

Using a foam brush, I applied a thin layer to the bottom and stuck the paper on it. I have a thing about the paper bubbling up, so I apply thin layers and let it dry in between. Then I applied 2 thin layers to the top of the paper.

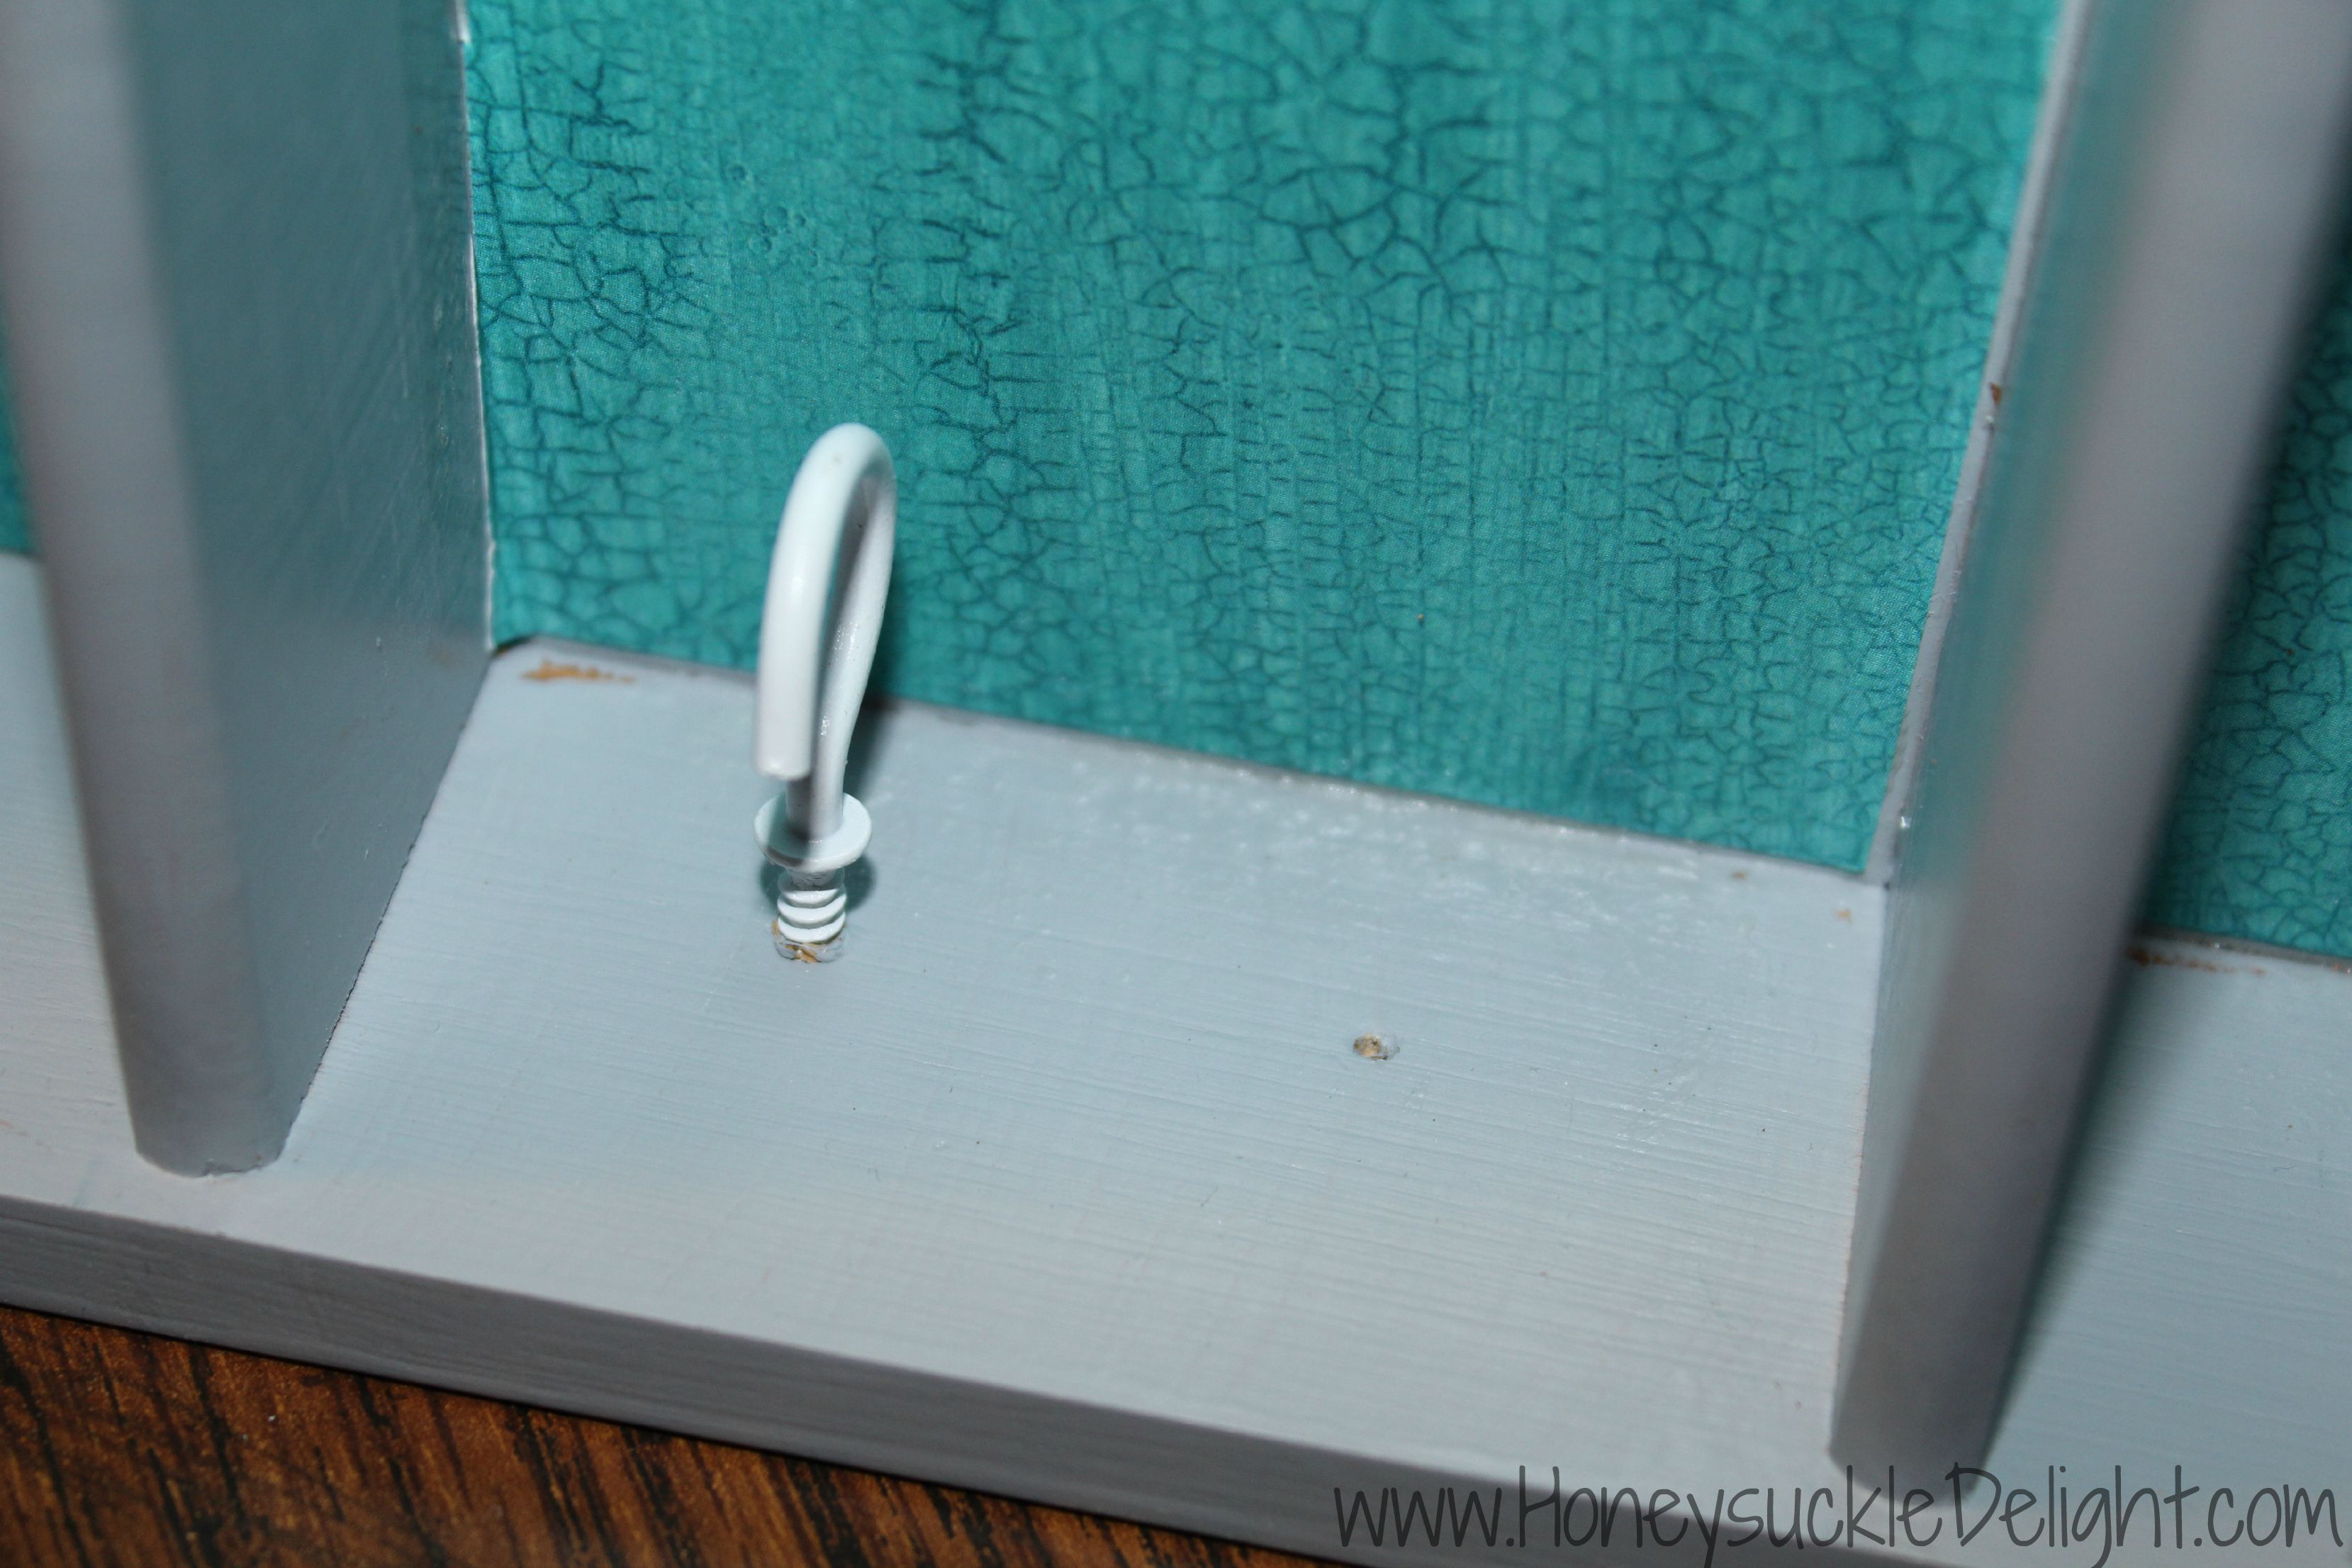
Once that’s dry, the last step is the hooks. I found these at Michael’s 20 for $2.99 in the framing section. They had them at Hobby Lobby as well but they were more expensive. I hammered them in a little to start and then screwed them in enough to hold. Make sure not to go all the way through the wood. Mine would have screwed quite a bit farther than what was necessary. Then you’ll have a hole all the way through. Please be careful!
Now it’s ready for your jewelry. My daughter loves it! And I’m on the lookout for more of these at yard sales!
Magnetic Kids Chore Chart

I have looked and looked for the perfect chore chart. We tried the dry erase ones….but they always seemed to get erased and the girls got frustrated. Then Mommy got frustrated! So they went in the trash. Tried just printing them out. That wasn’t really working for us. So I decided I wanted something where we could change out chores as often as I wanted and would be easy. And cute of course! Here’s what I came up with.
Supplies needed:
Board ( I found this zebra board in the serving supplies at Hobby Lobby.
It has a cork backing and measures 15 1/2 by 12.)
Small piece of metal (I got a large piece and cut it to 9 x 12)
Vinyl
Contact Paper
E6000 Glue
Small Wood Circles
Paint
Magnets
3M Hangers
Glue Gun & Glue Sticks
The first thing you need to do is glue your metal to your board using E6000. Leave extra room at the top so you can put a name on the top. I left 3.25″. Then just center the board from side to side.
I then cut the names out using my cricut and their favorite color vinyl. I like to put the name on a solid background shadow when there is a busy background. So I used white for the shadows. The name measures 2.25″ x 6″ The font is called Segoe Script. I like this font for anything I want to look kiddish. Then using the contact paper center the name on top of the shadow and then the entire piece onto the board.

Cut out the words To Do (measured 1.5″ x 3″), Done (measured 1.5″ x 3″) & a line to divide. Then using contact paper, place the words.
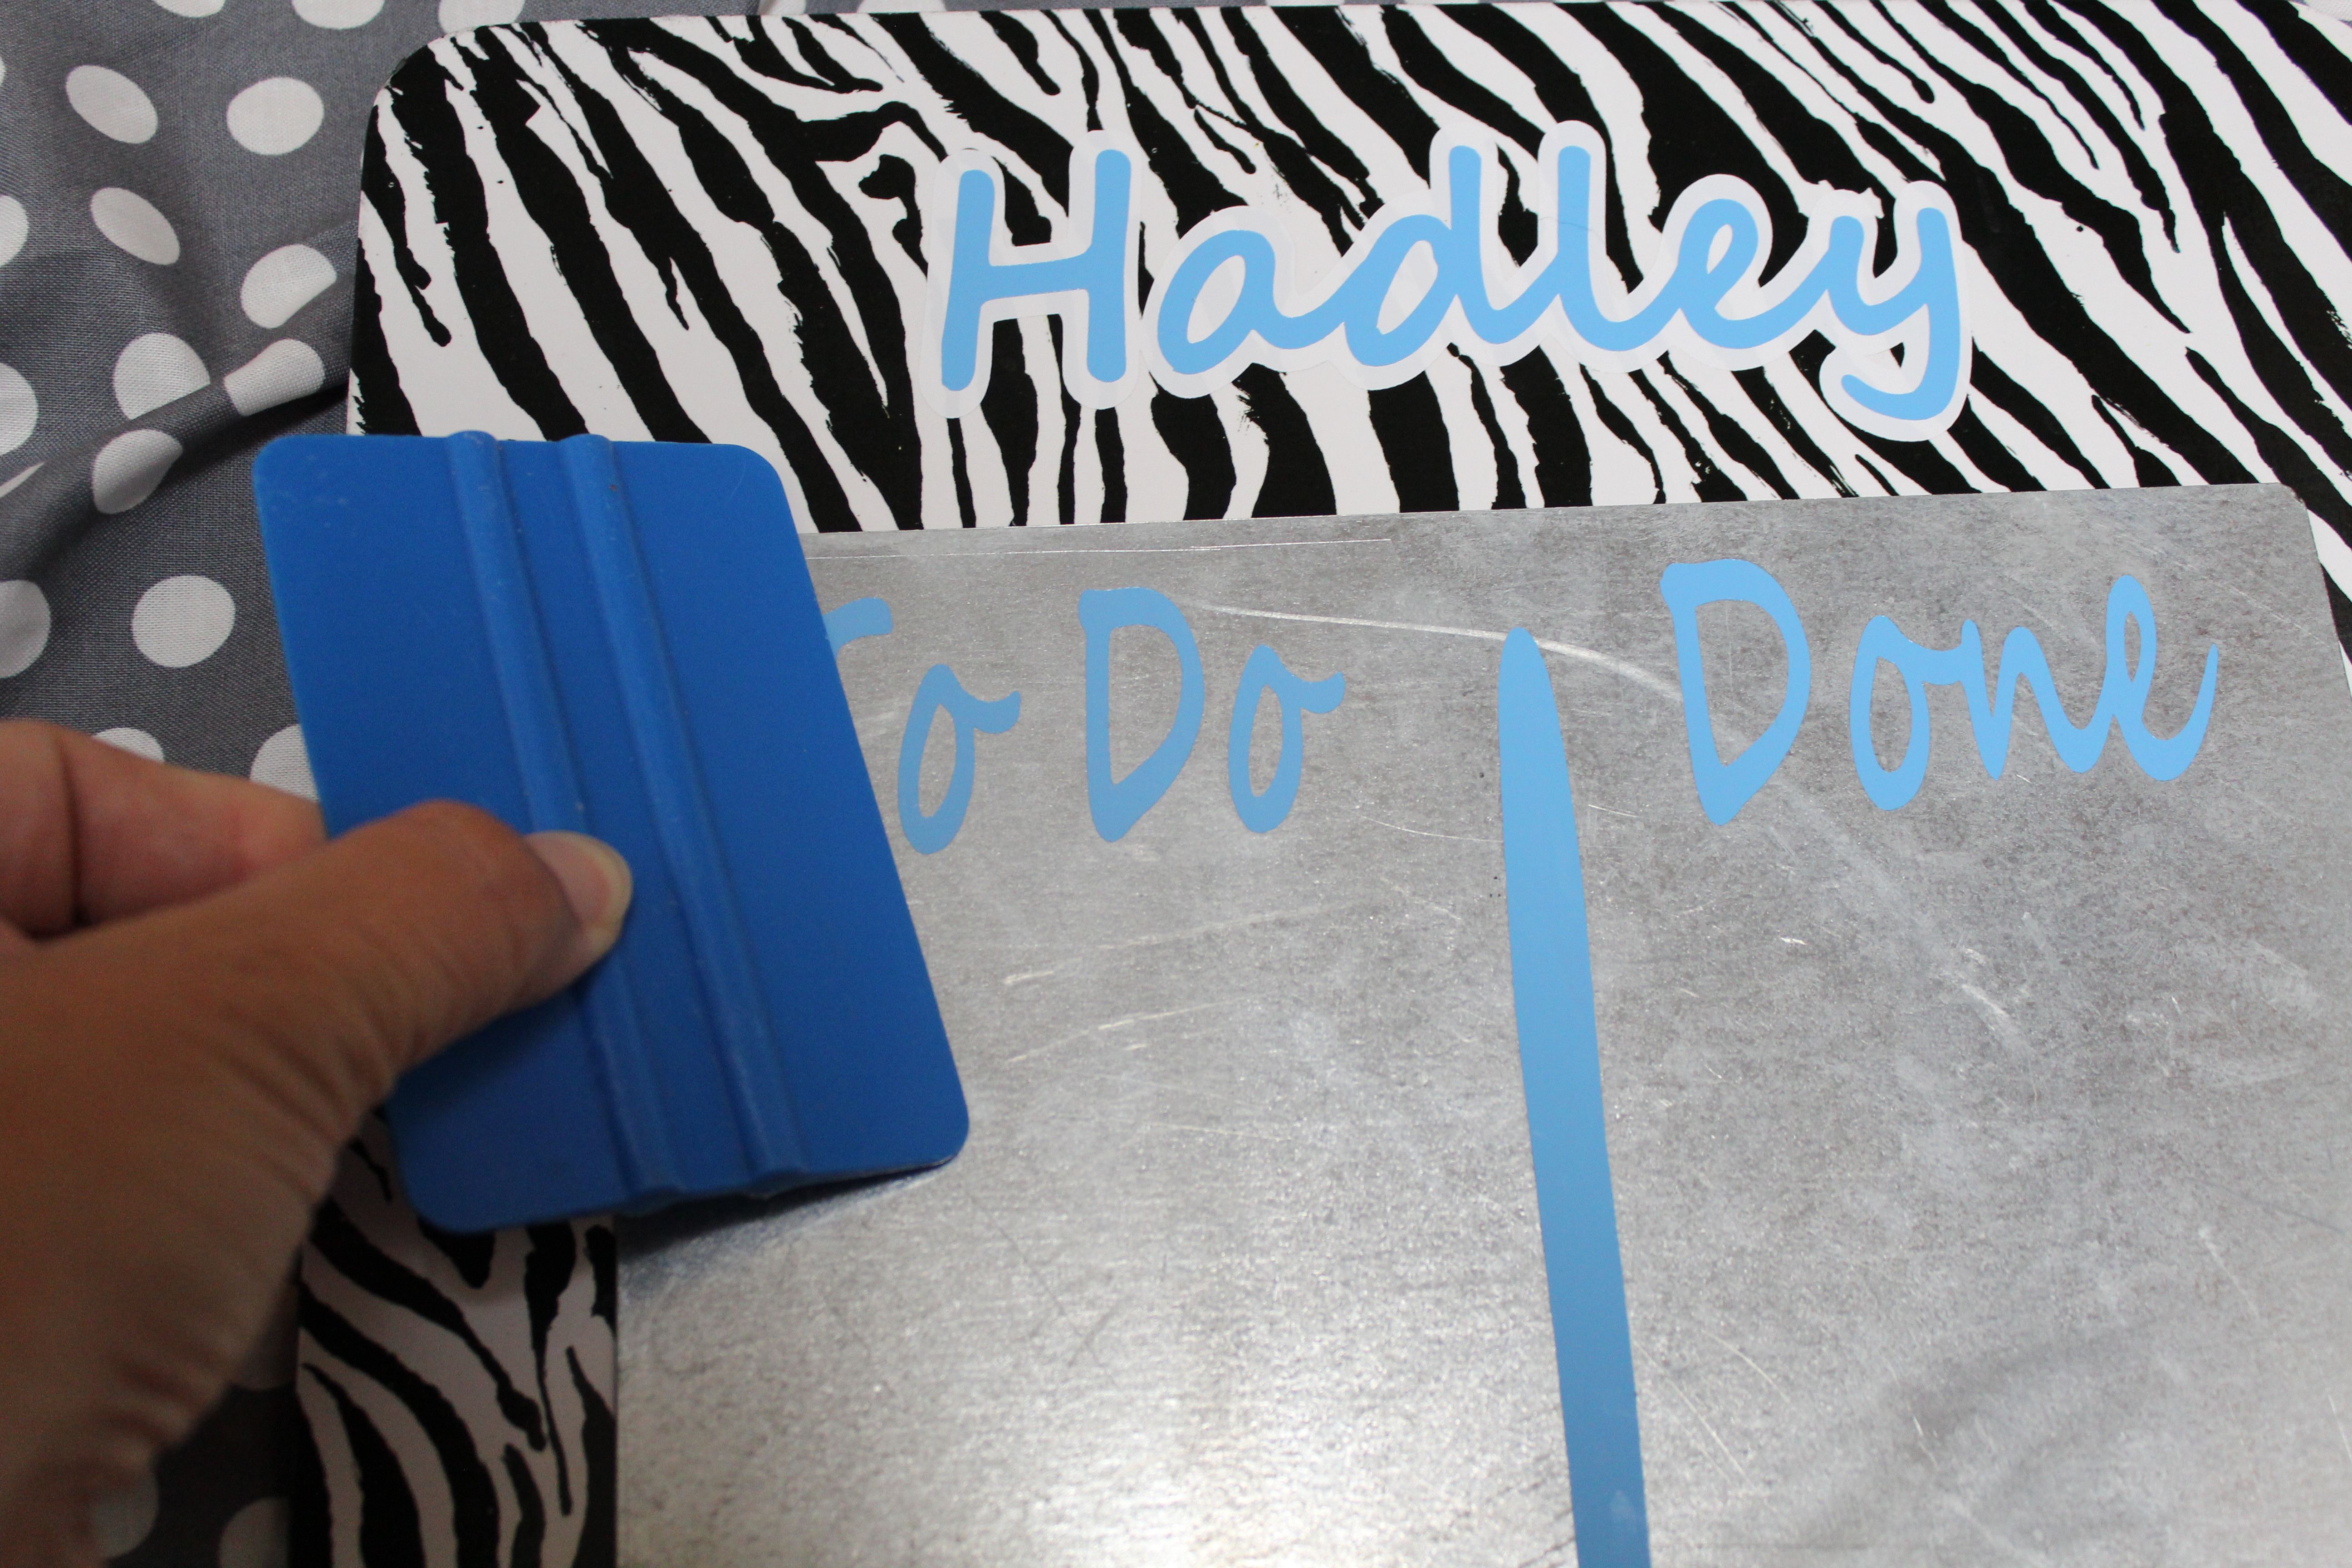
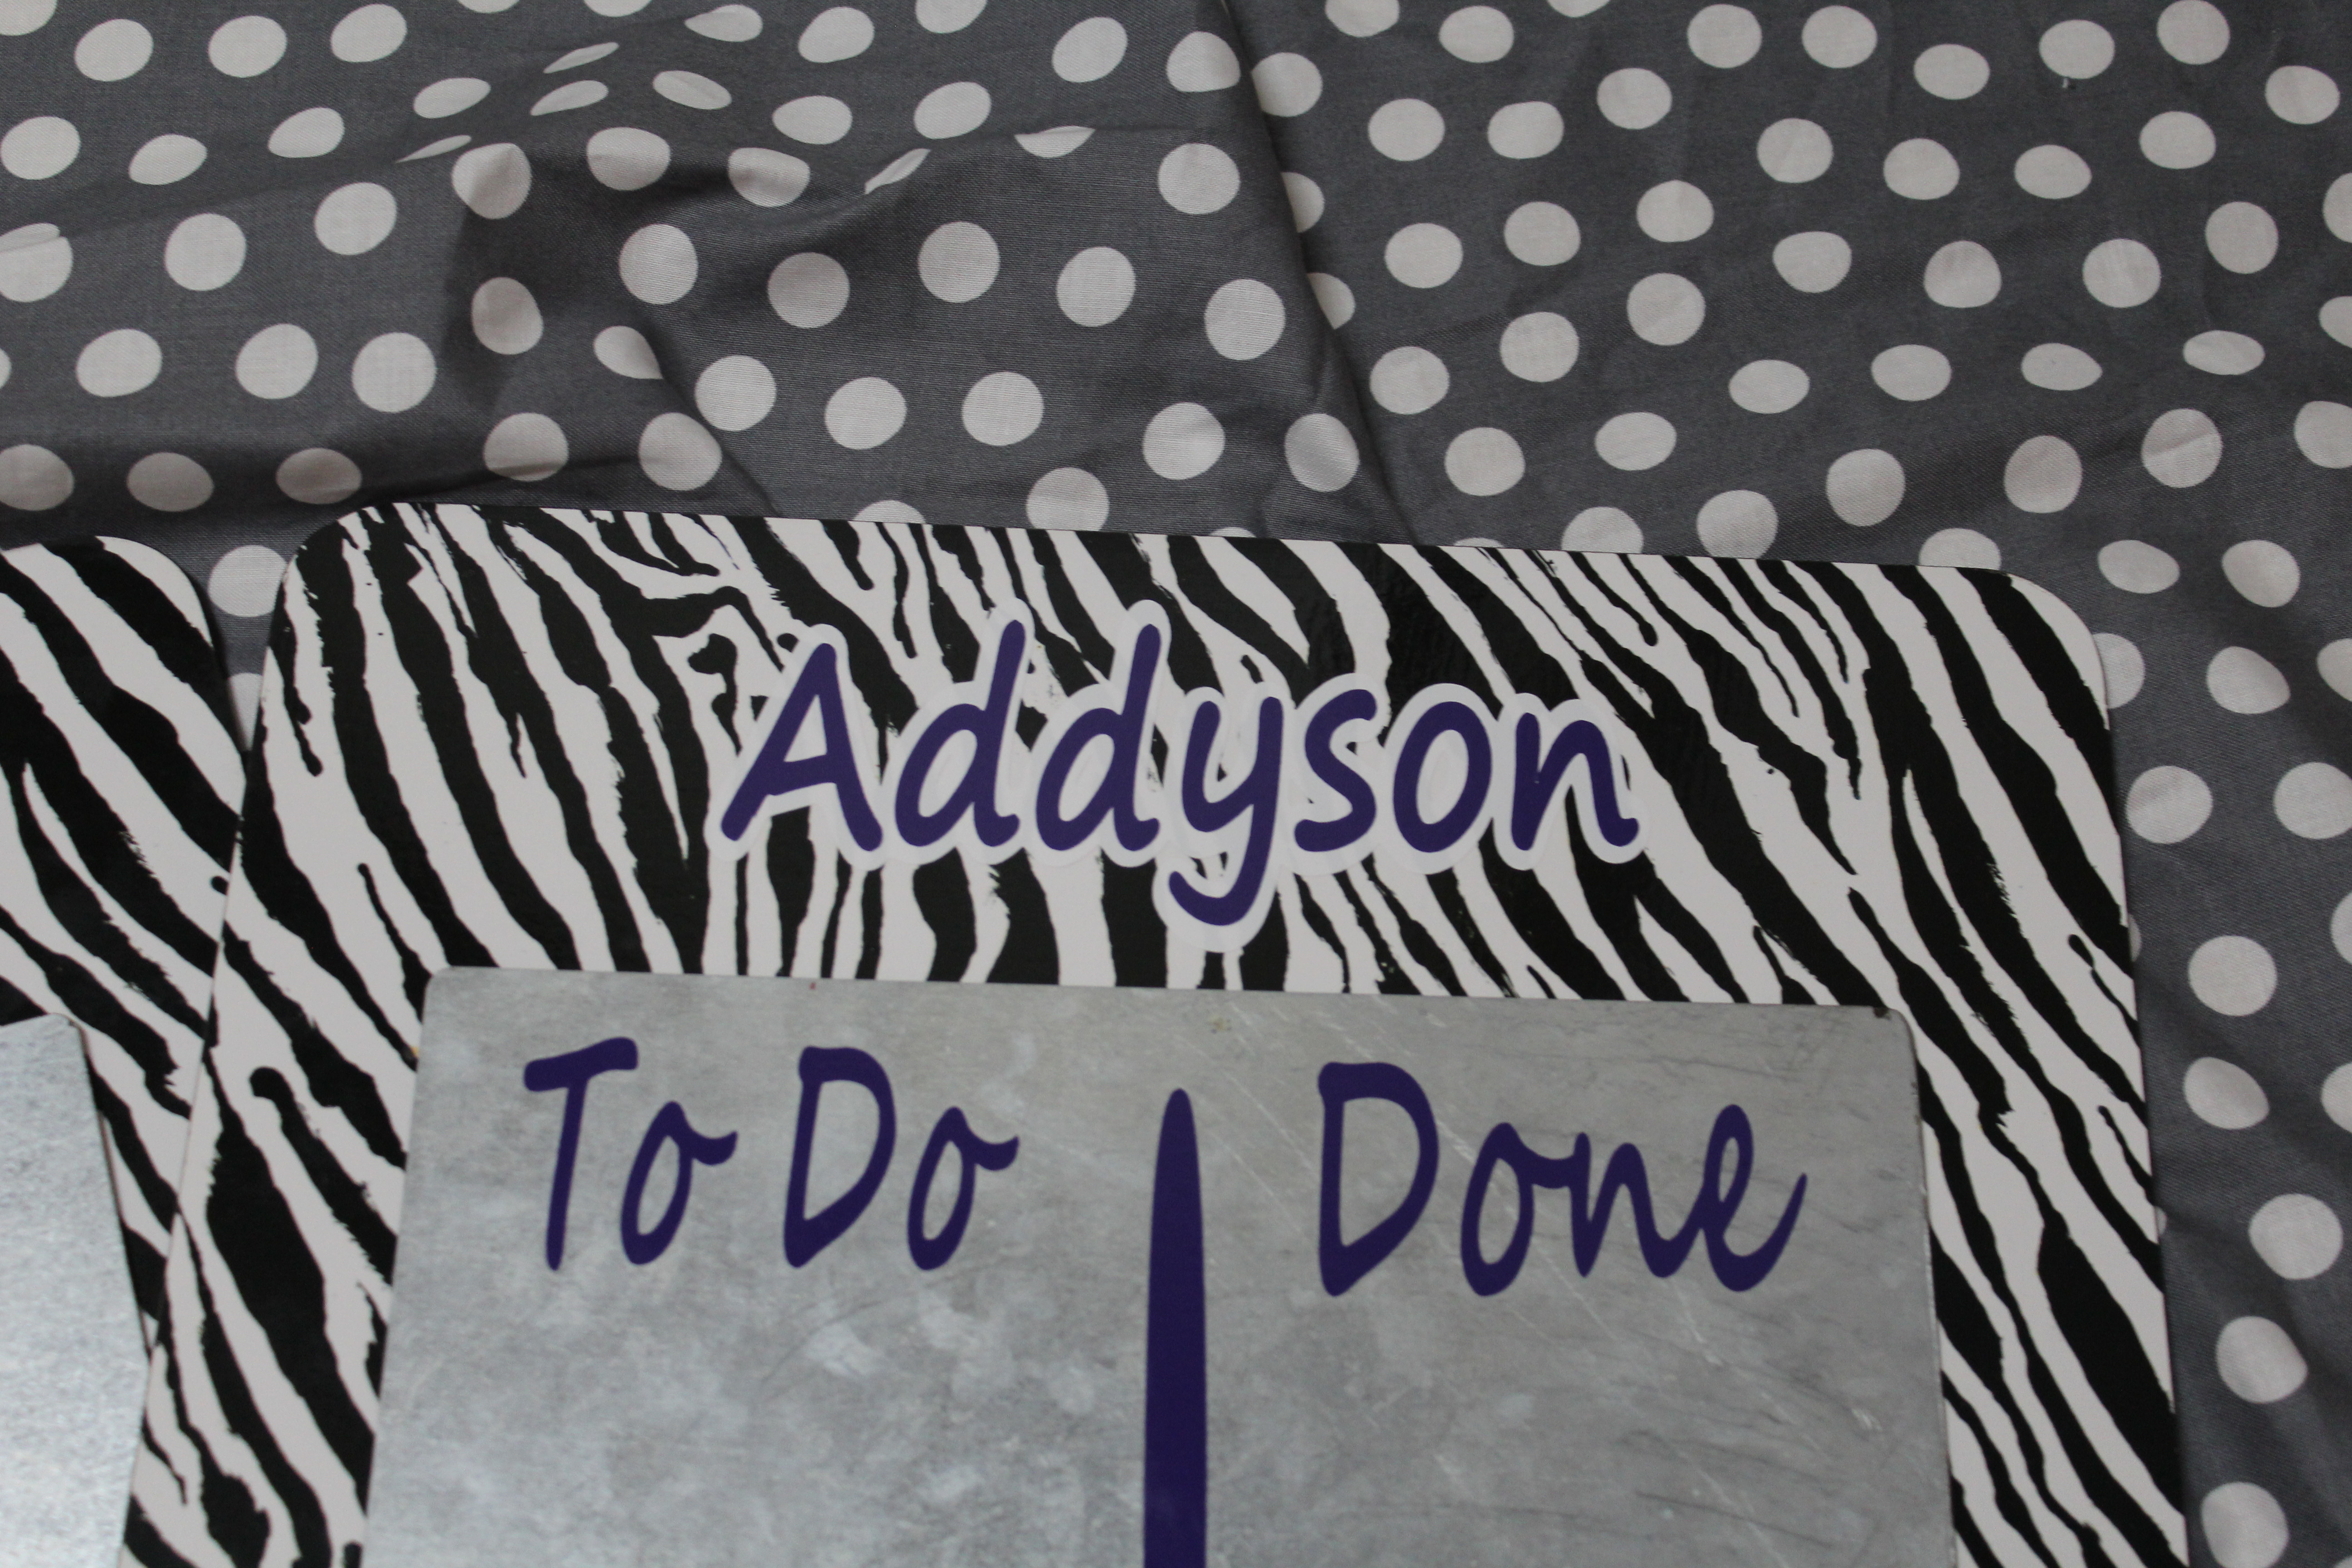
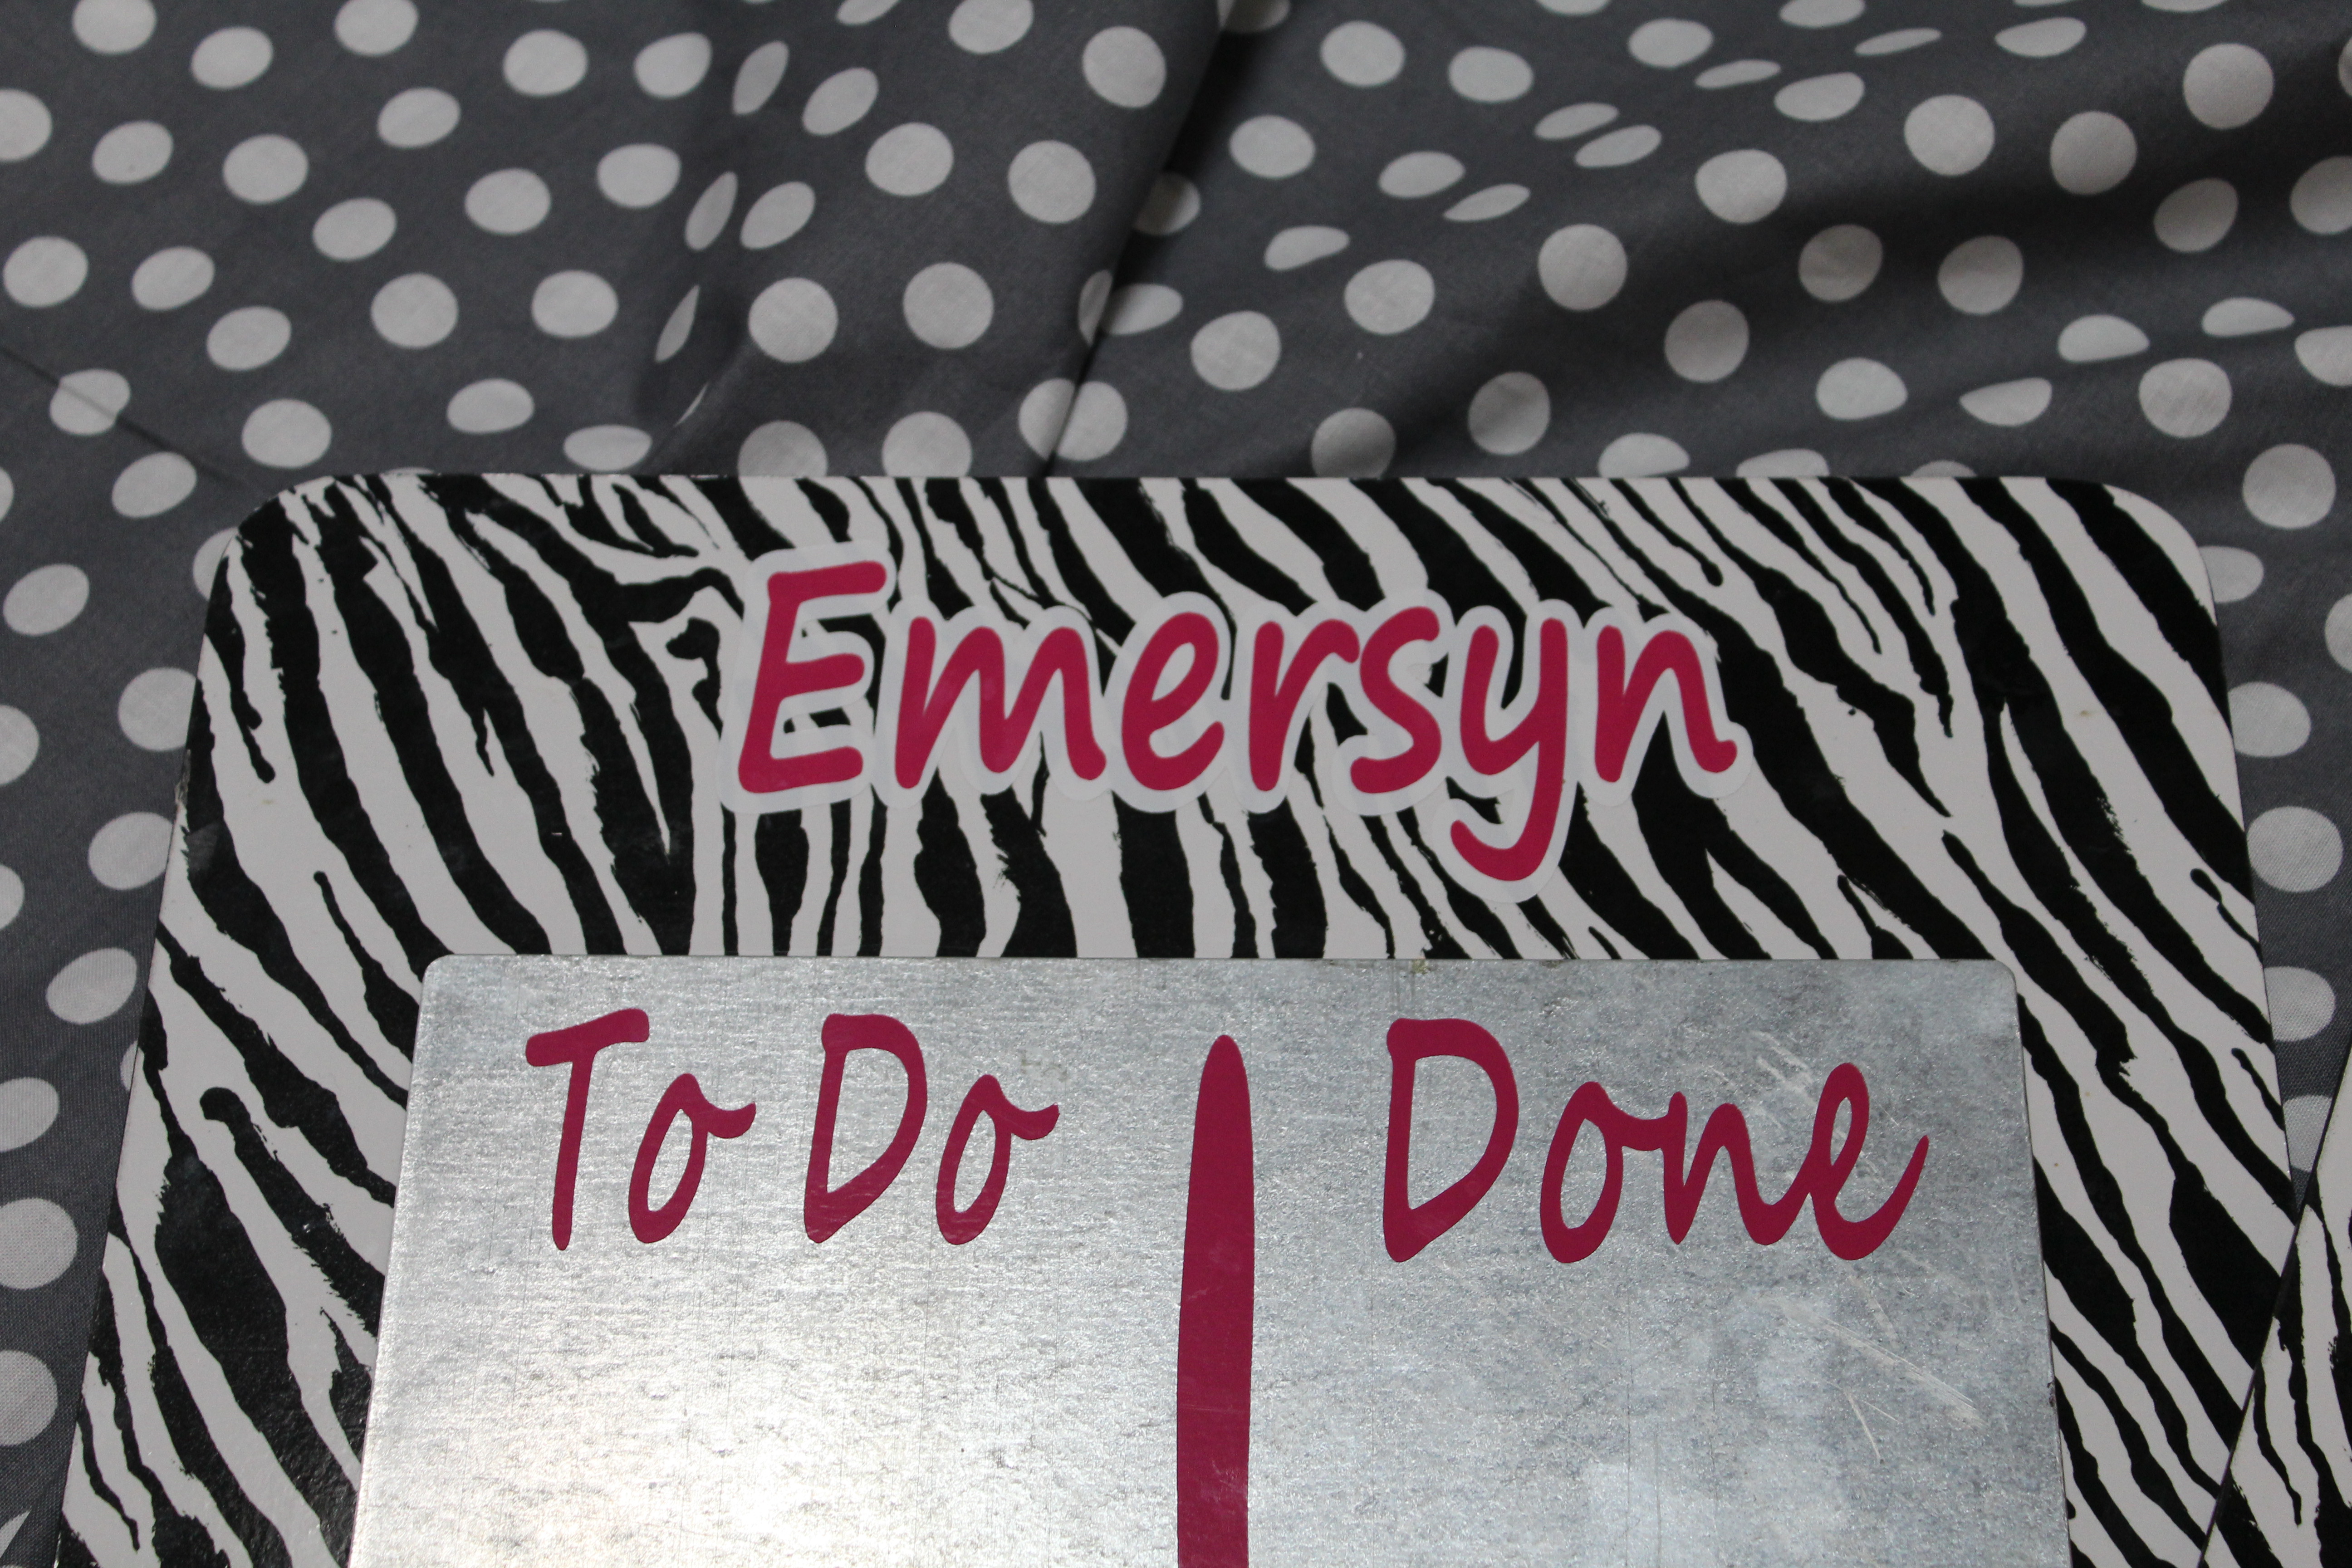

Paint your wooden circles and glue on the magnets. I got the sticky magnets thinking I would just use those. Don’t bother! Go ahead and use a glue gun to glue on the magnets. They will fall off if you don’t I promise!


Now you’re ready to hang your chore charts and put your kiddos to work!
I used the 3m Hangers that I got at Michaels.

Ribbon Storage
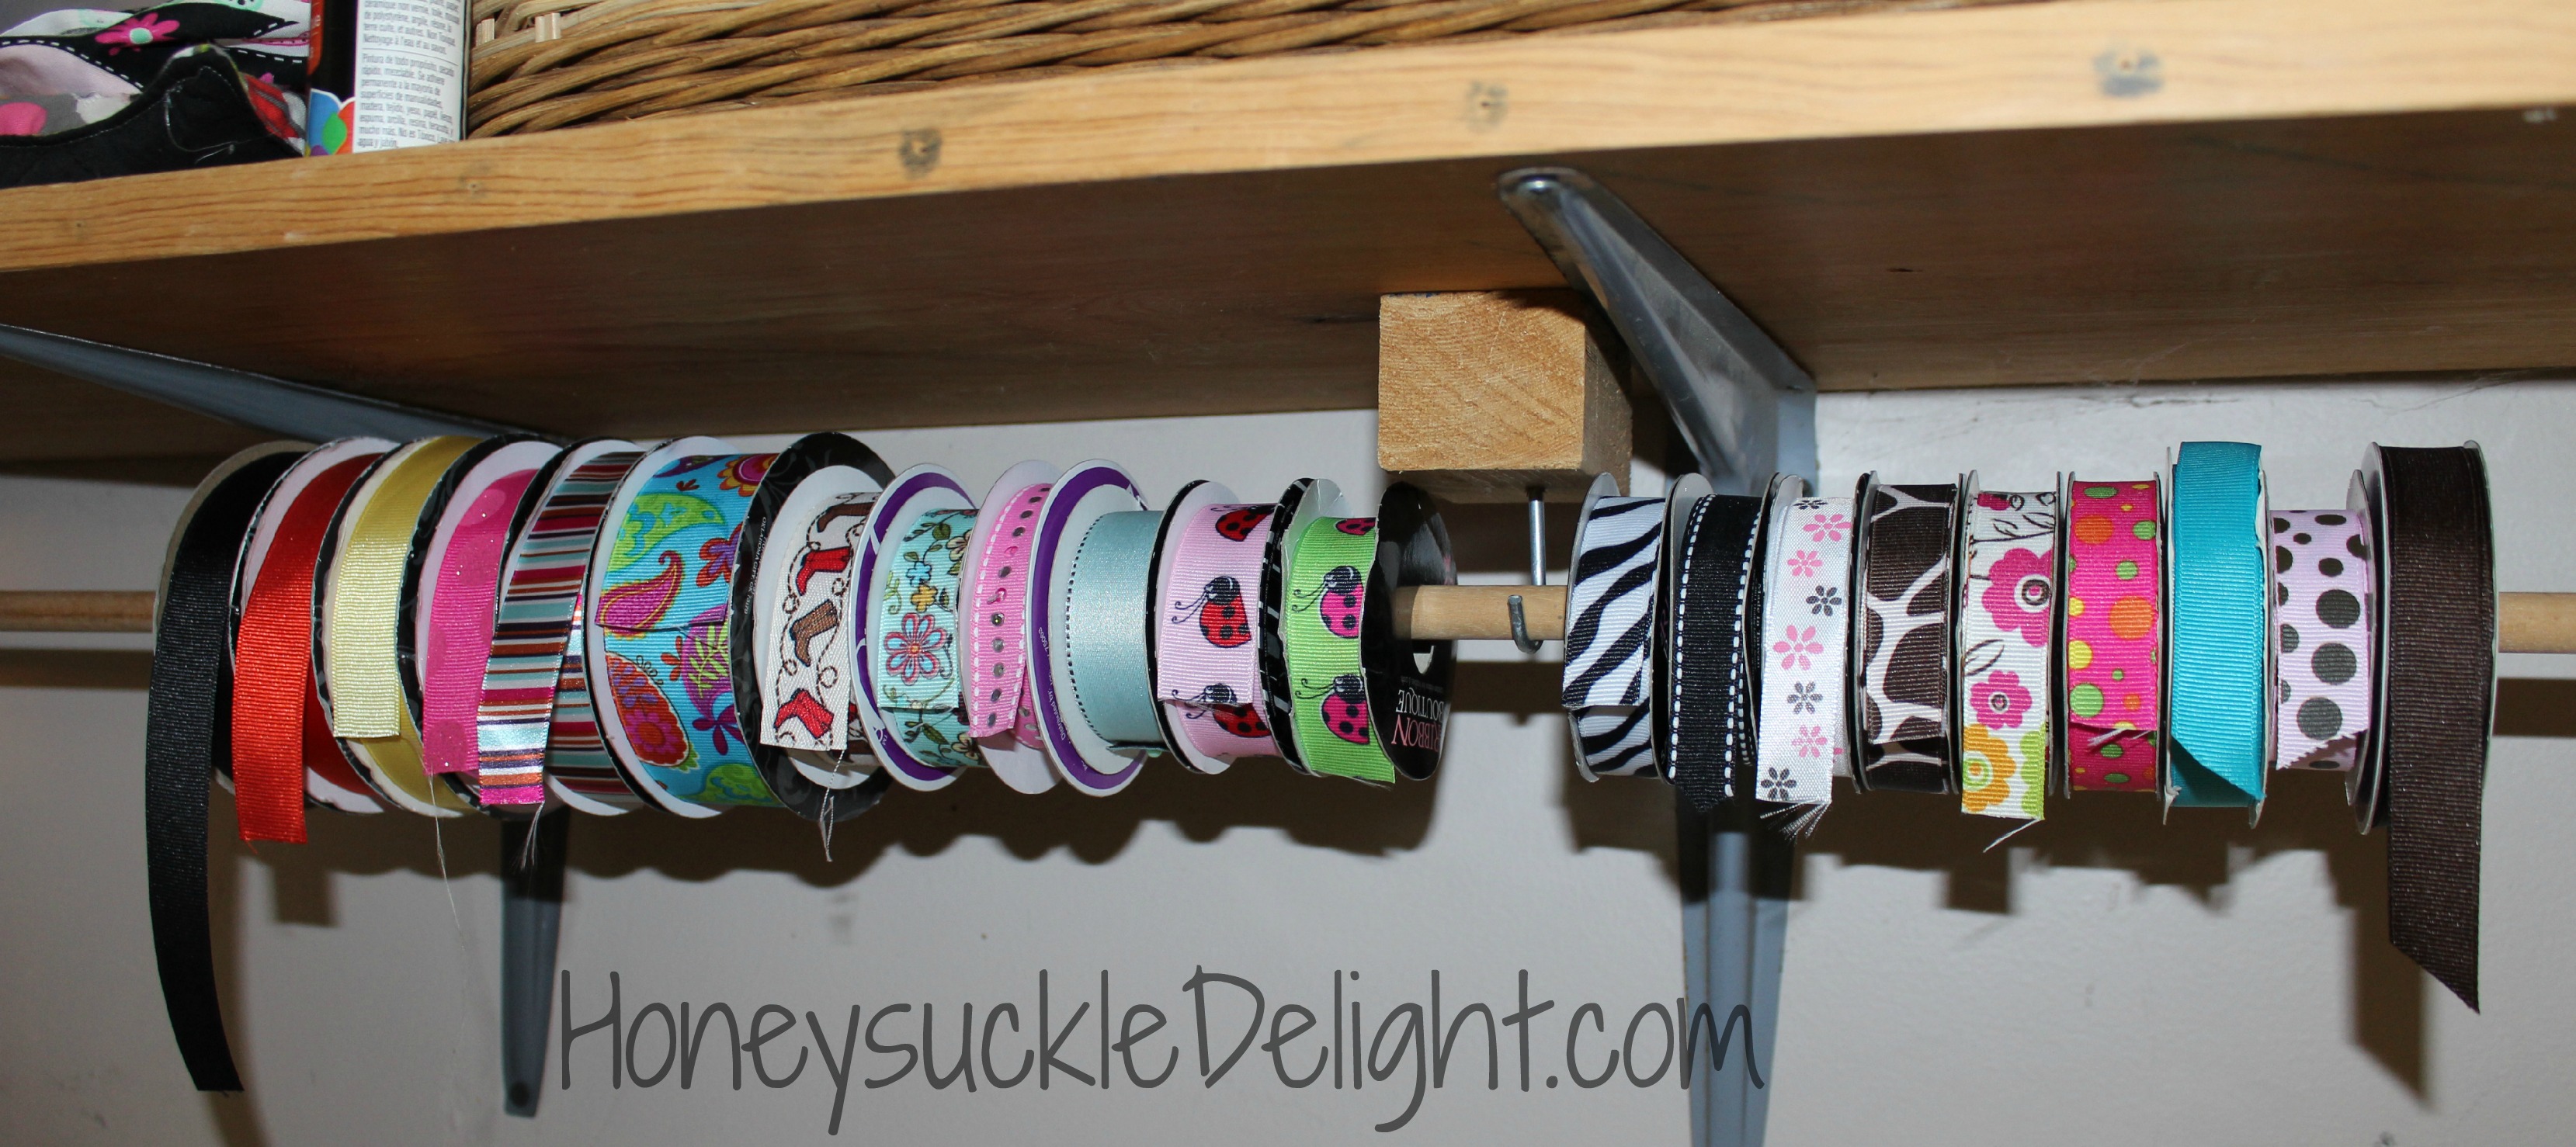
I am always looking for better ways to organize and store my craft supplies. So when my grandparents were helping me put up my shelves, my Grandmother & I came up with a great way to easily store my ribbon. Now I know exactly what I have just by looking. It doesn’t get unwound and messed up. It’s exactly what I needed!
Supplies needed:
Small boards
Hooks
Dowel Rod
Electric Drill
Screws
We started by adding a small piece of wood in order to make the hook hang low enough to allow the ribbon to hang properly.
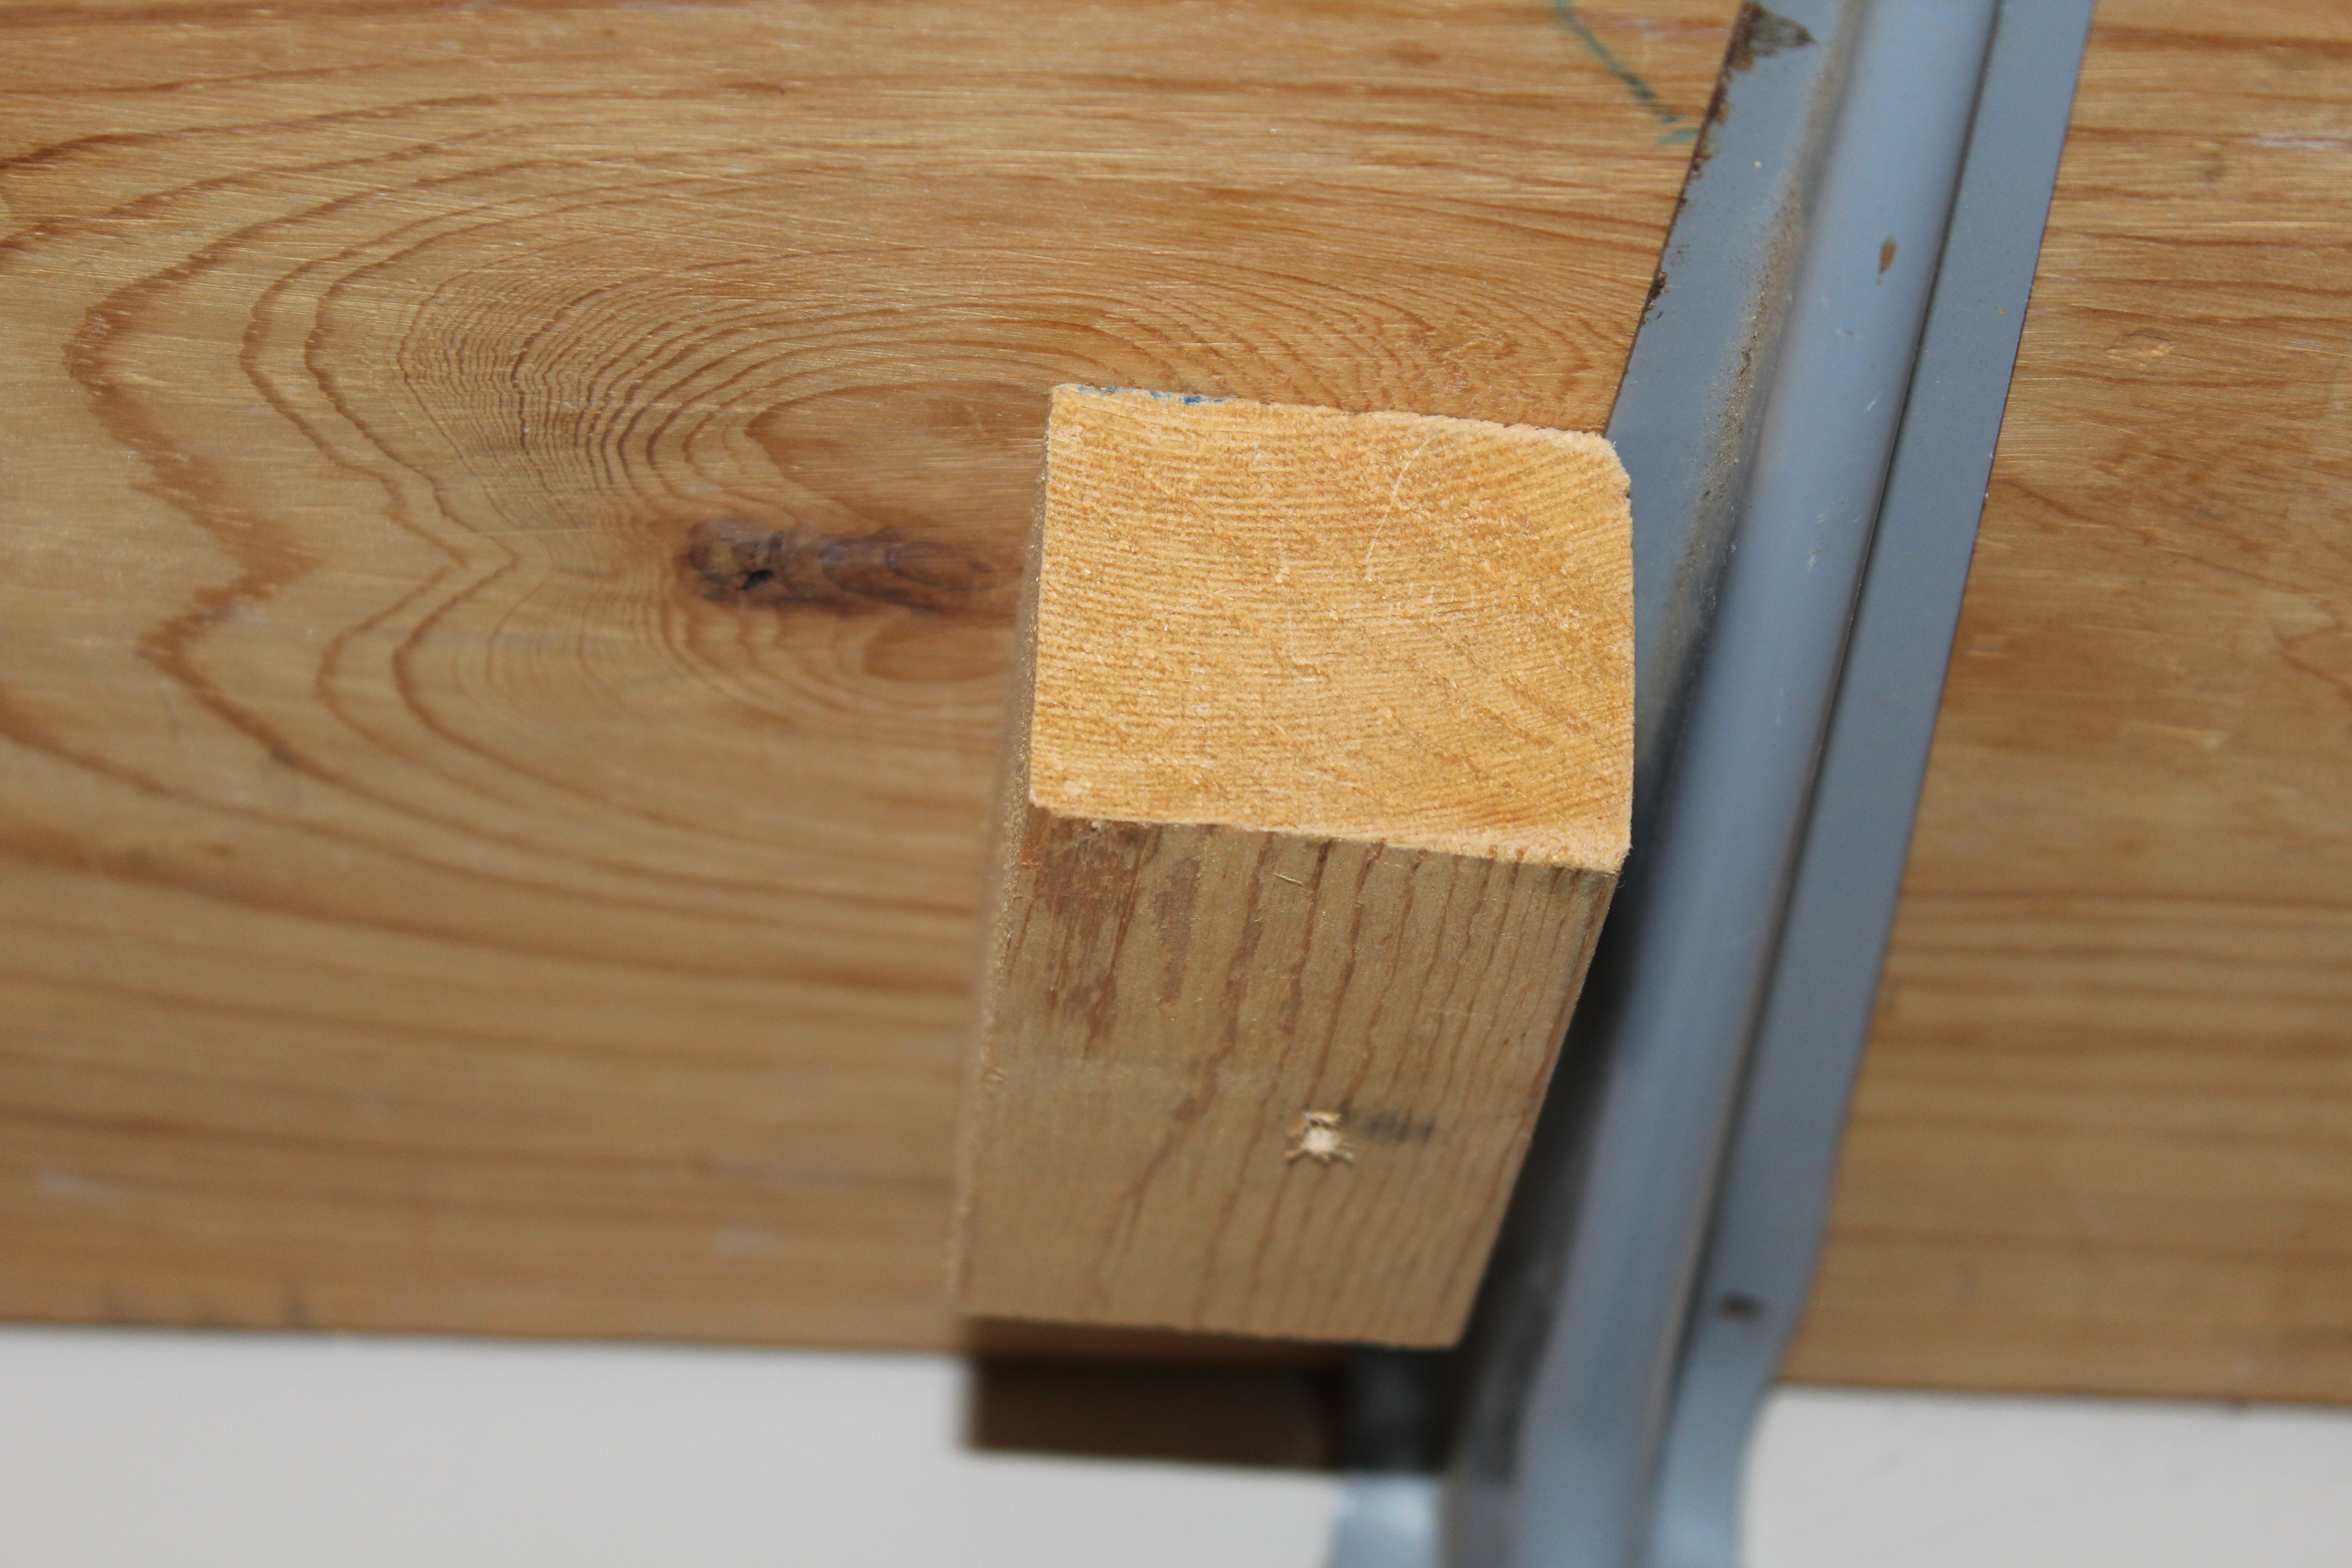 Use the drill and a screw to connect the small piece of wood. I needed 2 pieces of wood. But if yours is longer you will need to decide how many hooks you will need accordingly. Then add the hook into the piece of wood.
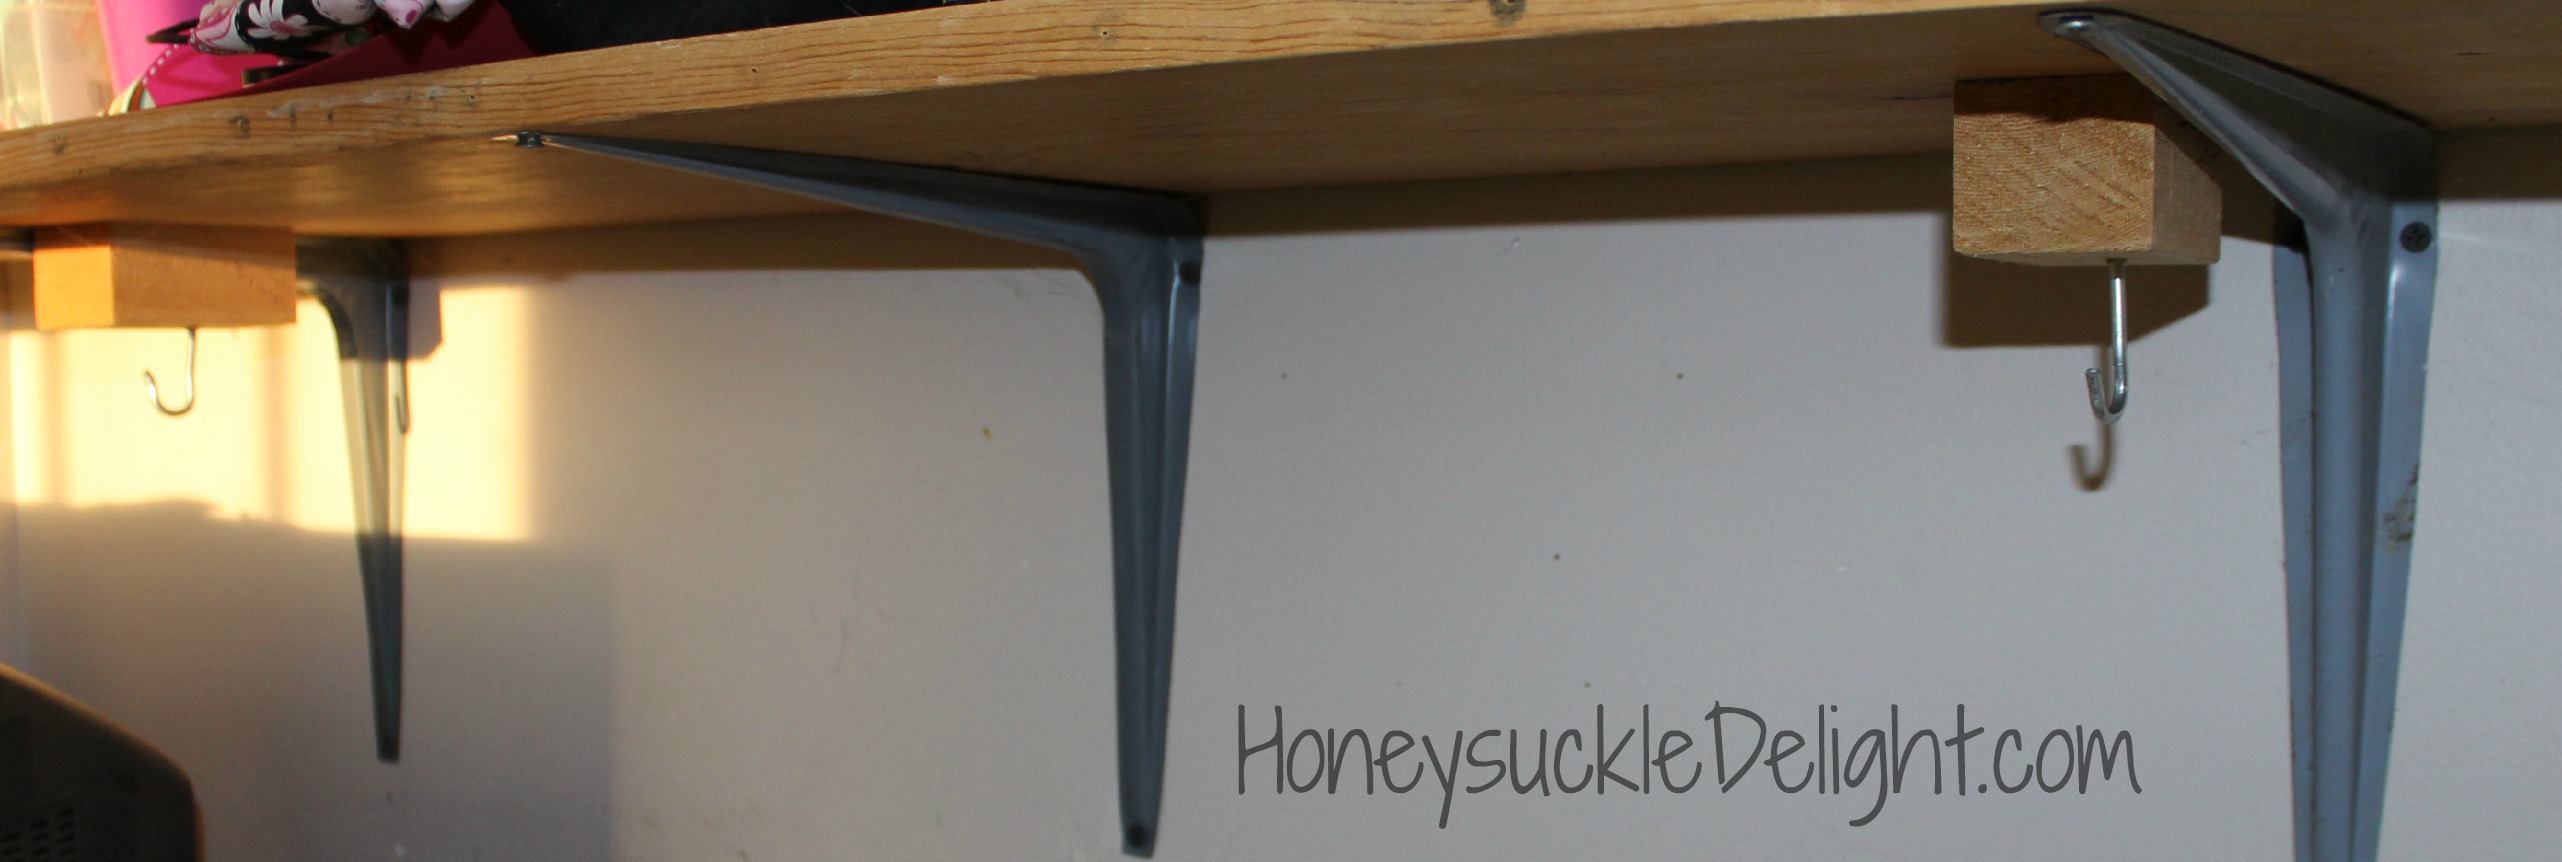
Now just add your dowel rod into the hooks. Done!

Now it’s ready for your ribbon!
