Uncategorized
Teacher Appreciation Gift
I must say my girls have the most awesome teacher this year. I am so very grateful for that! Just think about how much time and energy they all put into loving on and teaching our kids. The time that I am unable to be with my girls I am so thankful knowing they are still taken great care of. For that, I think anytime is a great time to say THANK YOU! But since it is Teacher appreciation week, I figured this was the perfect time to give their teacher and the aide in their class a gift! So since vinyl is one of my favorite things, I made them each a cup and filled them with candy. Because who can’t use a cup and candy! Right?

I use a program called Sure Cuts a Lot along with my cricut. If you don’t have that program, you could still use your cartridges to accomplish the same thing. But I’ll be honest I don’t know how to do the shadow without it.
Start by typing your word for the saying. I used the font Segoe Print. It measures 3.61 x 3.22. The word TEACHER is a shadow blackout rounded. Make sure to group your words and then meld them so they will cut out together where they overlap. I cut out my saying and the teacher’s name in turquoise. Once it cuts, use your contact paper to transfer onto your cup. Press down hard to get out all the bubbles before you pull off the contact paper.
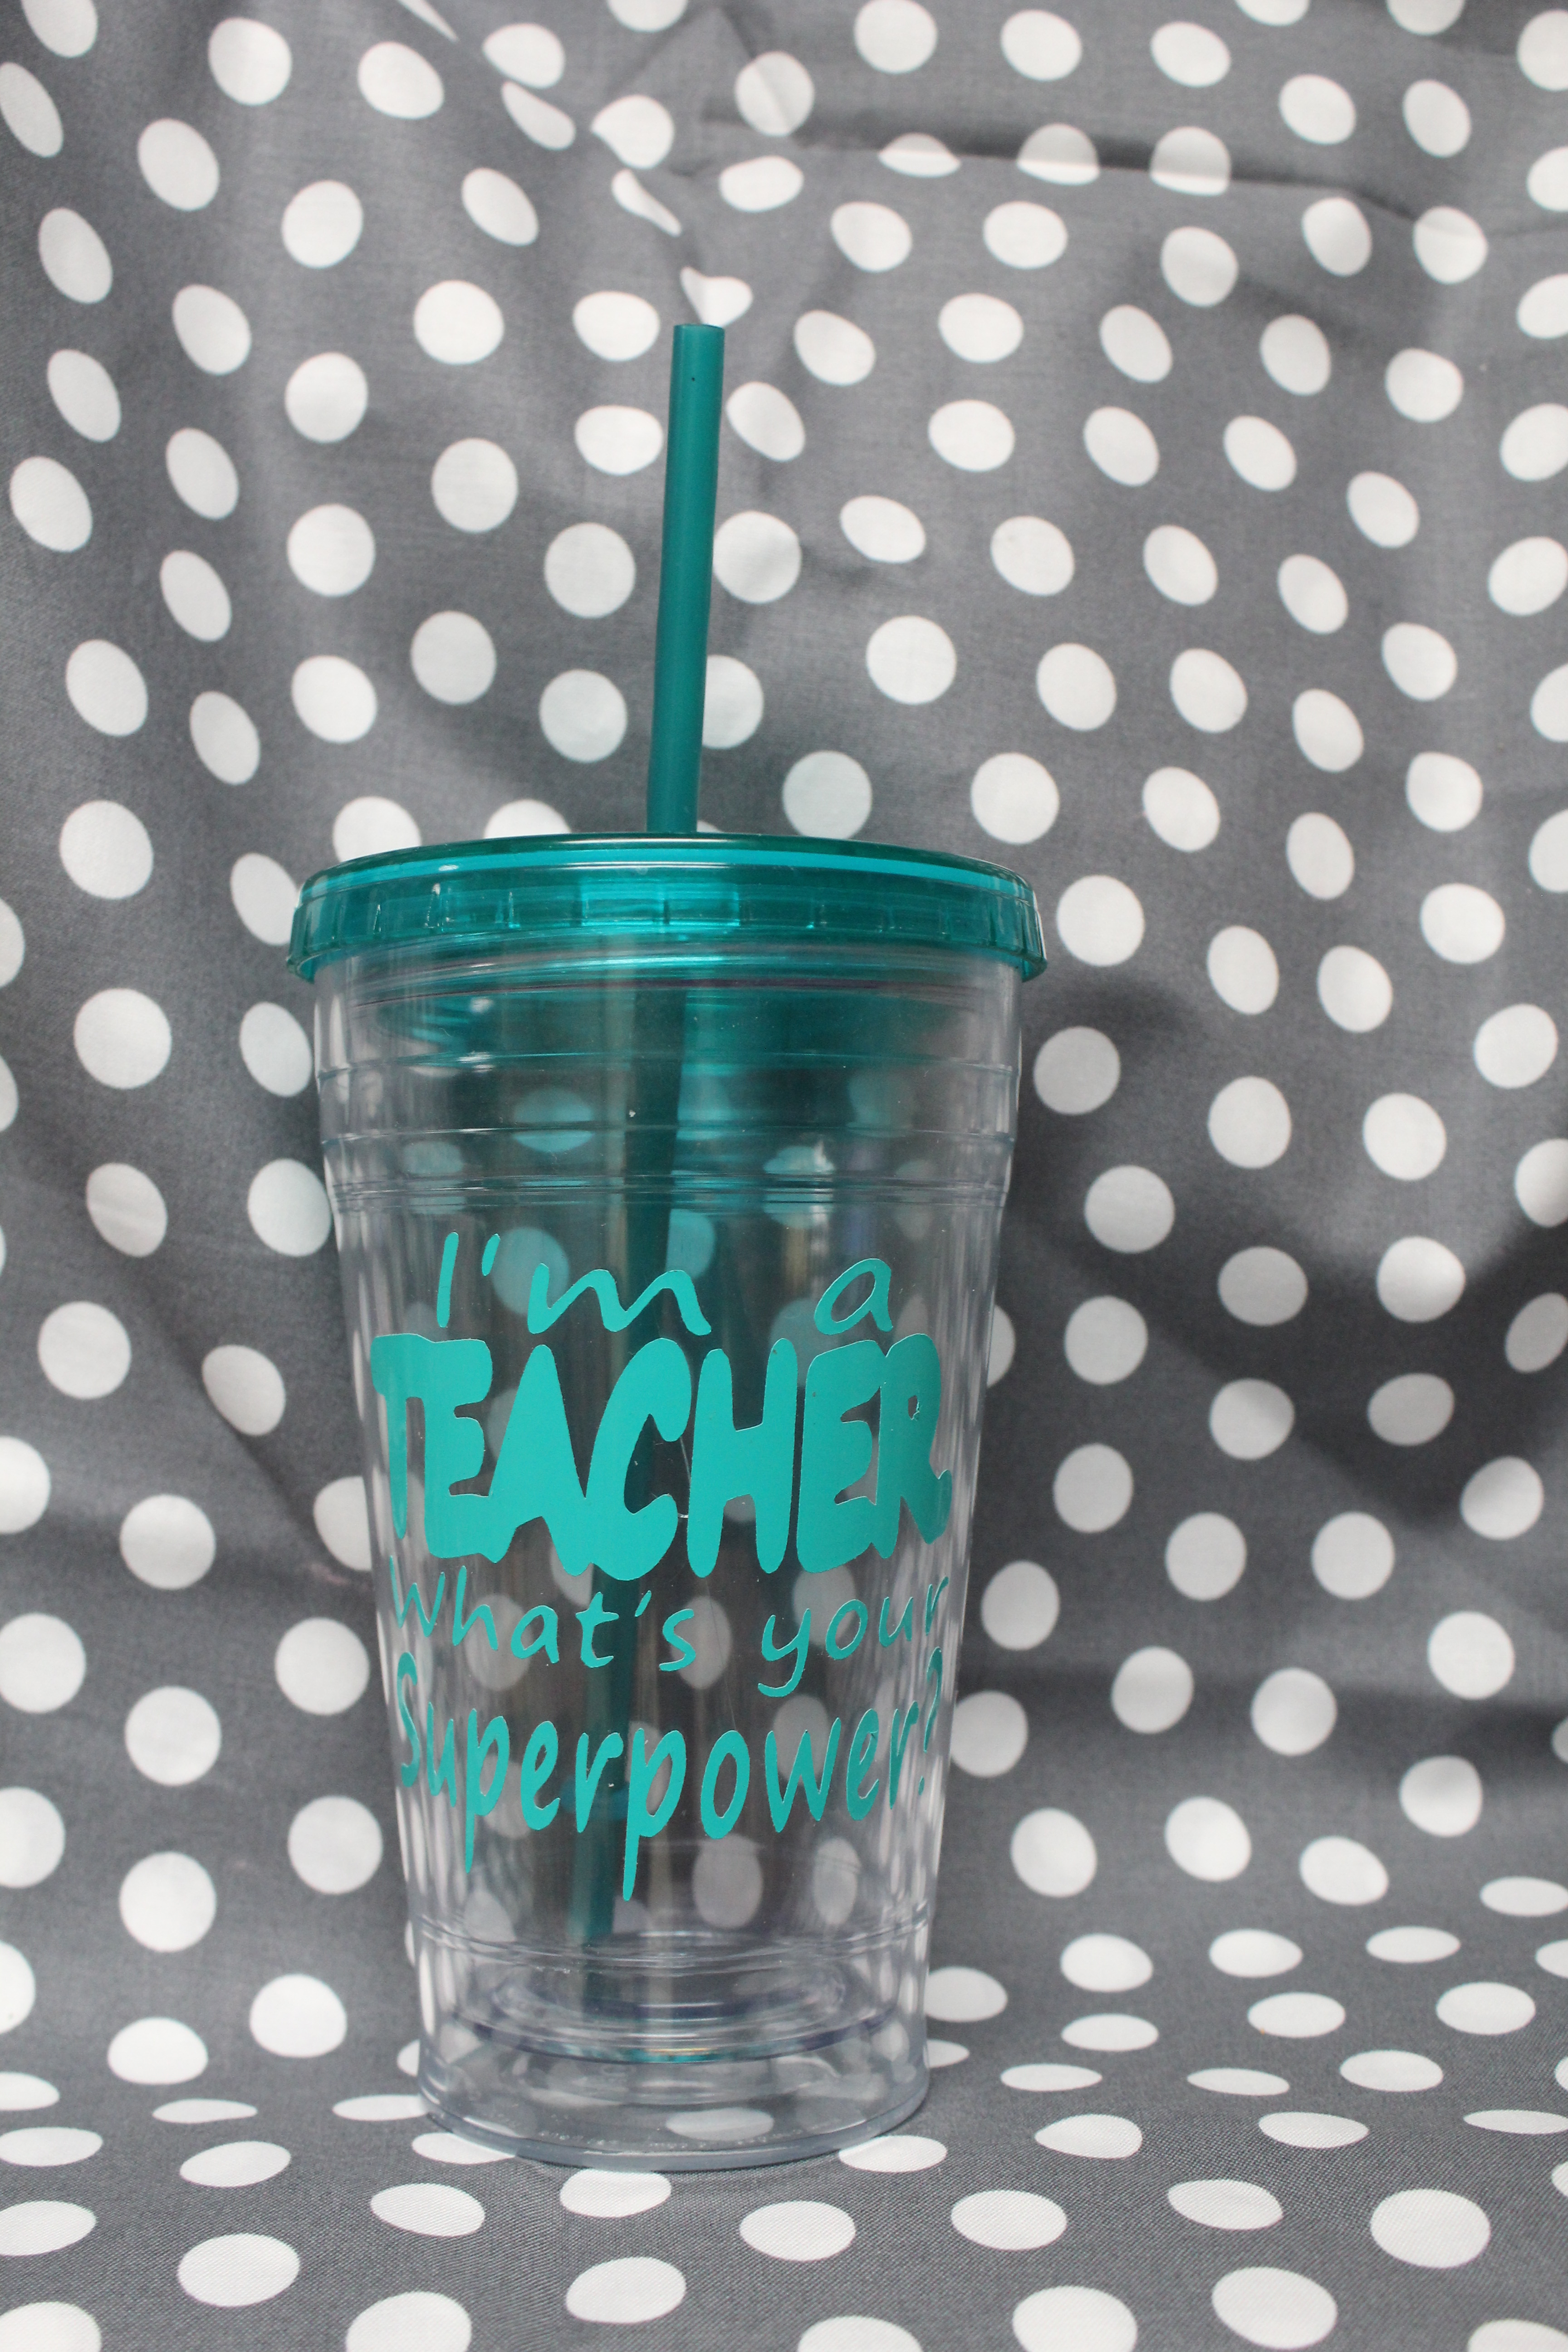 I used white for the shadow for the teacher’s name and also for the word TEACHER so it would stand out more. I cut these out together and then used my contact paper again to transfer them onto the cup. You can use any size and font that will fit on your cup. I made the shadow on the teacher’s name 3 x 3. Then used 2.77 x 2.74 for the name. This is just what size it ended up when I made the shadow a 3 x 3. Again I used a shadow blackout rounded measuring a 10 since I thought it matched the font well.

Now do the same starting with the white shadow teacher’s name and follow with the teacher’s name. Super easy but so special!
Fill it with candy and let your kiddos make a cute card! A perfect teacher gift!
Chalkboard Countdown
My crew & I are more than ready for summer break! So I thought it would be perfect to get out my countdown to count the days until summer break! Last year I was the craft leader in my MOPS group. This was one of the most loved crafts we’ve done! Hope you love it too!
 Supplies needed:
2 x 6 board (24″ wide)
Sandpaper
Vinyl (any color)
Contact Paper
Chalkboard Paint (not spray paint)
Paint Brush

Cut your board 24″ and sand the front and edges with your sand paper.
I already had chalkboard spray paint on hand but after trying it out decided that regular chalkboard paint would work better. So I painted on 3 layers of paint. You don’t have to wait very long between layers. Just make sure it’s dry to the touch. Don’t forget the sides since you will want those the same black color.

Now it’s time for your vinyl. I used my cricut to cut it out and chose a font named Pupcat. The vinyl measured 4″ x 11″.

Cut a sheet of contact paper the same size as your vinyl. Rub it down over your letters so you can transfer it onto your board. A credit card is a good thing to use in case you don’t have a tool to use. Just something with a straight hard edge will work fine.

Now pull up the contact paper making sure your vinyl is pulling up at each letter. I started my vinyl about 5″ from the edge. Make sure each letter stays on the wood well. Otherwise you could tear the letter.

Now you’re ready to go! I’m happy to count down the days with the girls until summer break!

The white vinyl board is the one we did in MOPS. This picture shows how many we had to have for our meeting. It was quite a bit of prep work since we had to sand and paint a layer of black. But it was well worth it. Everyone loved it! I cut the boards 18″ to save money . Then I used white vinyl and cut it 4″ x 9″. If you end up doing this for your MOPS group let me know. I would love to hear from you!
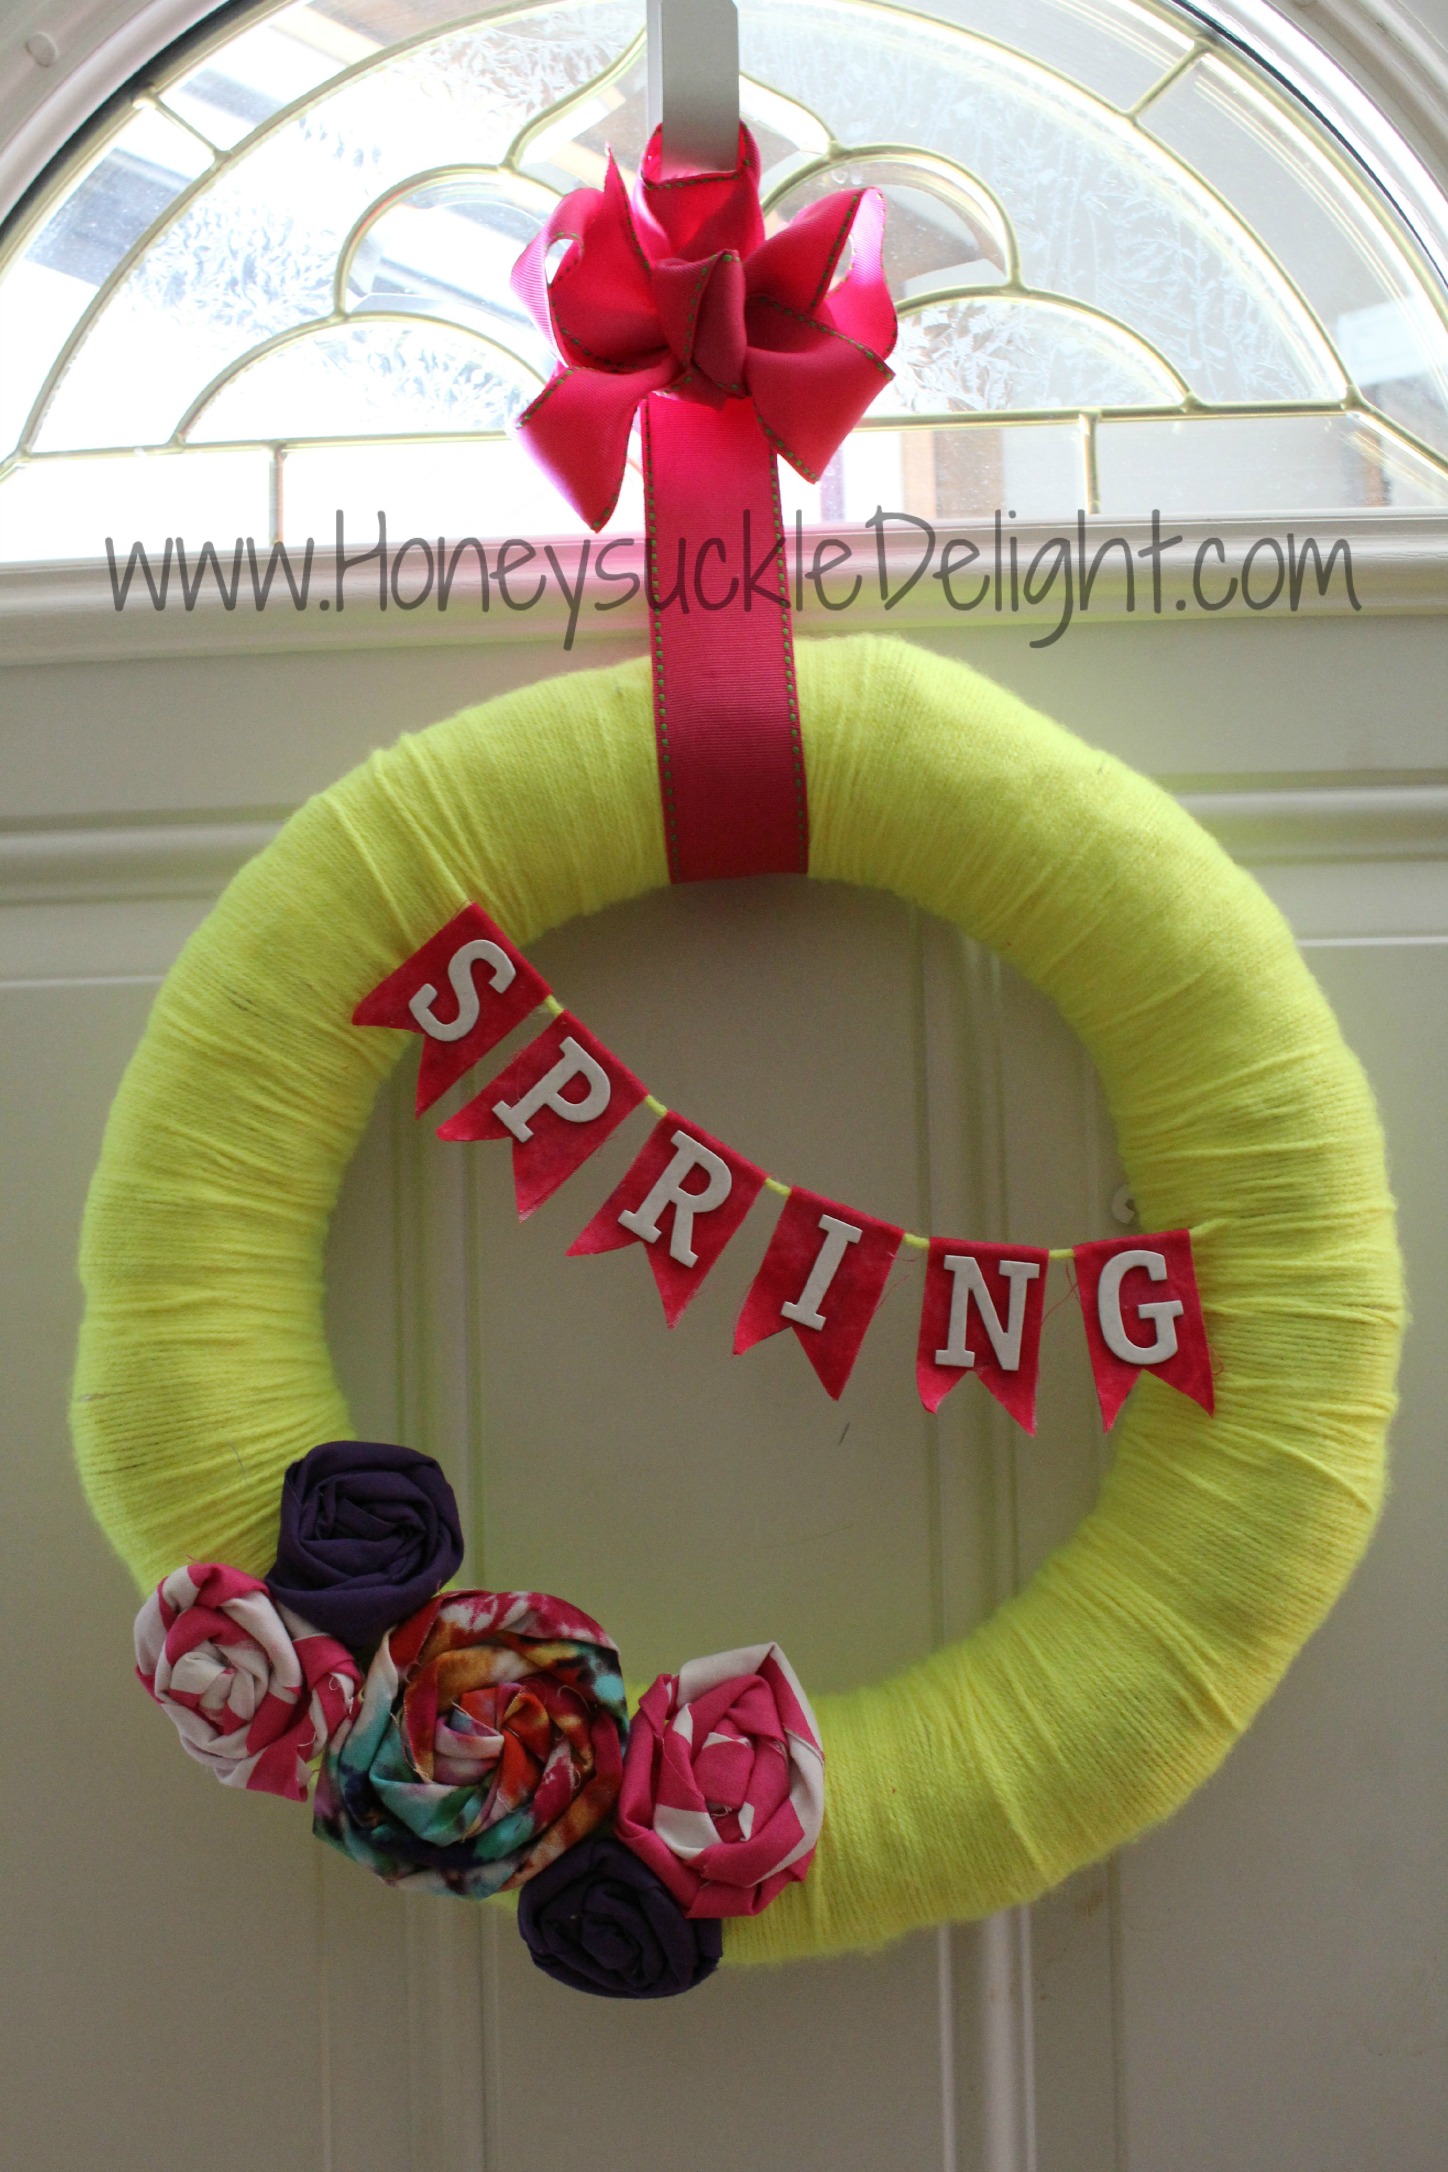
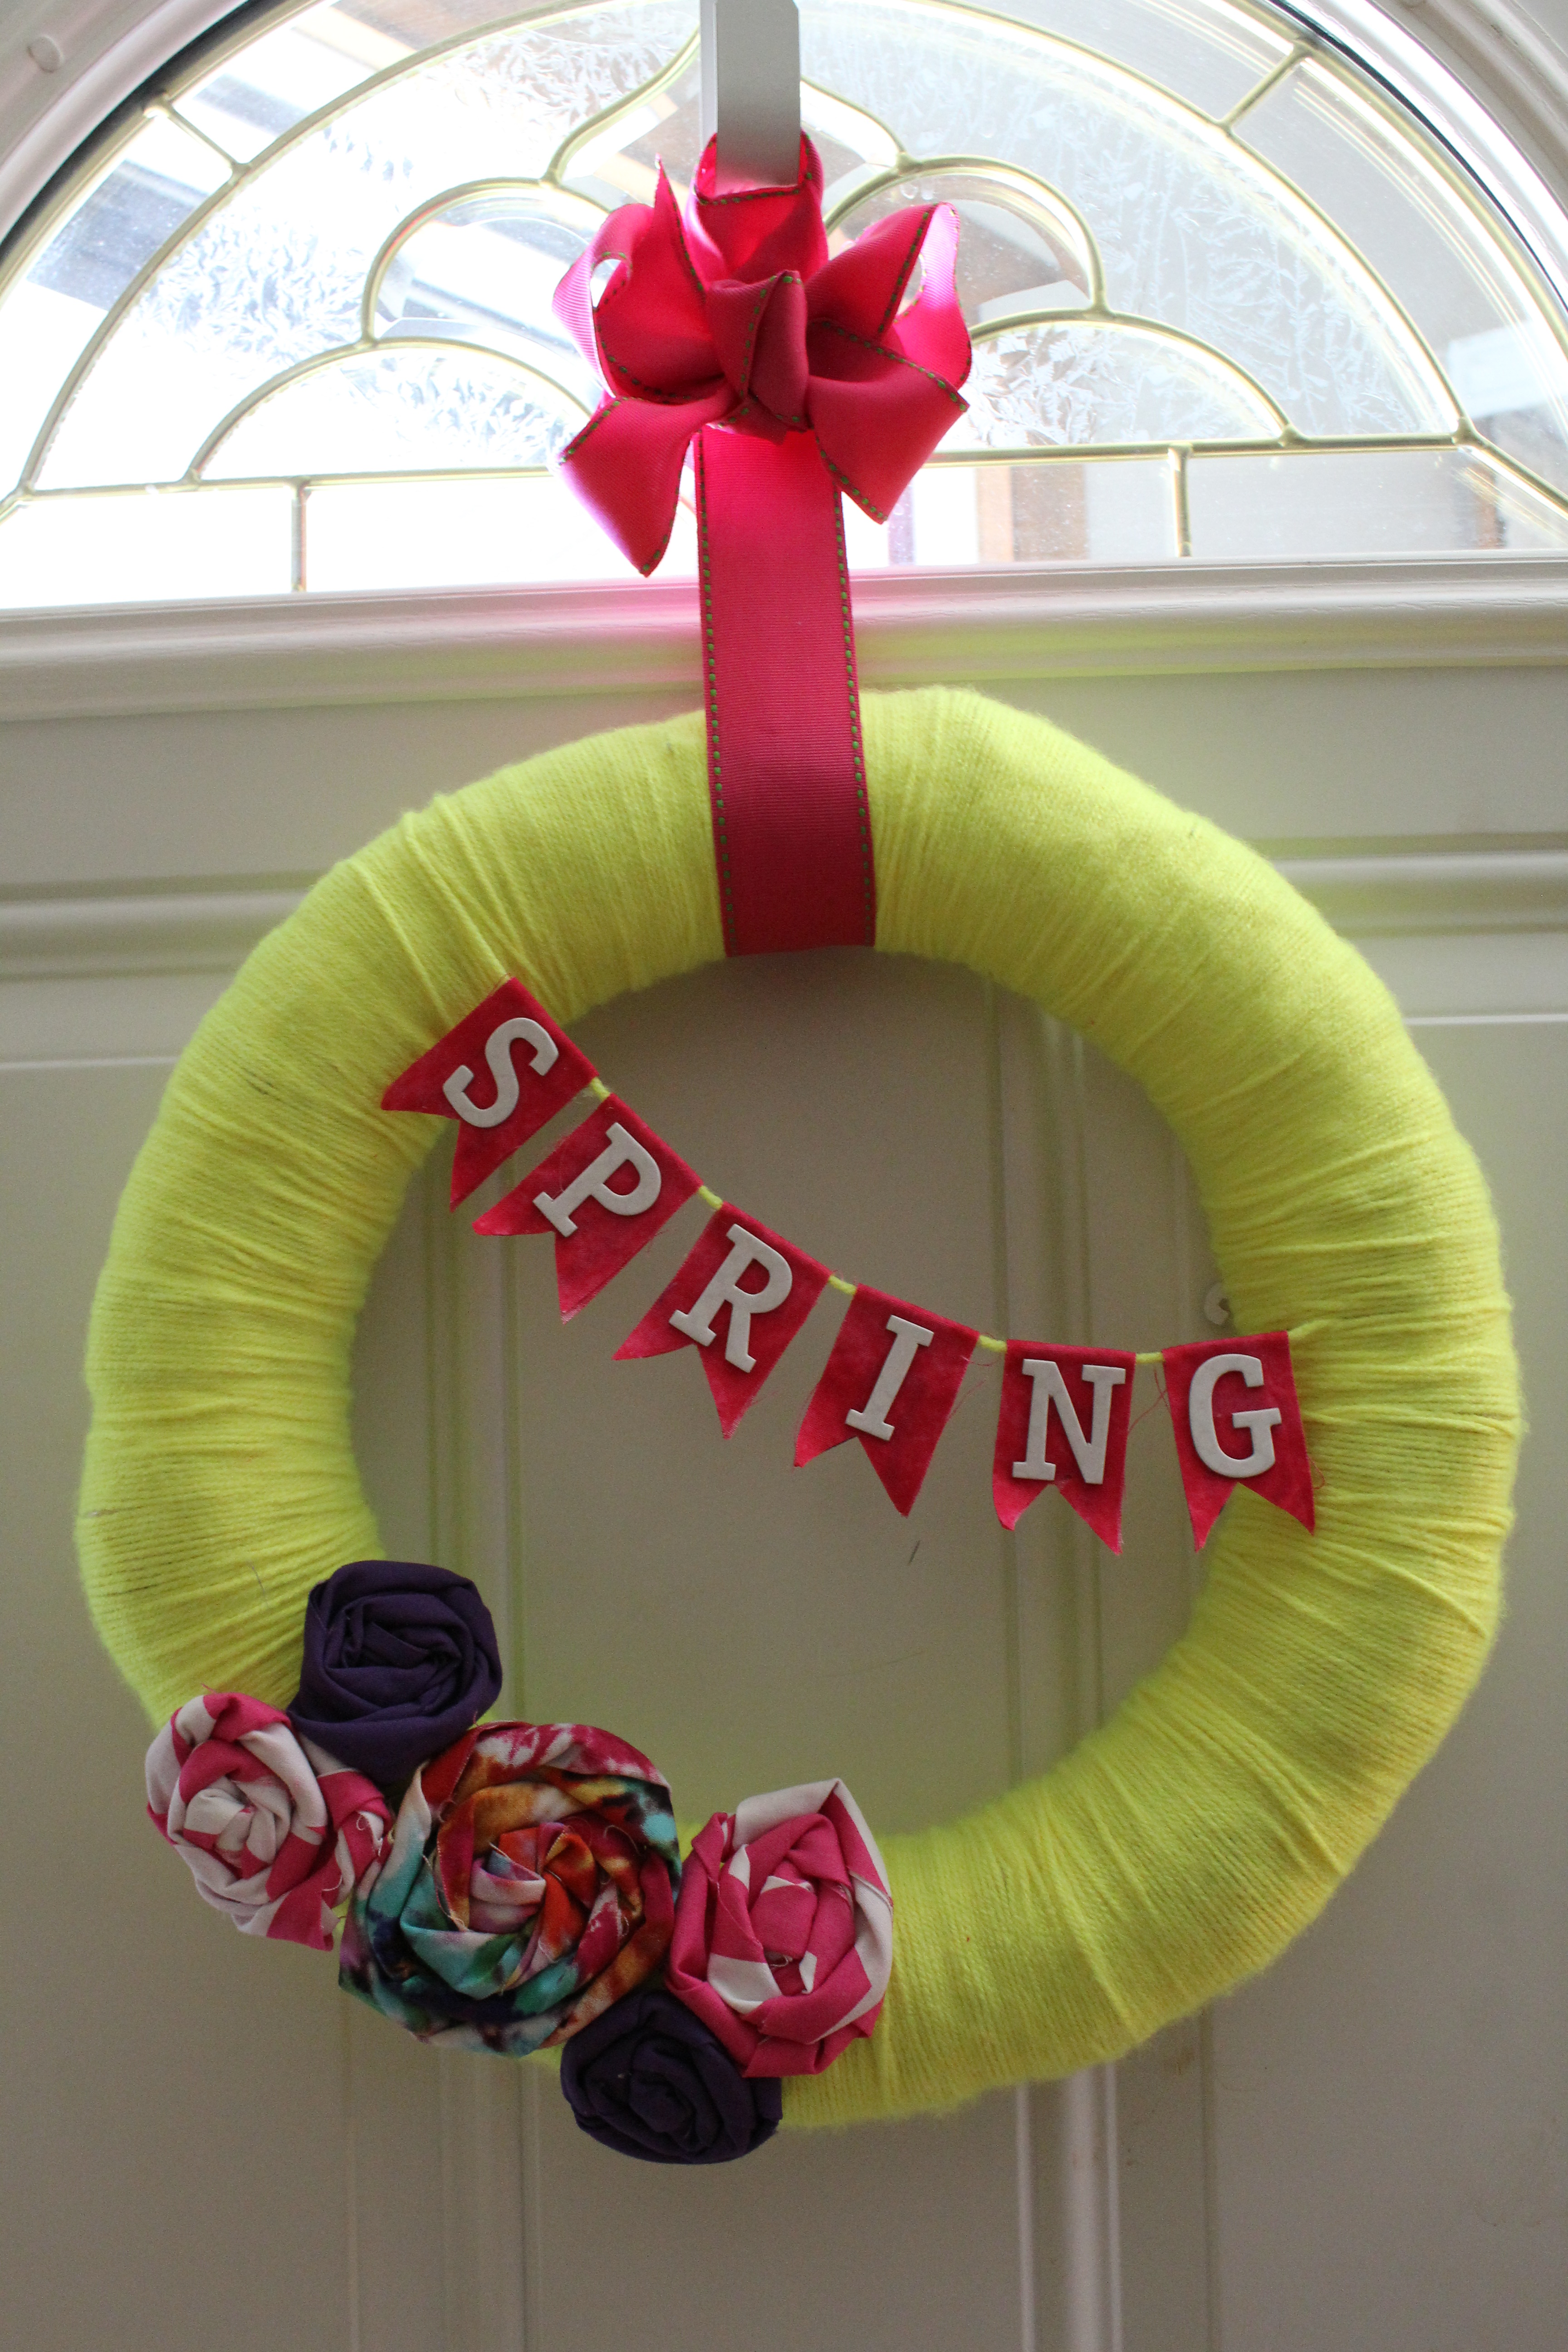
Fun Spring Yarn Wreath
Are you ready for a fun spring wreath? I was desperately in need of a new one.
So here’s what I came up with.
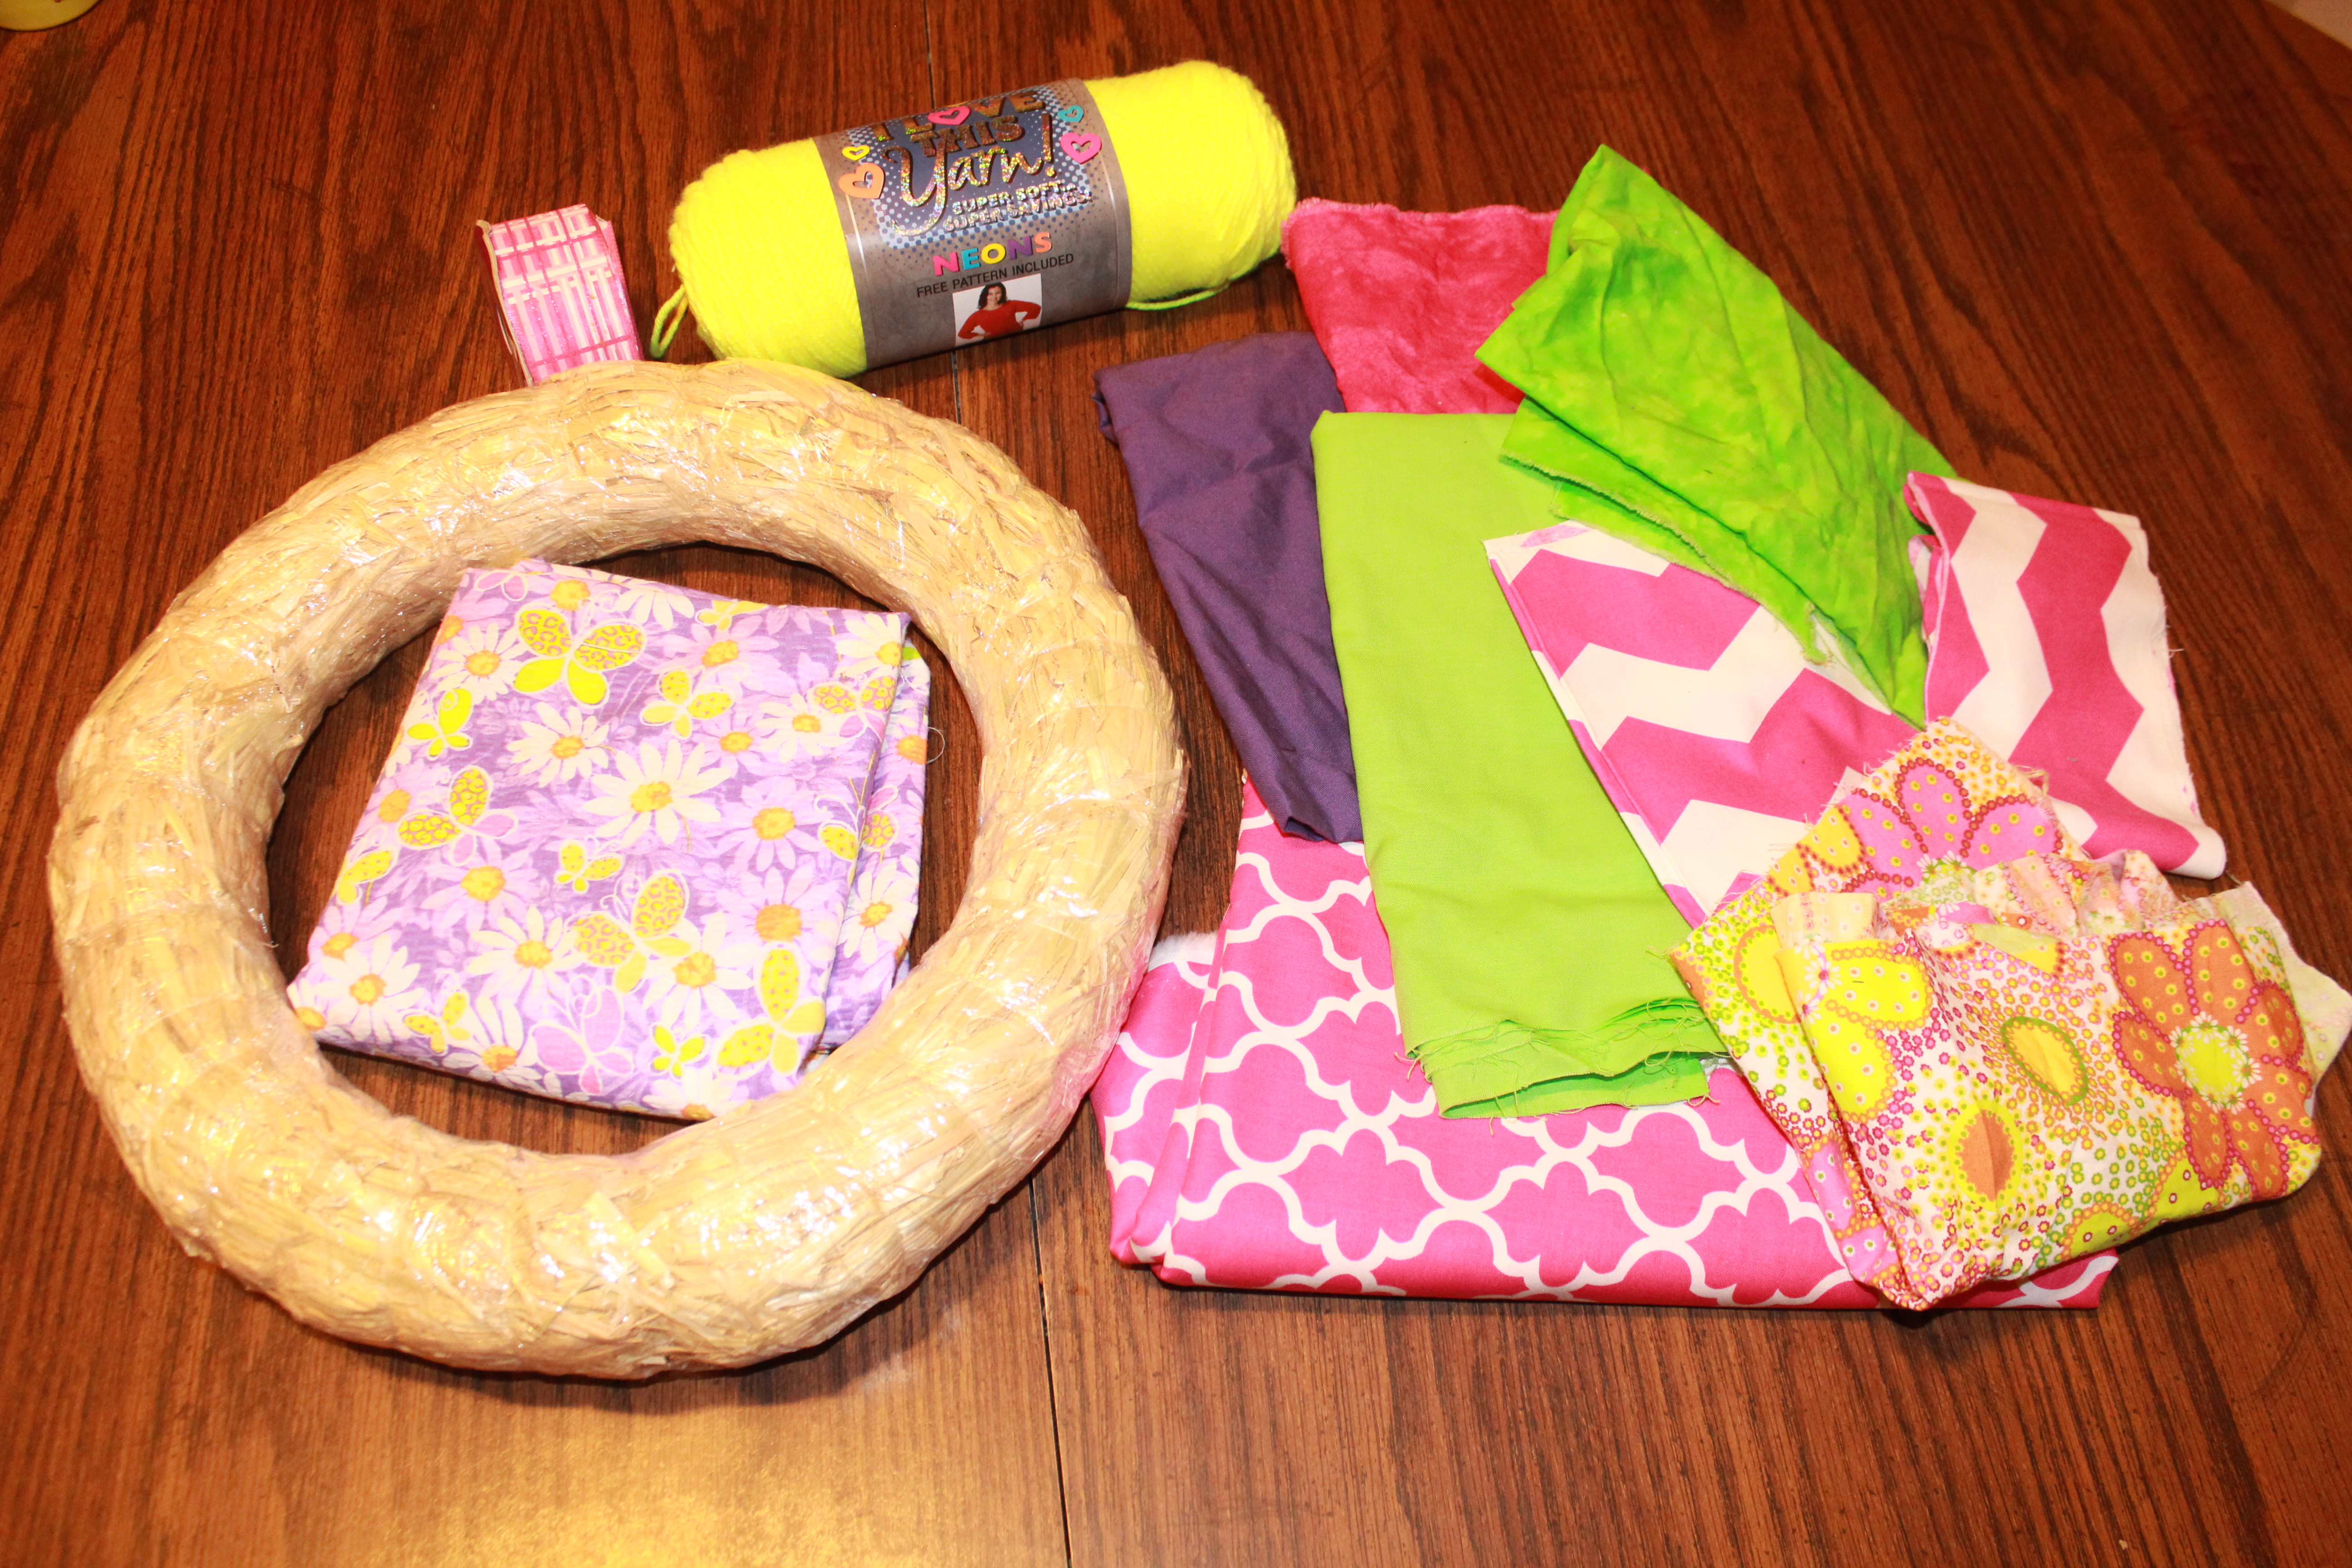
Supplies needed:
Wreath Form
Skein of Yarn
Scrap Fabric
Ribbon (I used 1 1/2″ wide)
Chipboard Letters
Glue Gun
Glue Sticks
First start by wrapping your ribbon around your wreath form. Knot the first end and put a dot of glue to help hold it. Make sure you’re watching a good show. This will take a little time. Don’t worry about making it too perfect though. I promise you will be the only one that notices it anyway! When you get to the end, put another dot of glue on the end. Just make sure it is on the same side of your wreath as the glue where you started from otherwise one of the glue dots could show.

Now take a strip of fabric and make your fabric flowers. Glue them on wherever you like. You can make as many or as few as you prefer. I made one large flower for the center and 4 smaller flowers for the sides.

Now to make your banner. Cut a long string of yarn that is long enough to wrap around each side of your form and hang down in the center. Mine was about 60″. For the letters you will need six rectangles of fabric measuring 1 1/2″ by 4″. Fold your fabric over the yarn and glue. I left about 1/4″ in between each one. Make sure you start in the center of your yarn so you still have plenty to wrap on the sides to hold it on. Then I glued on some chipboard letters that I had leftover from a scrapbooking project.
I then added a ring of 1 1/2″ ribbon to hang it by and a cute bow on the top!
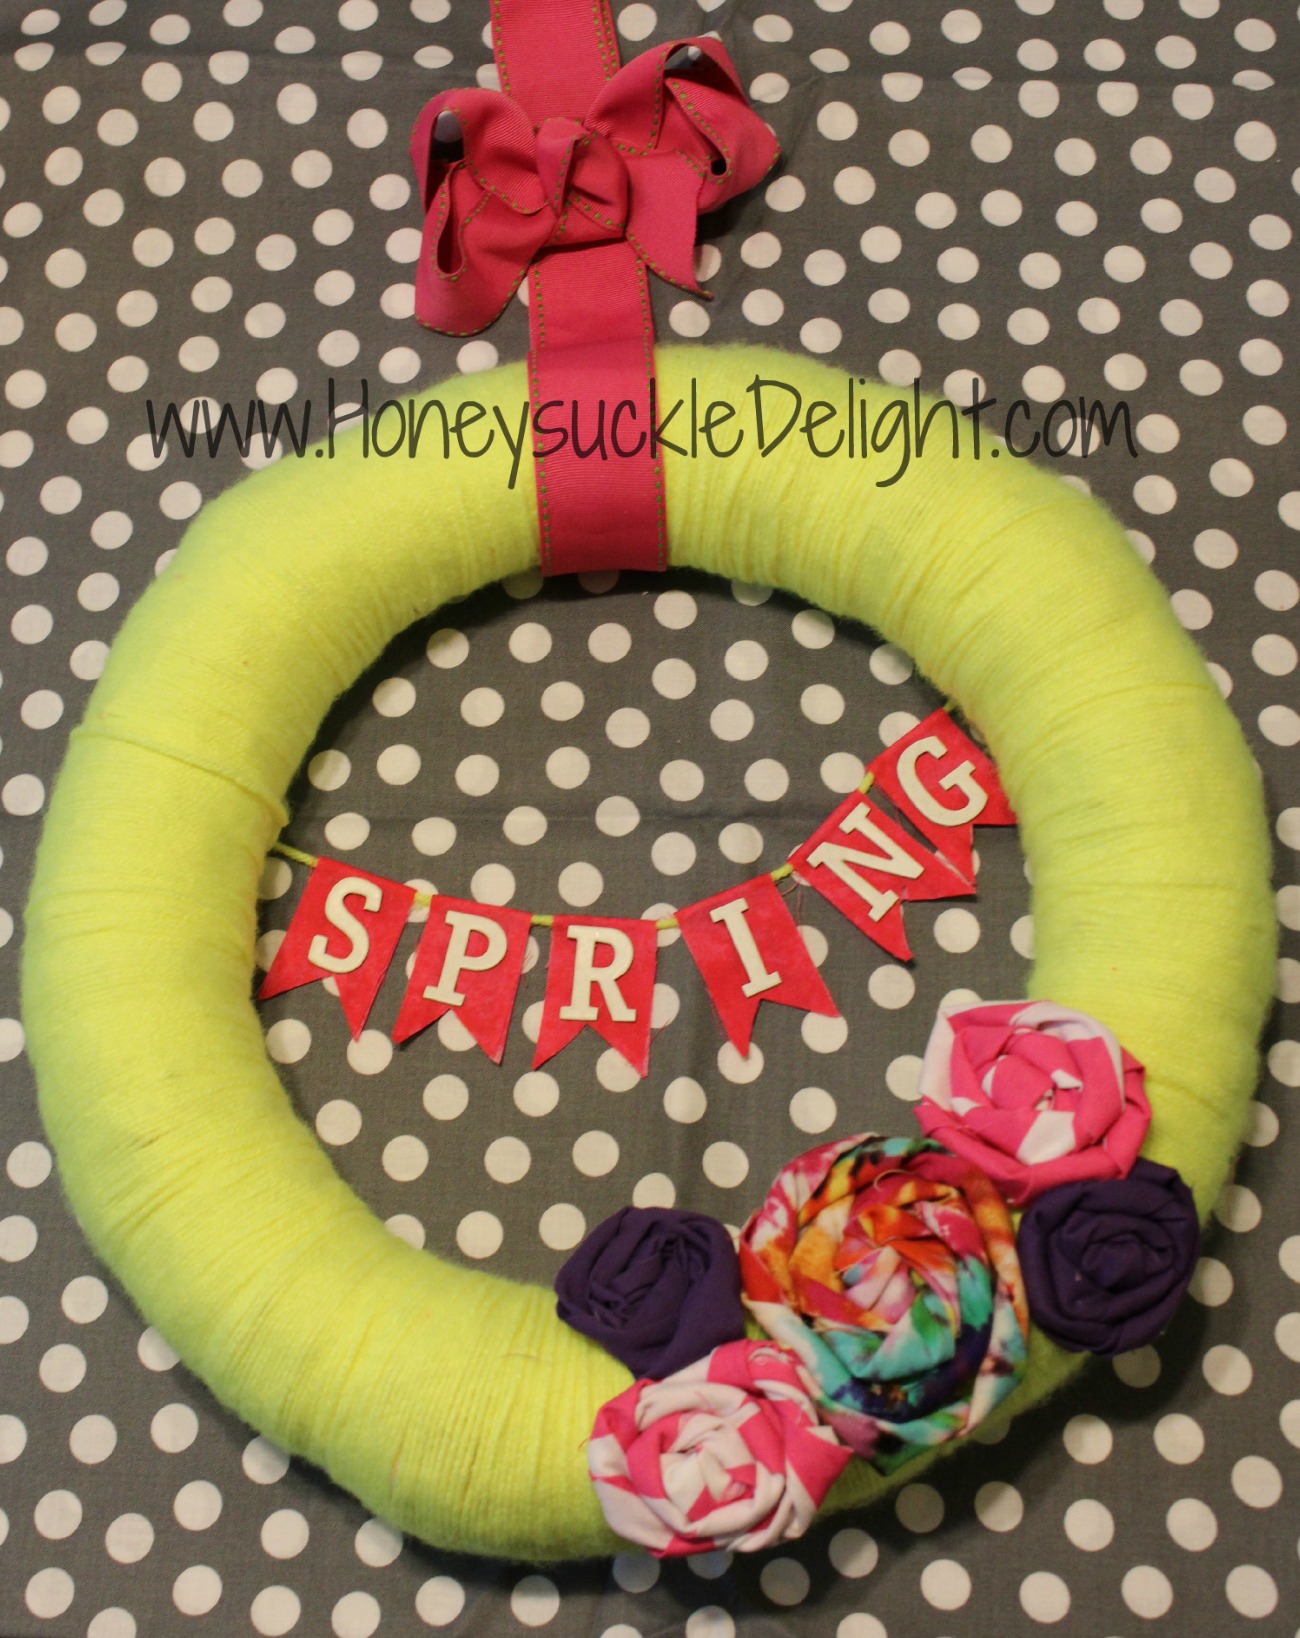
Now hang it on your door and you’re all set!
