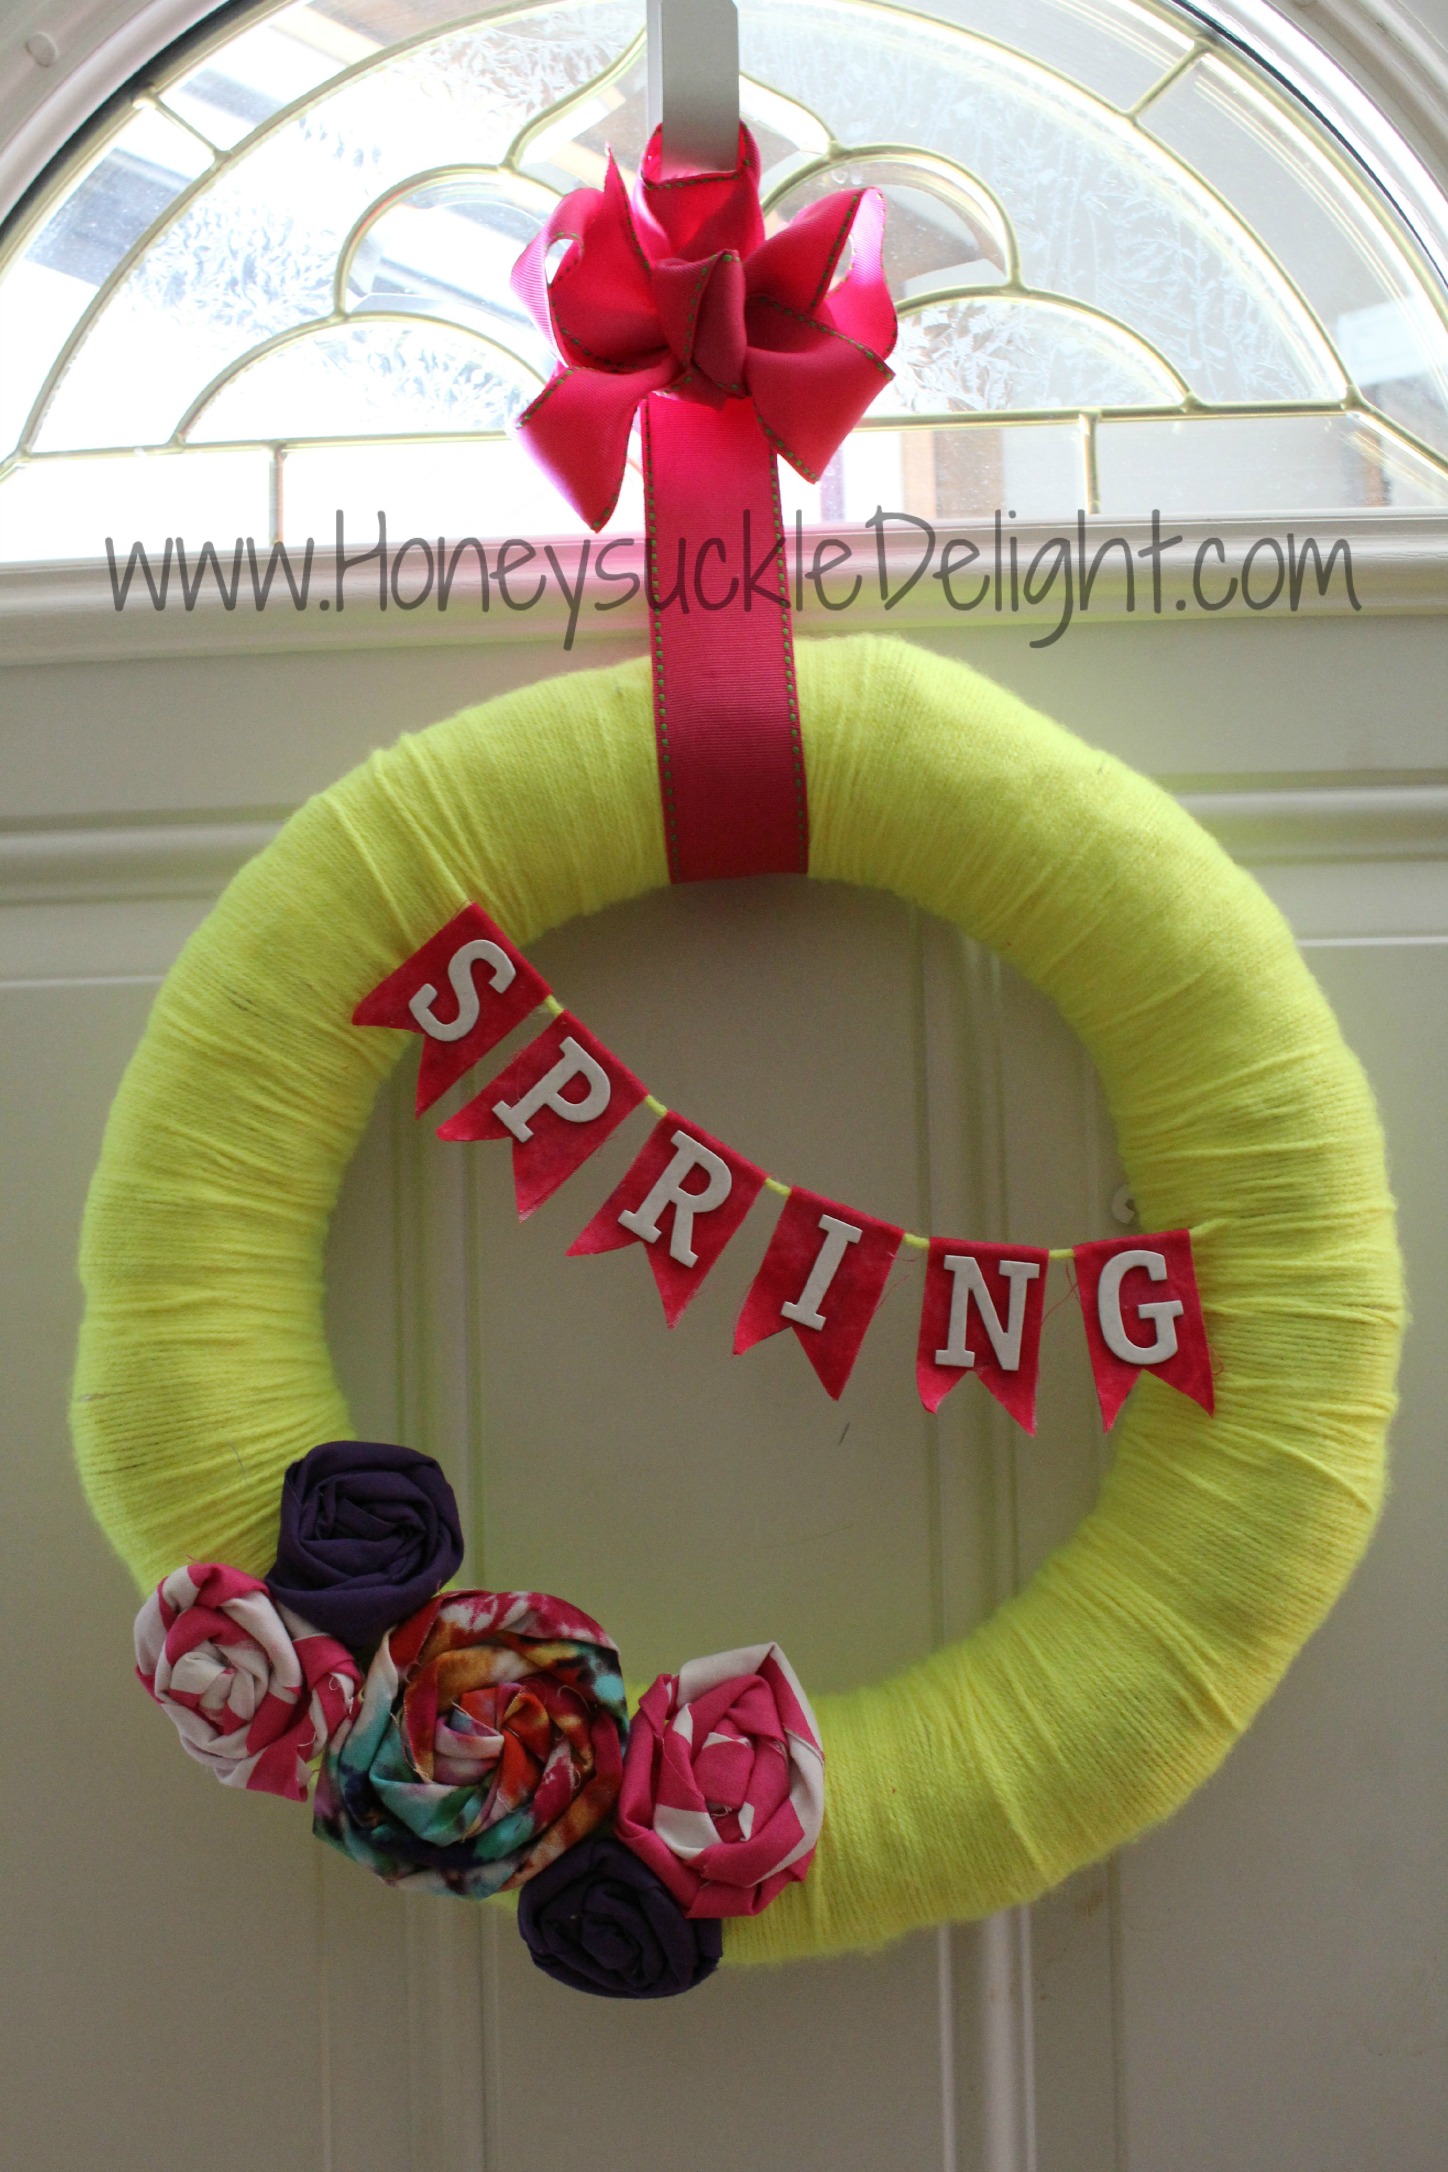
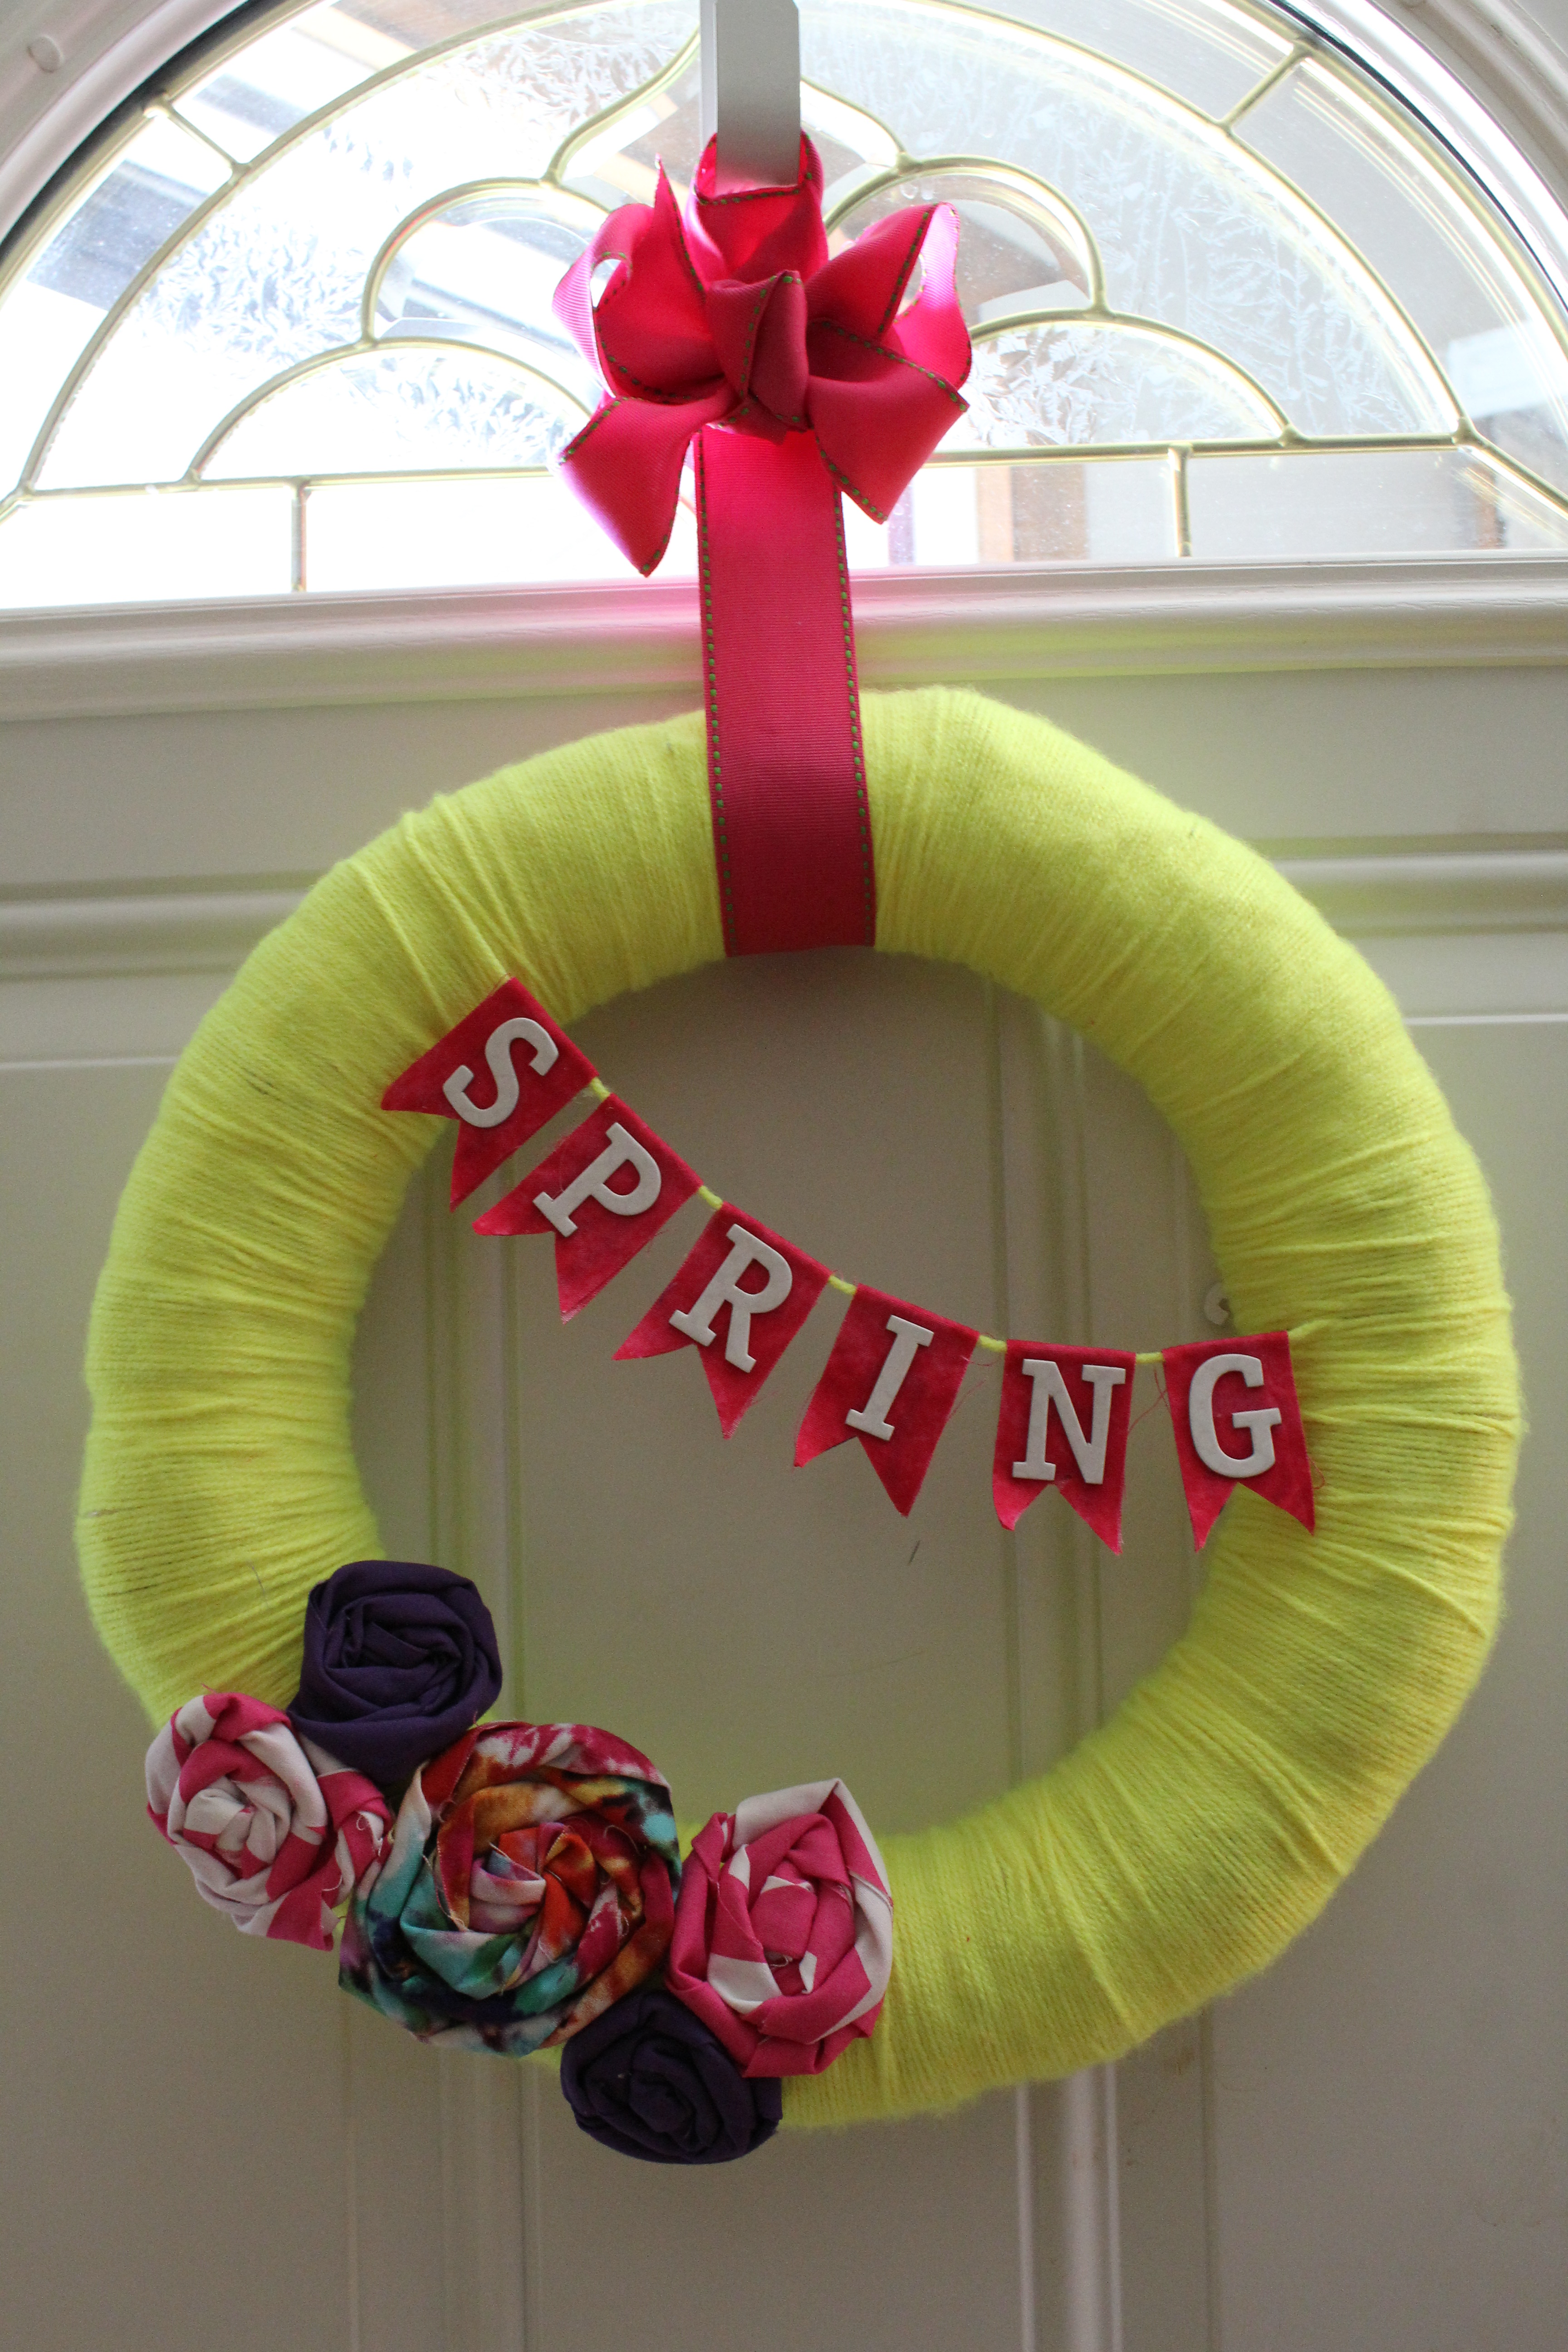
Fun Spring Yarn Wreath
Are you ready for a fun spring wreath? I was desperately in need of a new one.
So here’s what I came up with.
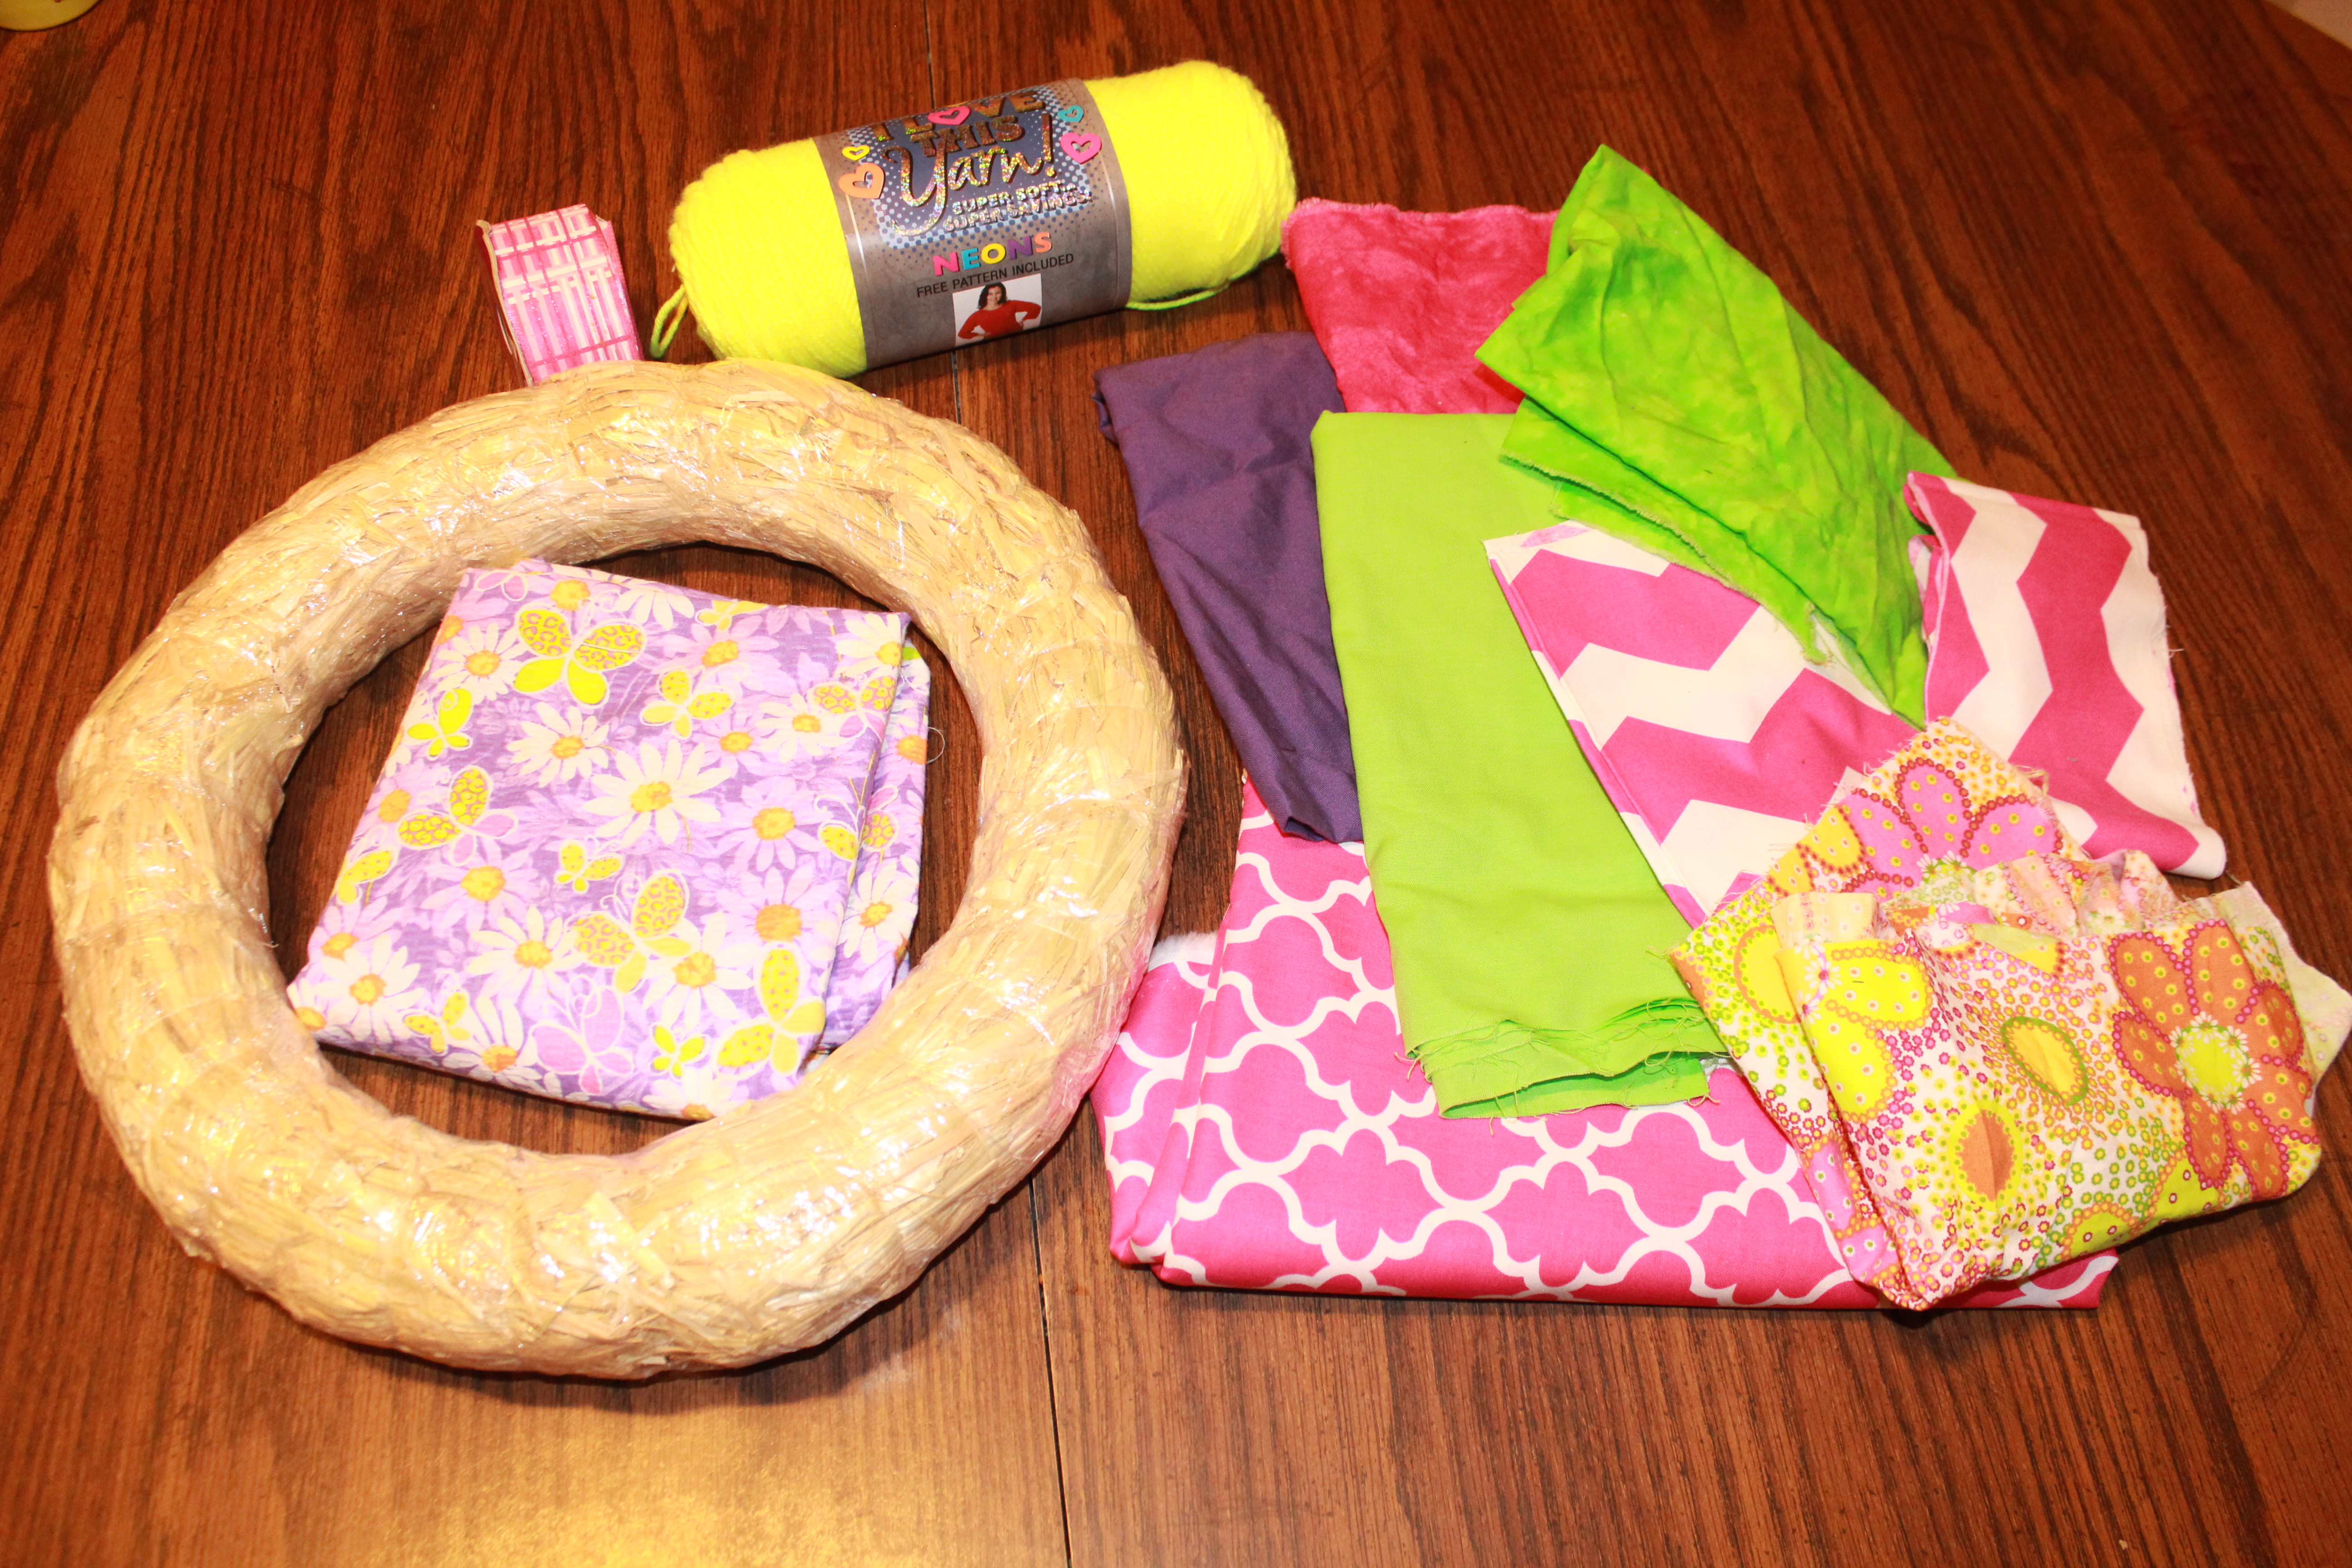
Supplies needed:
Wreath Form
Skein of Yarn
Scrap Fabric
Ribbon (I used 1 1/2″ wide)
Chipboard Letters
Glue Gun
Glue Sticks
First start by wrapping your ribbon around your wreath form. Knot the first end and put a dot of glue to help hold it. Make sure you’re watching a good show. This will take a little time. Don’t worry about making it too perfect though. I promise you will be the only one that notices it anyway! When you get to the end, put another dot of glue on the end. Just make sure it is on the same side of your wreath as the glue where you started from otherwise one of the glue dots could show.

Now take a strip of fabric and make your fabric flowers. Glue them on wherever you like. You can make as many or as few as you prefer. I made one large flower for the center and 4 smaller flowers for the sides.

Now to make your banner. Cut a long string of yarn that is long enough to wrap around each side of your form and hang down in the center. Mine was about 60″. For the letters you will need six rectangles of fabric measuring 1 1/2″ by 4″. Fold your fabric over the yarn and glue. I left about 1/4″ in between each one. Make sure you start in the center of your yarn so you still have plenty to wrap on the sides to hold it on. Then I glued on some chipboard letters that I had leftover from a scrapbooking project.
I then added a ring of 1 1/2″ ribbon to hang it by and a cute bow on the top!
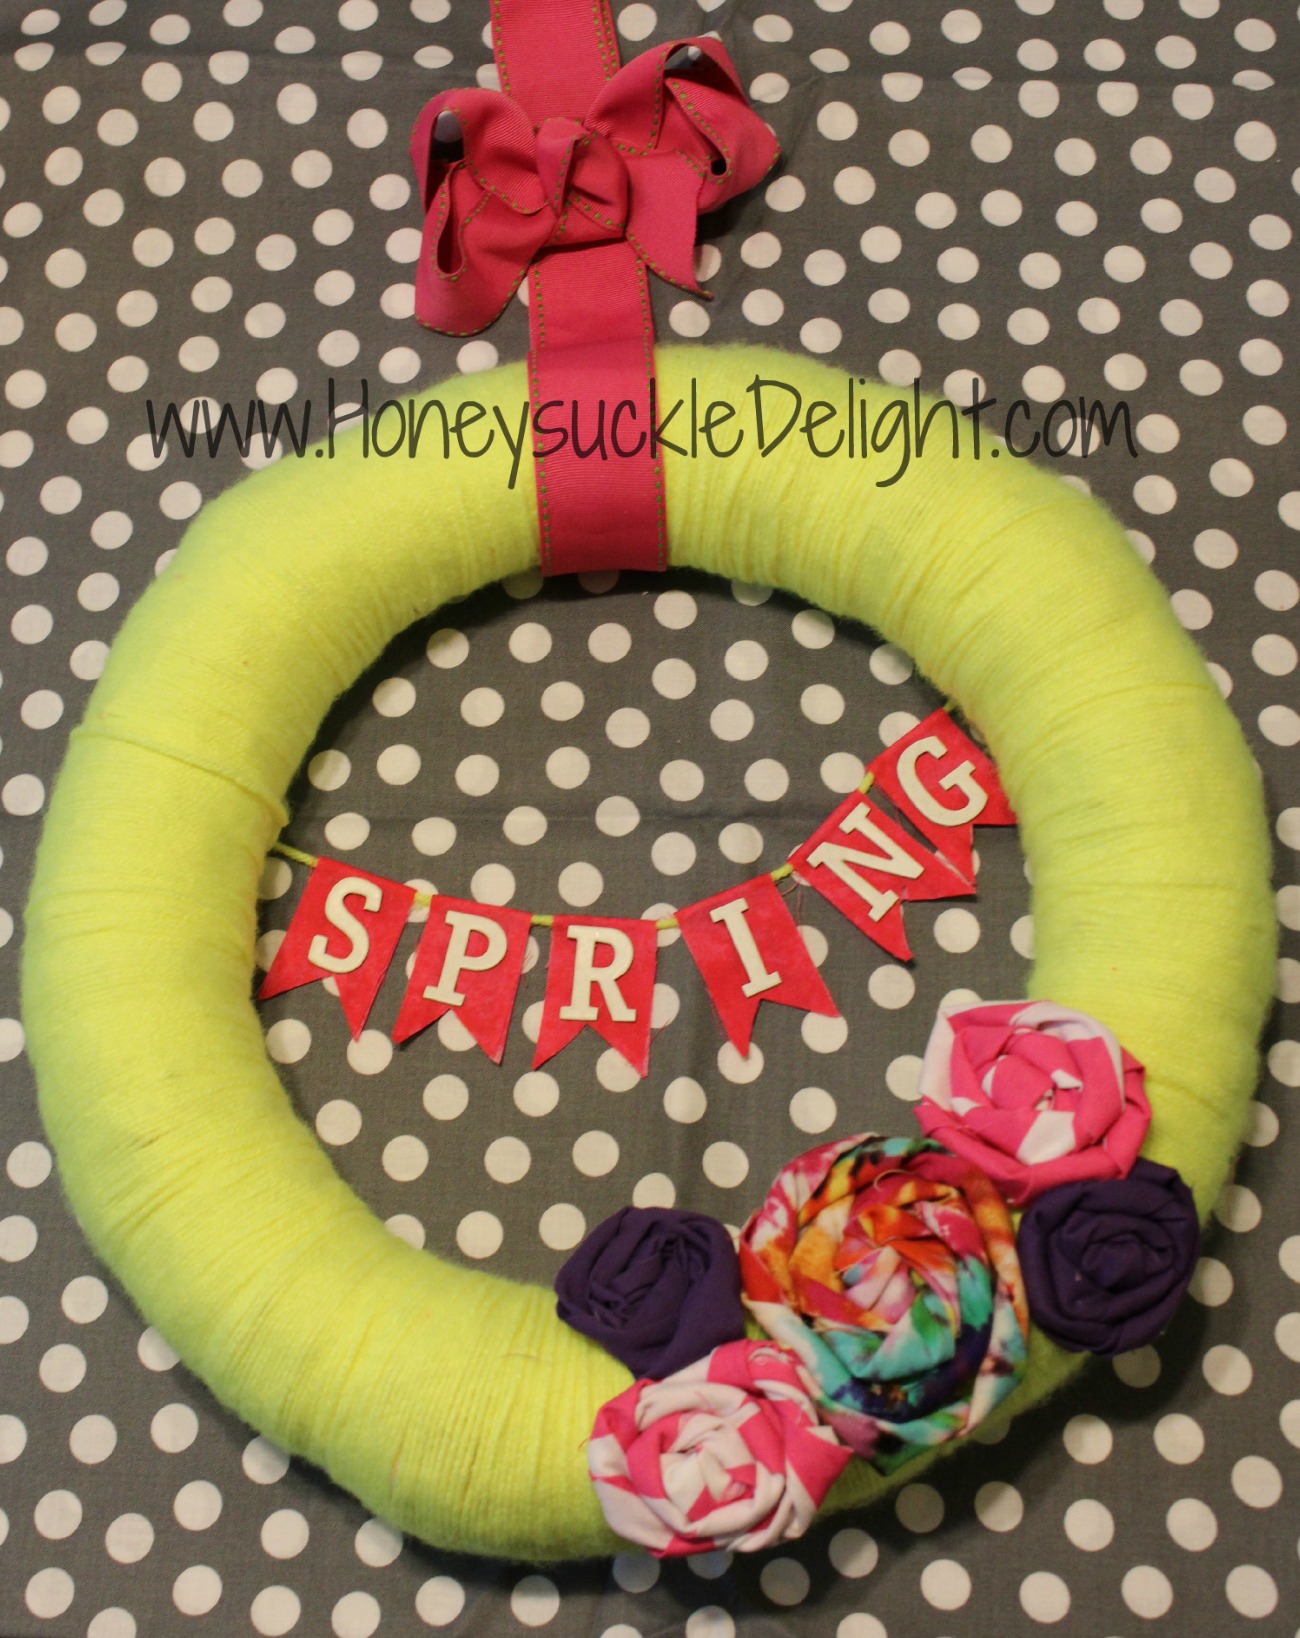
Now hang it on your door and you’re all set!

June 10, 2015 at 9:27 pm
Lovely!
LikeLike
June 10, 2015 at 11:14 pm
Thank you!
LikeLike